Showing posts with label Sewing. Show all posts

June 23, 2020

Exterior Canvas Replacement Project- Lists


Time to do the less than funny, more technical details of the dodger/bimini, cockpit enclosure re-do. Our older canvas enclosure was made in Trinidad in 2007, and had never been taken off. This means it was on for 13years, and some of it was well used, ready to be replaced, and other parts of it were as nice as the day it was put up. We made some of our design, and material choices based on this longevity. I've listed supplies, and tools, and then I'll do a separate post for the techniques we used. Yes, we.... Bill helped quite a bit, not with the actual running of the sewing machine, but these kinds of projects are 85% discussing, discussing again, patterning, re patterning, measuring, remeasuring, laying out, taking out, fitting, refitting, altering, adjusting, and high-fiving!

Supplies used:

PTFE thread. PTFE thread is dirt/water repellant, fade proof, mildew/rot proof, highly resistant to abrasion, nonflammable, chemical resistant, permanent 100% UV resistant, and lifetime manufacturer warrantied. What's not to like? Well, it's $130.95 per 8oz cone, which is 1650 yds of thread. I know it's expensive, but how many times do you want to redo your stitching on your time-intensive project. Me- I never want to take it down, and restitch it. This thread fits the bill. The old canvas was obviously stitched with a Lifetime thread, it held as good as new. 

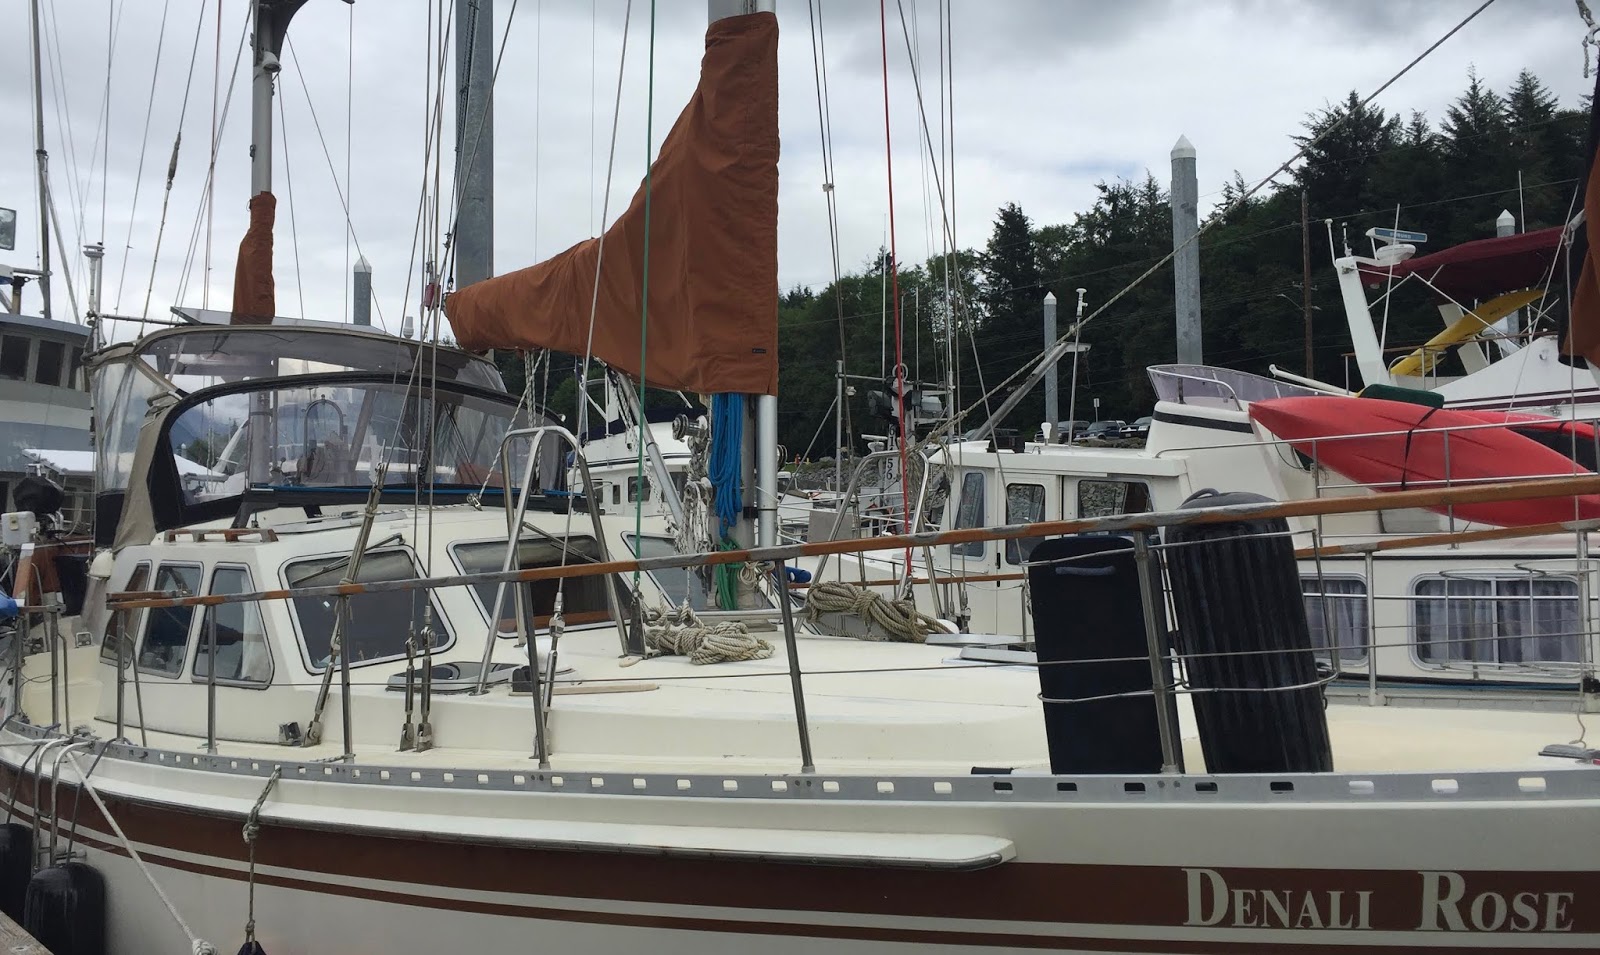
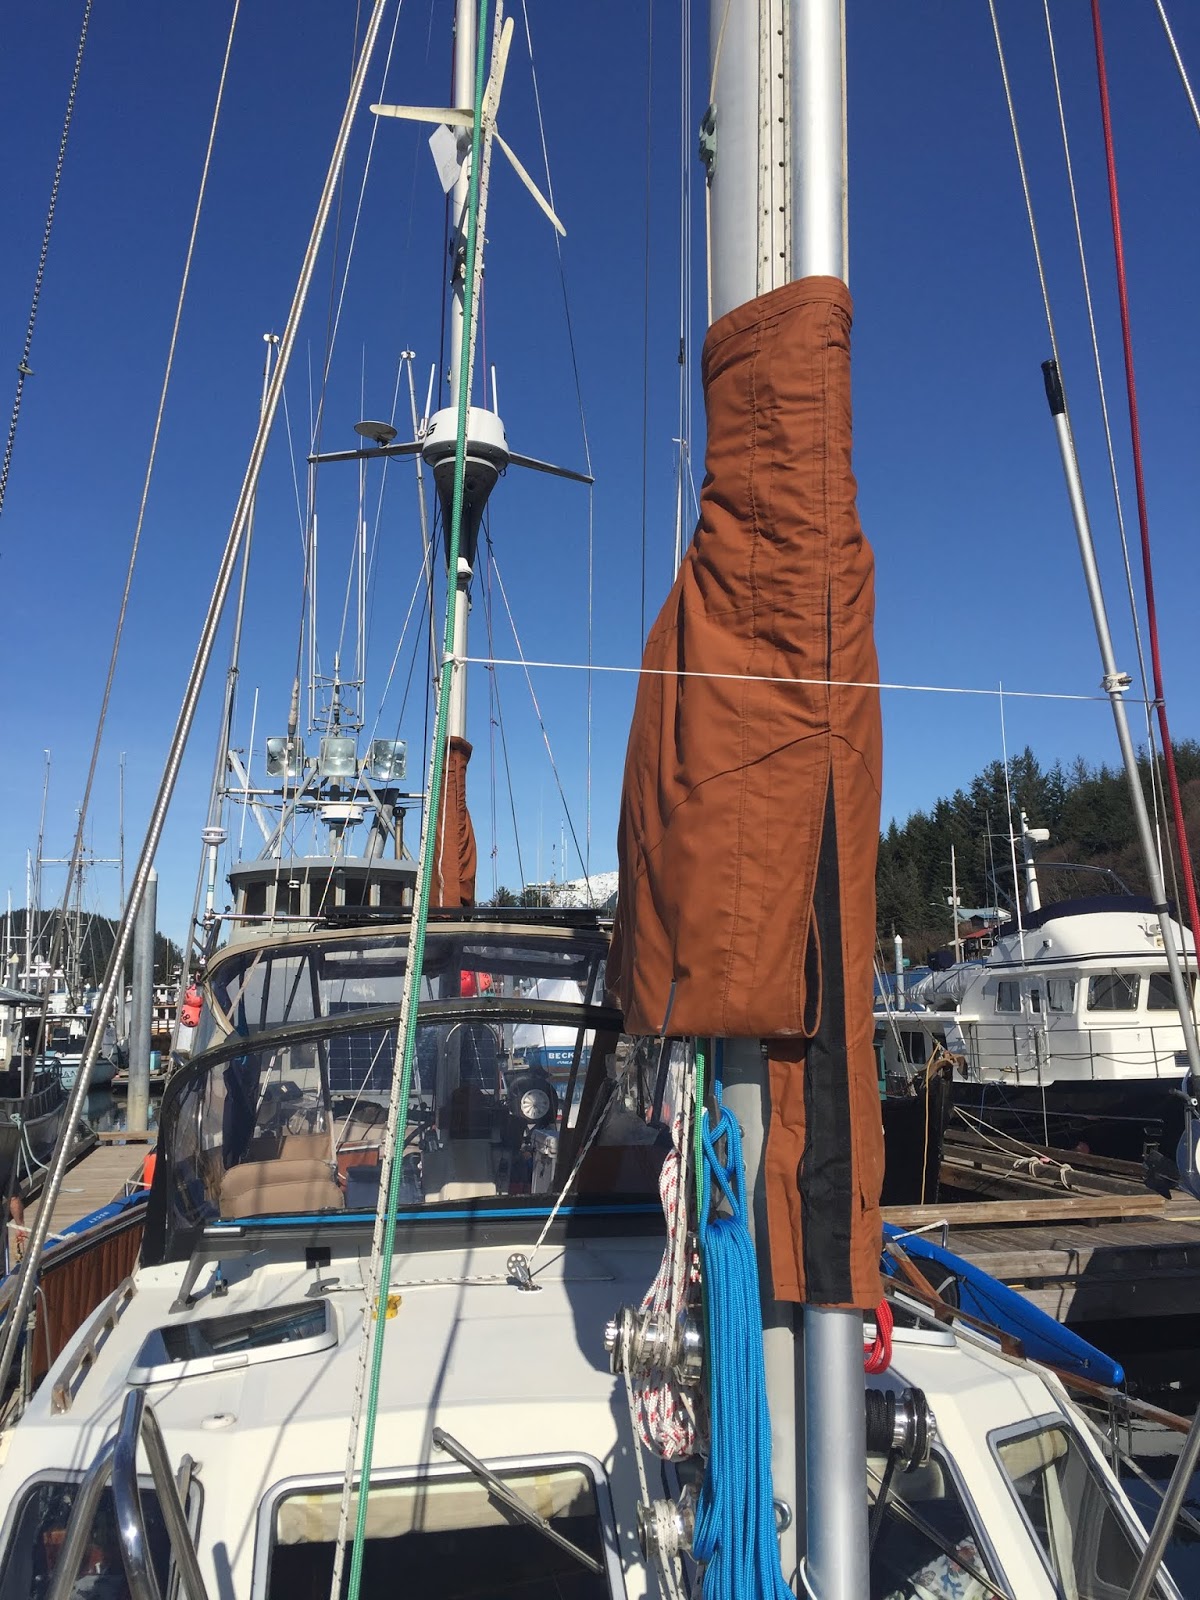
Marine Grade Canvas, I used Sunbrella for the side curtains on the bimini, the weather cloths, and the sail covers. It's a solution dyed acrylic material that is UV, water, and mildew resistant. Sunbrella doesn't like abrasion though, so I put chafe guard where needed, it will also fray at cut ends, so it must be cut with a hot knife, or run a lighter along the edges. None of my Sunbrella edges are left bare, they are either tucked under, or are covered with seam binding, all safe from unraveling.  Marine canvas has seen many new brands come onto the market, but I decided to stay with the recognized leader in durability. 

Seamark material is Sunbrella acrylic on one side, and color-matched PVC on the other side, this creates a waterproof laminate. Our old dodger/bimini had this on the tops, and even though the zippers were failing, and the Sunbrella side didn't look very fresh, the underside looked brand new, totally sold me on the longevity, waterproof, and ease of cleaning. If we got any mildew on the underside, I would just wipe it clean with a Clorox wipe, and done. Another great feature, is that you can cut this with regular scissors, and it doesn't fray, no hot knife, or burning edges needed. 

Seam binding  I like to use Stamoid binding, it's a biased cut, double folded, binding made from a vinyl coated polyester fabric. This is also dirt, UV, mildew resistant, and since its vinyl, it can be cut without having frayed ends, another plus for not having to deal with the extra bulk, and hassle of turning under raw edges.

We used Zippers that can withstand the outside application the same way that the materials can. With over 40 zippers in the dodger/bimini, I don't want to take down the enclosure to replace zippers. I used #10, Vislon, which has teeth made from plastic that are molded into the zipper tape. Since zippers aren't made in all of the odd lengths I needed, I had to buy approximate sizes, and cut them to fit. I used stainless steel zipper stops after I cut to length, and they were very easy to install.

Webbing, Sunbrella makes a polyester acrylic webbing that is resistant to fading and matches their fabrics. 

Seamstick is a double sided sticky basting tape, you use it before stitching, and it holds your intended seams together. It works great to hold your fabric so you can do straight seams, it also gums up your needle, bobbin, and mechanisms. They recommend that you use an alcohol swab occasionally to help remove any residue. I kept one in a baggie next to the machine, and used it constantly, if you don't, the thread will catch and break. Mostly I used 3/8" seamstick for the Seamark, and Sunbrella, but for the Makrolon windshield [more below], I used the recommended 1/2" Mylar/Kevlar basting tape.

Shelter-rite is a material I've never used before, but the folks at Sailrite recommend it for chafe protection. It's another vinyl coated polyester fabric material, but is formulated to be flexible in high abrasion areas, with high tear strength, and water resistance. I used it on all areas that needed a chafe guard, the dinghy cover, the leading edges of the dodger/bimini, and high wear areas inside the dodger/bimini, and curtains. Bill even used it to patch a couple of wear areas on the hypalon on the dinghy. 

HH-66 is the vinyl cement used to glue Shelter-Rite to other surfaces. I sewed it where I needed chafe protection, but this is the glue Bill used to patch the dinghy. One of the advantages of using Shelter-Rite, is if in the future we see a need, we can glue more to it,  Ex: I cut round holes for the inflation points on the dinghy, but if we decide we need a protective UV flap, we'll just glue one on.

Window Vinyl. Strataglass is a press, polished, and coated clear window vinyl. I used 30 gauge, for the side, and aft curtains on the bimini, and I choose this weight, instead of a heavier one, because we occasional roll up the curtains, and we needed a more flexible vinyl. Strataglass has a very detailed care sheet, and if followed, the longevity and clarity are increased. This vinyl is not an inexpensive solution, I've used cheaper vinyls before, and I expect this brand to outperform less expensive brands. It comes in 54"x110" sheets and is $204.95 a sheet, I bought three, and I will be using up all of two, and have the third for a spare. 

Makrolon is a clear, optical grade hard polycarbonate window material. It's less flexible than window vinyl, but definitely has more clarity. We bought the VR Flexible Marine in 40 gauge from Interstate Plastics for the windshield. We would have liked the 60 gauge, but the 40 can be rolled up for shipping, and the 60 can't. These come in 52"x110" sheets, and it would have been cost prohibitive to try and ship a flat sheet that size. We ordered 2 sheets of the 40 gauge, and they came rolled for $60.00 in UPS shipping.

Pipe Flashing is manufactured to wrap around pipes that come through a roof on a house. Bill thought this might be a good solution to help waterproof the bimini, since we have four areas where standing rigging runs through it. He sealed it with Duralink 50, Super Adhesion Sealant. More details about this in the "what we did" section later.

4.5 x 4.5 inch base; 4 inches tall...


Snads, Snaps, Snap hooks, D rings, oh my. Snads are adhesive backed studs for snaps, no need to drill holes in your boat in order to install snaps. Snaps come in many flavors, pick which one suits the application, just make sure they're stainless steel, nickle won't hold up in the marine environment. Snap hooks, and D rings are part of the webbing assembly that provides support and tension to the dodger/bimini support structure.

Bolt Rope tape was used to secure the bottom edge of the dodger window to the cockpit coaming, and to secure the top edge of the weather cloths to to the hand rail.

EZ Lace is a fabric strip with lacing holes, it eliminates the need for grommets, I used it at the bottom of the weather cloths to secure them to the toe rail.

Foam pipe insulation: Hint: Make the dodger fit tight on the frame. Before final install, put foam pipe insulation over the top tubing frame members and then install your canvas for the final time. It will be that much tighter, reduce chafe, and have fewer hard surfaces for crew to bruise themselves on...


Tools:
Sailrite LSZ-1, this is a heavy duty sewing machine, that is somewhat portable. It's heavy, and you don't want to be moving it around a bunch. The LSZ-1 can sew through multiple layers of canvas, leather, and sailcloth. It has what is called a "walking foot", which means the presser foot works with the feed dogs, to advance the material through as you sew. The customer service for the company is terrific, and the maintenance videos are fantastic.

One of the most useful tools is the seam ripper. This handy tool helped me to pull apart the old canvas to make patterns, and to pull out mistakes on the new canvas. I'd like to say I didn't use it much, but I can't. I have about 5 of these blue ones, and then several others in different sizes, and styles. Purchase many, they break. 


Water soluble marking pencils, grease pencils, and chalk pencils, all have their place, each is different in their ability to mark up patterning, canvas, vinyl, and window material. 


Snap positioning kit. We used the already installed on Denali Rose, male part of the snap, and put new buttons on the canvas. This kit comes with a pin socket that you snap into the male part, and then you stick it through the canvas, and it marks where you need to install the button part of the snap. Easy, and accurate.


The Press n Snap Installation tool from Sailrite makes installing snaps easy, and quick.

I have my regular sewing scissors from Wiss, but to cut the Makrolon, I purchased Fiskars Titanium Nitride #8 shop snip from Amazon. They were difficult to hold, and they did okay, but Bill liked his heavier tin snips.


LSZ-1 sewing machine parts: Needles, Retaining Ring Cap Springs, Scarfed Shuttle Hook, and sewing machine oil. 

We oiled, and changed the needle every new day I re-started to sew the Makrolon. I went through five #21 diamond point needles to sew it. For the rest of the canvas I use a regular #20, which is recommended for the PTFE thread, and Sunbrella. I don't normally change the needle so often, with Sunbrella, or other fabrics, I was just being extra cautious with the polycarbonate, to keep the sewing holes down to the minimum. 

The retaining ring cap spring, (without going into too much detail), is a piece that sits underneath the faceplate, and is part of the assembly around the bobbin, if the needle strikes it, it creates a burr on the metal, and this caused thread breakage. I've gone through five of these, mostly while sewing the Makrolon. 

Also from a needle strike, I had to replace the scarfed shuttle hook, which is another a piece of the bobbin assembly. I can use a jewelers file to fix the burr on the striked one, and still have a spare. 

Hot Knife Think of this tool like a hot pair of scissors that seals the edges of your polyester material so that it won't ravel. It works great on Sunbrella, but because of the vinyl backing on Seamark,  I didn't need it on that material.

Every time I order supplies from Sailrite, I include at least one other spare piece to the LSZ-1 machine. It's not that the machine breaks down, but IF it did, I want to be able to replace, or repair, and get back to sewing. If you live in Alaska, you know that shipping can be expensive, and time consuming, and having spares on hand can keep down-time to a minimum. I've also downloaded all of the maintenance videos, so if we have a need, we have the parts, and the instructions.

Sailrite has great customer service, and hundreds of instructional videos. They offer the videos for free, and I appreciate their knowledge, and the time commitment it takes to put them together. We've downloaded a majority of them, and store them on a hard drive. I like having them on hand, and using our data plan just once to download. 

I bought the Seamark from Rochford Supply, Sailrite didn't have the amount I needed, and Rochford Supply had it in stock, with reasonable shipping.

I didn't choose the least expensive, I didn't choose the most expensive either, I researched and choose the longest lasting, and the best product for our application. Your results may vary.


Online Merchants:


June 13, 2020

Friday Funny 06-12/20 (Roger that, Dodger)


You haven't heard much from me lately, I've been keeping my nose to the grindstone.
(idiomatic, after keep, put, have, hold (one's)) used to form idioms meaning "to work hard, or focus heavily on work." 

It's paying off, and we're seeing results, (finally, whew.) I thought the bimini would be complicated, and the dodger easy, but that turned out to be backwards.

In between rain squalls, I laid out, and cut the dodger pieces on the dock, and sewed most of it together inside at my sewing table.The challenge turned out to be getting the windshield sewed in, and then getting the zipper pockets to line up with the stainless support bars. Everything lined up so well with the bimini, so I wasn't too concerned, but the dodger didn't go quite as well. 


Dodger laid out for more detailing.

This windshield is not the typical heavy duty clear vinyl you normally see on boats, or the material I've used on the curtain construction. The brand I've used for the curtains is Strataglass, and it's the recognized leader in longevity, and clarity for marine clear vinyl. The windshield is a hard polycarbonate, Makrolon [VR; Fabrication and care info], and is is more rigid than the vinyl. My sewing machine is heavy duty, and is built to handle these kinds of jobs, but it balked at this until the engineer, (Bill), watched all of the maintenance videos, and did some work on the machine. I'm grateful that he likes that kind of stuff. Once we got the machine back in working order, it only took about twenty minutes to sew the perimeter of the window, and and the dodger is on! 

We're also grateful for our gracious neighbor on Twinkle [thanks Judge!] who allowed us to sew out of the rain on his back deck. No way were we going to get this rigid 10ft section of windshield down into the dinette area, maneuver it around, and get it sewed into the dodger material.


First fitting, without windshield in yet. Never mind the pressure washer in the foreground.


Twinkle


Set up on the back deck.


Bill working on my Sailrite machine.
We always tell Gus to get back on his own boat when he wanders down the dock too far, he mostly complies. While we were over on Twinkle, he spent the whole time keeping an eye on us, and loudly telling us to "get back on your own boat!"


Gus keeping watch from the cooler.

We finally installed the dodger for fitting, we didn't take the protective plastic off as we tweaked, stretched, and fitted it to the frame, just in case we needed to take it down again for alterations.

In place.
Gus has to do his job as Chief Quality Control Officer.

He approves.

Gus also had to approve the dinghy cover, I thought it was done until Bill pointed out that I had forgotten to put the slits in the canvas to install the center bench seat. Oops.... so off it must come for some adjustments.

This is nice....

We finished our tweaking, and did the great reveal!


We love the clarity we have now!


We still have the connector window between the dodger, and bimini to do, and that will be made with the Makrolon also,  and bottom snaps to stretch things further, so we've left our awning up for now.

Gus loves to sit under the awning, he's outside watching the goings on, and sheltered. He'll be bummed when it comes down.

Here is a post listing all the materlials we uses, why we chose them, and links to sources.

As always, we enjoy hearing from you, either here in comments or on our Facebook Denali Rose Sailboat page.


May 23, 2020

Friday Funny 05-22/20 (Dinghy Doldrums)


Remember hearing, "we interrupt this regularly scheduled program, to bring you...."? I think it was usually a test of the emergency warning system, or a news broadcast.

I don't have anything quite so dramatic, but I did interrupted my cockpit enclosure project to get the dinghy chaps on. Bill took the dinghy off of the davits, and put it on the dock, he put on a couple of patches, cleaned it up, and applied a coat of 303 Protectant. I ran out of the binding I needed to continue with the port side bimini curtain, so ordered some more, and I moved on to the dinghy chaps project.


Patched, and clean. [20 year old Caribe Hypalon RIB]
Why not buy a cheaper PVC dinghy?


Last summer, we removed the original chaps, they had worn through, and reached the absolute end of their useful life. The previous owners had already patched them up multiple times. On a sunny day while we were docked at a state owned float in Swanson Harbor, I cut up the old chaps to make a pattern, and then cut out the new ones. I had some Tan Sunbrella left over, and I cut out the pieces. That was before we decided this spring to completely redo the boat in burgundy.


27 year old cover [20 years in the tropics...] Many patches, and very worn material.
It did its job well...

I had thought I would be done with this project by the time I wanted to publish this post, but alas, it's not to be. I still used the tan that was ready for sewing, and then I added in some burgundy pieces.

Partially done, with burgundy accents. [i.e., leftover scraps from other canvas projects...]

I'm working on the rub-rail chafe protection, then the outside hem with a drawcord, and then the inside hem with new snads, (snaps) from the chaps to the boat. (Is that all?) It's at least a couple of days work. Bills says, "now we need an outboard cover". [Actually, Bill said 'Now I suppose you're going to want to make a new matching outboard cover...'] There's always another project, another day.

I received new materials in the mail for the continuation of the bimini/dodger project, so now, I'm anxious to get back to that. 

Gus approves of the new color.

As always, we enjoy hearing from you, either here in comments or on our Facebook Denali Rose Sailboat page.


May 15, 2020

Friday Funny 05-15/20 (Coffee, Sew, Wine, or is that Whine?)

My life.

The bimini is installed, not quite done, but up, and fitted. In addition, the starboard side curtain is zipped in, also not quite done, but fitted. I'm waiting to do final adjustments until I have all important pieces in place, like the bimini, both side curtains, and the dodger. We got the Makrolon windshield this week in UPS, so that will mean the dodger is next, especially since we may have a couple of days without rain, except that the dinghy doesn't have a cover yet either, and it needs protection from the sun. Decisions, decisions...

At one time, I thought I might do canvas work for profit, but now I have changed my mind. 
  • I don't have the room to sew.
  • I don't have the room to store sewing materials, and supplies
  • I don't ever want to do this again.
What a mess!

Since the previous owners advised the old canvas enclosure was made in 2007, and had never been taken off, I'm totally okay with doing it that way again. I'm not sewing a new enclosure, not even in 13 years.

A lump.

Gus had to try out the new bimini, he's the lump as we try to stretch it out over the bars. Big help buddy!


As chief QC officer, he's making sure the curtain fabric is up to his standards.

We've been enjoying the recent spate of warm weather, it's good to be able to work out in the sunshine, but bad, because we're working out in the sunshine, not cruising.


Hmmm, brown, burgundy, tan, hopefully at some point it will all match, to keep my spirits up, and my motivation going, I envision it in my mind.


As always, we enjoy hearing from you, either here in comments or on our Facebook Denali Rose Sailboat page.


April 24, 2020

Friday Funny 04-24/20 (Sew Sew Sew your Boat)


I tapped into my courage, and decided to finally tackle the new bimini project. The zippers were failing, and flaking, and we knew that once we took this bimini down, it would never go back up.

"A Bimini top is an open-front canvas top for the cockpit of a boat, usually supported by a metal frame."
Wikipedia

The old bimini with the reinforcement I put on a couple of years ago.

We haven't taken the dodger down yet, one piece at a time.

It's off.
It was a wonderful sunny day, and we ended up with two in a row. It was enough to get the materials laid out on the dock finger and cut out to be ready for assembly.

Gus is helping.

The topside is really dirty, and the chafe guard on the leading edge is chafed. 😁

The underside I kept clean with regular washings. 

Except for the bimini being dirty, the zippers failing, and the rigging holes at the aft edge leaking rainwater, the material, and stitching was in pretty good shape. That's a testament to quality material, and good UV Lifetime thread. The previous owners let us know that this enclosure was made in 2007, in Trinidad, and it hasn't been down since.

It clouded up, and we've had nothing but rain since. I've dashed out a couple of times to try and lay things out straight to measure, and seamstick it together, but I usually have to gather it all back up, and dash back inside.


Water buckets.

Bill draped the Noah's Tarp over the framework of the bimini, and we tried to keep the rain out, and provide a dry place to work in. It was a no-go. The rain created pockets, that didn't run off, and the wind gusts kept flapping it around. We didn't want to ruin the tarp, so we took it down. 

So now I have the space in the pilothouse to work in. I can lay about half of the bimini out at a time, and Gus loves to help.

"I'll just hold it down here, Mom"

I'm about half-way done, and I've gone slow and sure, I'm going to do a larger write up about the process when I'm done. On the Facebook page, "Sewing on Boats", I've been asking questions, and answering questions, and I'll need a post about what materials I used, and why, and about the process I took. Sailrite has terrific how-to videos, but my bimini is far more complicated than the one they create, so I had to do a bit of my own engineering.


As always, we enjoy hearing from you, either here in comments or on our Facebook Denali Rose Sailboat page.


March 1, 2020

Friday Funny 02-28/2020 (Dodger/Bimini, Order in Chaos)

Nice title.

That must be me. 

Sailrite shipped all of my supplies for the new dodger and bimini ultra fast. I'm not complaining, but I'm not quite ready to start, so in the meantime, we move around the supplies.  One of the boxes had split the end in transit, it contained three rolls of expensive Strataglass window vinyl, so a big "whew" when it was found undamaged.


There are over 40 zippers in the existing enclosure, and I ordered that many, and a few more. As it turns out, I got a couple wrong, they need double sliders, instead of singles, back to Sailrite for another order. 

Zippers aren't made in every length, so I had to buy the closest size, and I will cut them to fit. I've sorted out the packages, and labeled them, that way I don't inadvertently use a length that was intended for another area.

Sorting zippers.

Bill put up brighter light over the sewing table, and I'll be able to see much better! Now I need to clear the table, and bench of non-essential items.


My sewing "room".

I also bought these clamps to make it easier to hold things together while I run it through the sewing machine.


We're storing the rolls of Seamark, Sunbrella, Strataglass, Shelter-Rite, and soft window liner in the forward head, it's convenient that we can use the aft head instead.


A few on the bookshelf in the forward V-Berth also.

The cockpit is also piled with stuff, and I'll need to clean that out too. The bimini keeps the rain out, but I need to take it down to create my pattern for the new one.


Important stuff.

We'll probably rig up some kind of blue tarp over the cockpit until I get the new one ready. We're scheduling for a haul-out this spring to do some maintenance, and we haven't decided yet whether we want to put up new canvas while we're in the yard. Last time we were there, the boat got pretty dirty. My guess is that we'll need the bimini top, and won't put on the new sides. 

It's pouring rain today, so inside organization will be better than outside. 


As always, we enjoy hearing from you, either here in comments or on our Facebook Denali Rose Sailboat page.


March 22, 2019

Friday Funny 03-22/19 (Mainsail Cover Part Deux)


I've read somewhere that "perfectionism is the enemy of good enough", I believe that to be true. Also, most people know when you start a project, and you make a prediction as to when it'll be finished, always add additional days, more money, multiple elements, and increased frustration to it.

I made the current mainsail cover two years ago, to replace the aged one that finally shredded in the wind.

Old mainsail cover.

New mainsail cover. Denali Rose dressed in her Carhartt colors.

I used the old cover as a sort of pattern for the new one, and changed/added a few differences. After using it for the last couple of years, we decided we needed to make a few more modifications.

We felt that the cover impeded the view forward from the cockpit, and the twist-lock fasteners were not holding up as well in the marine environment, as we would have liked. They were getting hard to twist, and I guessed they would eventually seize up.


We talked about what else we could do, and I ordered webbing, and plastic buckles from Seattle Fabrics. I figured about 2 days to get this project completed. I should have known better.

First to measure up how much to cut off of the bottom of the cover.


Making the cover sleeker.
The weather is cooperating, with a nice dry spell, and I laid it out on the dock to make my cut with the hot knife. This device cuts the fabric, and because it's also hot, it seals the edge to keep it from fraying.

Take a breath, and cut away!

Our dock finger partner boat is away sitting out of the water, on the hard, in the Marine Service center area, waiting to be sold. That means I can use the finger for projects, and not be in anyone's way.

I made the cut, and then laid the hot knife down on the canvas... duh, it melted a small hole before I could pick it back up. 

Crud, and some other words.

I took the cover inside, and sewed on the binding tape for the hem. It's getting late, and I knew if I continued on, I'd just frustrate myself with being tired, and hungry, and so I called it quits for the day.


Day two, I turned the hem under, and used seam stick to hold it in place, now I needed to put it on the boom to make sure of my measurements. I got it up there, but it's a challenge to get the front closed in front of the mast, because it's too high for me to reach. It was difficult before, but I'm still not as mobile as I would like, and now it's impossible. Bill is away doing other things so I pulled it back down, and decided to go with it. The folded hem wasn't sitting nicely, it was going to require some finesse, (yanking and tugging), so again, to keep down frustration, I tossed it in the sewing area, and quit for the day. Scope creep starts...

Day three, I sewed the hem up, it's not as bad as I thought it would be, happy points for waiting till I'm rested and fed. I found Bill was ready to help me put it back on the boom, so I could verify my hem, (hoping not to rip out seams), and to mark where we wanted the new tie-downs. Using my chalk marker, we decided where the webbing should be located, and I pulled it back down. I still needed to mull over in my mind how I wanted to secure the strap ends, we don't want them flying around in the wind.

Day four, I'm procrastinating by writing this blog post, but I can't finish the post until I get back to sewing, so it's a catch 22. 

(Forced myself back to sewing.) I had purchased new thread for this project, I decided to switch from Tenara to Profilen. Both have a high UV rating, but Tenara makes my machine's tension go haywire, and takes lots of fiddling, I thought to try another type, and see if the tension improves. All was well with the new thread until I started sewing the webbing on. 

Lovely. Not.

Next:  

I interrupt this regularly scheduled blog post to say I didn't do any more sewing that day or today.

We did our yearly fasting, and this morning went in for our blood draw. Wrangell's medical center does a handful of wellness tests and provides the results at our annual Health Fair in April. It's a terrific service, and extremely cost effective at $25.00 a test. 

Then I went to my Friday Water Aerobics class, and when that let out we went to watch the Coast Guard, who were in town for rescue drills. We took a bunch of great photos, and videos, and it probably deserves it's own post. 

We ate our lunch about 1:30p, did some errands, and arrived back to the boat. Bill is working our our in-counter fridge, so working at the sewing table is out. I'd just be in the way. That's my story, and I'm sticking to it. Tomorrow is another day.......

Coast Guard rescue swimmer is in the water.
The helicopter came from the Sitka Station.

Selfies next to the Coast Guard helicopter.

As always, we enjoy hearing from you, either here in comments or on our Facebook Denali Rose Sailboat page.