Showing posts with label Perspective. Show all posts

March 27, 2024

Tidbit: Walkie-Talkies [GMRS Radios] for casual comms

This is one of a series of brief, no nonsense posts that we call a Tidbit:

noun; small and [possibly] particularly interesting items of gossip or information...
The purpose is to share succinct posts about lessons learned, or things we use or do that work [or don't...] that are common to many of us boaters. 

This post is also worthy for listing in our Stuff we have and use sidebar —>

The goal is to garner feedback from those of you having first-hand experience with a better approach/ solution/ product...  
We never assume what we are sharing is the ideal or only; it just seems to best suit our needs [and/or habits and/or budget] from our experiences thus far...
Sometimes these Tidbits originate from a topic of discussion on one of the forums we participate in, and this happens to be one: Link to original post [27-Mar-2024]

Since we encounter this question on occasion, it made sense to post a more detailed response for future reference.

                               ➛ ➛ Peruse the right-hand sidebar for the up-to-date list of Tidbits ➛ ➛                               


Many users [ourselves included] use hand held Marine VHF radios to maintain comms when some or all crew are off the mother ship [on land or other watercraft] in remote areas.

Sometimes these are not appropriate- especially if you need to issue radios to several different guests off exploring in different directions since other vessels in the area might also hear the conversations [and we might occupy marine channels those actually boating need to use…]

Therefore, we have always keep a few [5; lost 1 over the years] cheaper, general use GMRS radios onboard for years for the same purpose. 

They work great. 
And once [so far…] on a remote kayaking trip, these radios were of great assistance during an emergency when one of 3 of kayakers [each with their own GMRS Radio] broke their wrist [during inclement weather; e.g., It was a dark and stormy night…] because of a fall on ice while hiking alone. 
There are several Walkie-Talkie radio types available, and are well described on this forum post.
Note: Last I knew [in the US anyway] technically you need an FCC license to use the high power GMRS channels, but that may have changed.
We issue them to guests whenever they are venturing off the boat [e.g., kayaking, SUP, dinghy, or hiking on land- remote or in a town.]
For safety, we do also issue those off on their own waterborne adventures from the mothership Marine VHF radios [and PLBs] for emergency use. [e.g., As we tell visitors ‘In case the mothership is struck by a meteor while you are away…’]

Coordination with users who may not be used to using radios:

About 15 years ago, we color coded ours with a wrap of different colored electrical tape on each antenna [useful when wanting to hail someone anonymously; original tape is still going strong…]

Photo taken Mar-2024; Taped applied ~ 2008?

We have fun making up bogus call signs:  [Sounds cool and officious; Less prone to interruptions by other radio users not in your group in crowded locations- like big cities- where we would likely be using cell phones anyway…]
Charley-Alpha-Kilo-Oscar, this is Charley-Alpha-Kilo-Bravo 
[Candy-Ass Kayaker Orange (antenna tape), this is … Blue…]
For distance use when separated, our protocol is to start/ hail first on a specified low power channel (e.g., GMRS 13; 1 watt- for better battery life) then, if unsuccessful raising the other party(ies), switch to a specified high power channel (e.g., GMRS 14; 5 watts?) and try again… [This works best with a comms schedule- e.g., everyone check in every 30 mins.]


Battery considerations: 

We prefer electronics that can use the Panasonic Eneloop rechargeable batteries [AAA, AA] we standardized on almost 20 years ago [still rate among the best for low self-discharge rates; e.g., long shelf life once charged.] This is so we can issue spare batteries for the GMRS issued to those traveling a distance from the boat [just in case… There aren’t any charging stations handy when traveling by kayak, sup, or hiking in remote locations…]

Sidebar: Radios are half - duplex [only one can speak- or more accurately, be heard- at a time, and then you have to release the PTT button to listen… If you want to…] Even if VOX [voice activation] is used. This is very adequate for most of our use cases, and what VHF radio users are used to. [This paradigm is also perfect for certain couples; some have even confided they found that judicious use of their personal volume control very satisfying…]
But for ‘real time’ comms on the boat [volume up; e.g., anchoring, hauling anchor, mooring, etc.- especially in sporty conditions] we prefer full-duplex headsets [you can still hear the other person if you are talking- like a phone; no PTT (push-to-talk) button.]. Nothing missed that way…

We do recognize that some relationships claim to attribute their longevity to only one member being able to [or being the only one to ever] speak [be heard?] at a time [half-duplex; the other party remaining silent until the speaker is finished- reportedly sometimes for long periods thereafter- or has released the button on the radio in our case…] 
But there are situations when the ability to interrupt is necessary [if not sometimes risky…] hence our preference for full-duplex headsets for real-time comms during boat maneuvers… [Always with carefully modulated volume— of one’s own voice of course. After all, they didn’t nickname these headsets ‘Marriage Savers’ arbitrarily…]


Please share your experiences, choices, and recommendations. We learn something new every day…


March 11, 2022

Immersing ourselves in new [to us...] cultures...

One of the reasons many of us have adopted this cruising lifestyle is to travel; to visit lands and cultures we either have never experienced, or wish to learn more about.

There are often some minor barriers to admission; things we don't know or are unfamiliar with, like language, dress, customs, and cultural mores...

We never want to offend anyone, nor be perceived as the 'Ugly Americans'... 

I personally enjoy asking what must be mundane questions, but one has to start somewhere... 

This is akin to our being occasionally asked if we live in an igloo, have a dog team, where to exchange currency [this from fellow citizens- and yes, I can handle that for you...] or insistence that shipping to Alaska from the lower 48 US states is international... [A testament of our public education system perhaps?]

Regardless, I always enjoy being immersed in a culture- especially one that is new to me. I have found that is the best way for me to absorb some the cultural nuances and bits of language. But it rarely sticks for long- especially if we are just passing through- but I can't stay isolated just because I am embarrassed by my own ignorance...


Another example: I have lived and boated in Mexico several times, the most recent being many years ago. I was fluent in Spanish then, but languages don't stay that way [for me...] without continued use. 

Keeping with my desire for immersion, when I have an opportunity to converse in Spanish I jump right in. I try speaking without thinking it through in English first [i.e., translating; it is said you know a language when you think in the language you are speaking- or attempting to speak in...] This can lead to some funny situations...

I remember being in Mexico joining friends for dinner in very nice restaurant- after a few years of absence from the country [and the language...] I intended to order camarones a la diabla [Shrimp of the She-Devil (chipotle sauce) which was not on the menu... To die for! (Or die of...)]

At this point my tongue was well lubricated through my reacquaintance with the local beverages, and running about half a step ahead of the brain which was driving it...

What I actually ordered was a few demonic trucks [camiones.] And I knew this as soon as it escaped my lips. Hysterical laughter ensued; mine and theirs.

My second attempt would have required a waiter [camarero...] to volunteer to be diced and sautéed in the chipotle sauce...  Now they think I'm a stand-up comedian... A round from the house!

My friends are getting pretty hungry at this point, and some food in me might help ensure we receive something familiar for desert...

Of course I hit the target on my third try [as if they didn't already know...] and we [especially the wait staff] continued to chuckle our way into dinner... 

It was great fun and a marvelous learning opportunity at the cost of some humility; a small price to pay indeed.

C'est la vie! [...or should I say que será, será...]

And I can assure you boaters that- unlike unfamiliar cultures-  unknown waters do not compel in me that same desire for immersion...


August 23, 2020

Please don't take me for granted...

I never anticipated such a violent reaction- especially after 20 years of blissful togetherness. 

We do have to take into account we live in very close quarters, subsequently time together is compounded faster than in most [pre-pandemic] relationships. 

And since we each have our own responsibilities— which are often reduced to daily grinds— it is understandably easy for interdependencies to form. 

I am consequently reminded how easy it is to start taking you for granted.  I'm sorry.

Hopefully this is just an example of how daily routines can get out of hand if you don't pay attention to each other— causing eruptions when you are least prepared…

In the aftermath, I like to think we aired our mutual grievances while I cleaned up the mess, and hope everything is once again back to normal… 

I promise not to take you for granted ever again...


Never take an inanimate object for granted either...


April 23, 2019

Tidbit: Bedding considerations in cooler climates... [Updated Apr-2019]

This is one of a series of brief, no nonsense posts that we call aTidbit: 
noun; small and [possibly] particularly interesting item of gossip or information...
The purpose is to share succinct posts about lessons learned, or things we use or do that work [or don't...] that are common to most of us boaters. 


The goal is to garner feedback from those of you having first-hand experience with a different approach/ solution/ product/ or additional useful information to share...  
We never assume what we are sharing is the ideal or only; it just seems to best suit our needs [and/or habits and/or budget] from our experiences thus far...
Note: The blog post which follows [Originally posted 5-Mar-2016] — having been reviewed and updated— has been inducted into Tidbits since it qualifies, but was published ~3 years before we initiated the Tidbit series...  
                               ➛ ➛ Peruse the right-hand sidebar for the up-to-date list of Tidbits ➛ ➛                               

Since most of my experience is boating in cooler climates, [ignoring one multi-year coconut-milk-run...] I am sometimes asked about special considerations and adaptations I found useful over time. 

In this post I'll discuss my take on bedding [sheets and blankets if you like] and ways of reducing/preventing condensation under and around mattresses. 
I will use the term mattress to mean whatever substrate you choose to sleep upon. This includes custom innerspring mattresses, foam pads, seat cushions, camping mattresses and pads, sacks of rice, etc. Basically, whatever you prefer...
I [now we...] have been making our boat beds a bit differently for the last few decades. (Those of you in warmer climes may wish to experiment with non-fleece variations of what I am about to describe...)

I always hated the fitted sheet wrestling match [as does Donna...] so I experimented on myself one winter 30+ years ago and made a fleece bedroll the shape of the V-Berth on my 37 ft Valiant Esprit at that time. [I'm positive I'm not the first, and I'll bet there are even better ideas out there, but this works great for me, now us...]

Wonderful! I had one item to wash, and making the bed was as easy as standing at the head of the berth and unrolling the fleece on top [with a flourish if anyone is watching...] 

The bedroll facilitated easy access to the stowage below the berth as I had no fitted sheets to wrestle with. And it cost [much] less than a set of custom fitted sheets- which are only part of a solution anyway...

My original bedroll design was more complicated than it needed to be [as I am wont to do...] But hey, it was the middle of winter and I needed another project...

It had the full length matching two-way zippers that met in the middle of the bottom, so the top and bottom could be separated [each half then became a single person bed roll] and one of both sides of the bottom could be unzipped for ventilation for a hot footed sleeper...

I eliminated the zippers in subsequent models [which typically failed after a few years, and weren't all that comfortable to lay upon if the bedroll shifted around while sleeping... 

The new models were sew together across the bottom and up the sides to about knee level. [Don't go higher otherwise it is more like exiting a sleeping bag instead of a bed- especially if the berth orientation requires you to enter/exit toward the foot or side of the berth vs. crawling out head first...] 

This modified design is ideal for us; easy to get out of if you have to exit the foot of the berth as we do, and no tangling or burrito effect...

Other variations over time included using a heavy [thicker] fleece on one side [e.g., 300 weight— which is what I recommend if you like a cool sleeping area but a single 'blanket'...] and a lighter fleeced on the other. [e.g., 200]  This way I could flip the bedroll over to accommodate seasonal temperature changes... 

I learned to always use high quality Polar Fleece. [e.g., Polartec] It doesn't pill-up [becoming coarse in texture and uncomfortable to sleep on...] like the cheap stuff does. 
Research your fleece choices and shop carefully... [Today we purchase high quality PolarTec fleece online from Seattle Fabrics... I'm sure there are other good sources of high quality fleece as well...]
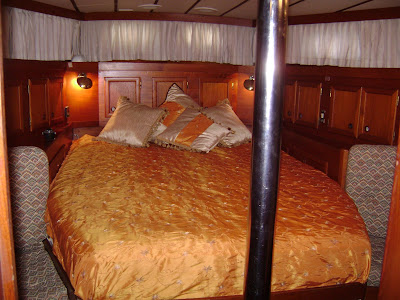
Fast forward to our current boat with a custom shaped, quasi-queen sized mattress. It has a cloth hinge down the middle so the mattress folds in half lengthwise. This is handy for getting it into the boat through our companionway in the first place. 

Folding the mattress in half also allows for reasonably easy access to the storage and steering systems underneath the berth. And the emergency tiller arm [which extends through to the aft deck] can be installed and used with the mattress folded in half...

At sea, a lee cloth can be attached to the hinge to split the berth in two— making two pilot berths when needed... 


The bedroll eliminates the need to remake the berth whenever we fold the mattress over to access stowage beneath the berth. [Which isn't really that often, however the convenience is not to be overrated...] I think two seperate mattresses would also work well if they were covered by a single foam topper of choice to prevent us from feeling the joint in the middle... 

We keep a few fleece blankets on hand if we need them, and of course we have super cold weather sleeping bags on board. [And a 4 season tent I can use as the dog house... All are in a supplemental ditch bag in case we ever have to abandon ship close to shore. Remember we are exploring the Alaskan coastlines these days...]


Other considerations:

Since Denali Rose spoils us with a small front-loading combination washer/dryer, we have made some micro-fleece sheet liners that fit inside the fleece bedroll so we can wash those easily on the boat. 
The one piece queen size fleece bedrolls are just a tad too big for our 1.8 cu ft washer... A two piece bedroll (with zippers on the sides and bottom) may work better for us now so we could wash the fleece halves separately onboard... [The liners save us having to wash the fleece bedrolls very often...]

What about condensation under the mattresses and cushions on a boat? 
If you don't provide for constant air circulation [which also creates a thermal break between the warm and cool surfaces] under all mattresses/ seat cushions that are in use in cool climates, you will induce condensation where they touch cold surfaces. Portions of the mattress/ cushions will get wet underneath— and on the sides where they contact the hull— eventuallly leading to mold and mildew... [Not to mention a damp, smelly, unhealthy bed...]

How do we avoid this?

We have found it is very desirable to cover all often used mattresses with a totally encasing hypoallergenic, water resistant, breathable [i.e., not plastic or rubber...] cover. It keeps the mattress clean and helps keep moisture from reaching the mattress. 

But a mattress cover alone is not enough. It won't stop condensation from occuring... [It does help keep the mattress clean and dry, however...]

To help prevent condensation from occurring under mattresses and cushions we use Hypervent

I personally used it on my last 3 boats in cooler climates [occasionally living aboard in -20°F temps and colder during some winters...] for the last 30+ years or so. It is still a very good value for the price, and light [albeit bulky] to ship... 

Since Hypervent is waterproof, if it ever needs cleaning just take it outside and hose it off...


One Hypervent trick [more ideas here...] I discovered over time is to also extend it up the side(s) and end(s) of the mattress [just to the top of the mattress... this stuff is stiff and scratchy...] anywhere the mattress is against the hull, bulkhead, furniture, etc. This greatly improves airflow, and keeps the mattress/foam pads from sliding around.

The Froli sleep system appears to be another very viable option for providing air circulation [and user adjustable mattress comfort] but we haven't tried it yet. It reportedly works well, and has the added advantage of letting you individually customize your mattress comfort levels by zone. It is also the most expensive of the lot.


Dri-Dek and the like also work to some extent, but these wet floor tiles are not as thick as the above solutions, so air flow is diminished. Therefore this approach is not as effective as the thicker Hypervent... [From personal experience long ago...] 


Other boaters have reported having some success reducing condensation under their mattresses with parallel wood slats and/or drilling a series of holes [e.g., 1"+ diameter] in the platform supporting the mattress. Neither of these solutions allow for 100% air flowhowever, and only the slats would create a partial thermal break between the slats...

Some who live at the dock in winter [i.e., have shorepower] report using undermattress electric heating pads with good success.

And speaking of shore power, don't forget to run a dehumidifier. [Or those of you in warmer climates, run your air conditioning. We find our A/C works well for us to quickly dry out the boat in summer...] Either will really help keep everything dry...
Do you have proven bedding options you prefer, or other ways of preventing condensation under the mattress in cool climates? 
Please share in a comment!

Additional Resources:


March 6, 2019

Tidbit: Docking with Bull Rails Instead of Cleats... [Updated Feb-2024]

This is one of a series of brief, no nonsense posts that we call aTidbit: 
noun; small and [possibly] particularly interesting item of gossip or information... 
The purpose of these Tidbits is to share succinct posts about lessons learned, or things we use or do that work [or don't...] that are common to most of us boaters.
The goal is to garner feedback from those of you having first-hand experience with a different approach/ solution/ product/ or additional useful information to share...  

We never assume what we are sharing is the ideal or only... 

We share this information in case there are any points of interest for others, and to solicit your feedback.

                         ➛ ➛ Peruse the right-hand sidebar for the up-to-date list of Tidbits ➛ ➛                         


Each year we hear from a few visiting boaters who are surprised to discover there are no cleats available on most docks in Alaska; only bull rails. [Small vessel slips excepted...]

Most bull rails we encounter are wood, and sometimes galvanized steel:


Why Bull Rails? 

  • Bull rails are more versatle and generally much stronger than cleats
  • One size fits most [commercial and recreational; 30 to 100+ ft.] 
  • You can tie-off anywhere along a bull rail
  • Cleats may not be ideally sized, affixed, or positioned, and not every mariner agrees on proper use:


The ketch on the left is a 95 footer...


How does one 'grab' a bull rail when docking?

We have several approaches we use, depending upon conditions and circumstances at the time:

1) Ideal conditions 
[e.g., No appreciable wind or current; lots of maneuvering room.] 

We pull up to the dock and step off [never jump...] carrying a temporary breast line [a relatively short line made fast to a midship cleat.] 
This fair-weather docking reminds us of the Hollywood version of docking in that the opportunities are rare, but practice is still required...
When stepping onto a dock, one needs to always exercise caution; they can be slippery...
Sometimes conditions might even justify issuing crabbing gloves to the line handler(s)...

Now that we are standing on the dock, we run the short breast line line under the bull rail and back to cleat; making it taut. [Again, in benign conditions...]
But wait a minute; lets revisit this: 
One of our contributers [in the comments section, below; thank you, Brucemade a valid point— emphasizing securing the temporary breast line while the boat is still moving— or being moved:
Bruce describes running the temporary breast line over, then under the bull rail [a full turn around the bull rail] to provide more friction for the line handler to stop the boat [and/or keep it from drifting away from the dock due to wind and/or current.] 
Following through, the line handler could then take a second wrap and finish with a couple of half hitches on the standing part [a round turn with two half hitches...] to secure the vessel.
We may need to reconsider our SOP for the temporary breast line and always take a round turn on the bull rail instead of the half turn I described above. 
Why? Even though we already take a full wrap when conditions warrant, muscle memory from the benign conditions half turn approach could cause a moment of hesitation at the wrong time... So why not always take a full turn and make that the new muscle memory— even in benign conditions...? 
Thanks for making me rethink this, Bruce! 
Why make the temporary breast line taut? So the boat can't venture very far or pivot enough to get us into trouble. [Remember, we stepped-off the boat, so we started pretty close to the dock with this neutral conditions approach...]

It takes about 5-10 seconds the first time you do it...  

The boat isn't going to go anywhere, and no helpers on the dock are pulling your bow or stern line making you go cockeyed... [This is not a difficult maneuver with a little practice- even if single handing in the wind...]

If there are helpers at the dock, the breast line is the only line we would hand them initially. Not bow or stern [for reasons already mentioned, above...]

Here is a good article about using a breast line— with illustrations


Note that bull rails are typically set back a few inches from the edge of the dock. This helps prevent line handlers from getting an appendage caught between the boat and the dock. [We call this becoming a human fender... not recommended...] 


2) Less than ideal conditions: 
[e.g., windy, adverse current, close quarters maneuvering, etc.] 

When we cannot get close enough to the dock to safely step off, we have two other approaches we typically use:

A) Grappling hook

These can be useful when you are too far from the dock to step off, but the potential for inflicting damage to yourself, your boat, the dock, or other individuals or vessels is pronounced. [And unless they collapse— like some dinghy anchors— they are a pain to store...

Instead we use a purpose designed Easy Docker for grabbing bull rails: 
[Unfortunately, the Easy Docker website no longer exists...]
Close examination reveals it is more than just a simple hook; it has well thought out 3 dimensional geometry that makes it work every time on our 6 inch square bull rails- and even the larger 8 inch square rails with a little practice... 
It is extremely well made, and we highly recommend it...
Demo using the EZ Docker [by the inventor]


B) Docking spring line:

Another method is 'lassoing' the end of the bull rail with a balanced spring line as we approach parallel to a dock. [Typically bow in.]

Balanced spring line? 

A line with a loop [bowline] on the dock end [for lassoing the end of the bull rail...] which emanates from the vessel's point of balance.

Balance point? [In this case docking bow in— forward gear.]

This is the fairlead/attachment point a balanced spring is lead from where— after the line is made fast to the dock and boat— as you slowly power [with little, if any helm...] it will draw the boat to the dock and hold it there— still in gear— as you step off [cautiously; facing the boat— like a ladder...] and make fast the temporary breast line [#1, above]. 
Many commercial fishing boats we have observed docking in slips often enter bow in, just kissing the dock with their bow. sometimes with the engine still in forward gear to hold the boat steady [depending upon conditions] They then step off the boat and secure their dock lines. 
You need to experiment with your boat to determine where that point of balance is... [most vessels have one...] 
It may be worth noting the balance point will likely be different when docking stern to. [in reverse...]  On our boat, the midship cleat is close enough to being the spring balance point when we are backing while docking.
The designers of our boat [Sparkman and Stephens] added a fairlead in the toe rail right at both [port and starboard] docking spring line bow in balance points [i.e., the balance points when approaching bow first— in forward gear. Brilliant!]


Close-up of the docking spring fairlead.
Another view showing the midship cleat and fairlead [far right in image] and the docking [balanced] spring fairlead [with a fender line running vertically through it; left in image.]

We run the docking [balanced] spring line through this fairlead and then either to the midship cleat, or a return [snatch] block fastened to that cleat and then back to a primary winch for controlling that line from the helm... [Very handy when single handing a bow in approach...]


If you wish to learn much more about implementing and using a balanced spring line for docking and close quarter maneuvering, read this excellent series of articles
[The modest membership fee is well worth it for us...] 


How do we secure dock lines to bull rails?

We always deploy at least one of each of the following docklines: [And more as needed for conditions and circumstances...]
  • Bow line
  • Stern line
  • Fore and aft springlines
When possible, we prefer to run the bow and stern lines from their designated cleat on the boat around a bull rail vertical support, and then back to the boat. [i.e., Line 'on a bight'] 

This allows us to work from our deck to adjust the bow and stern lines— as well as easily slip them when departing...


This photo was taken after being at the dock for 3 straight months in winter. 
The spring line rolling hitches were never retied, and only adjusted once— to remove a small amount of 'stretch' after a strong windstorm. 

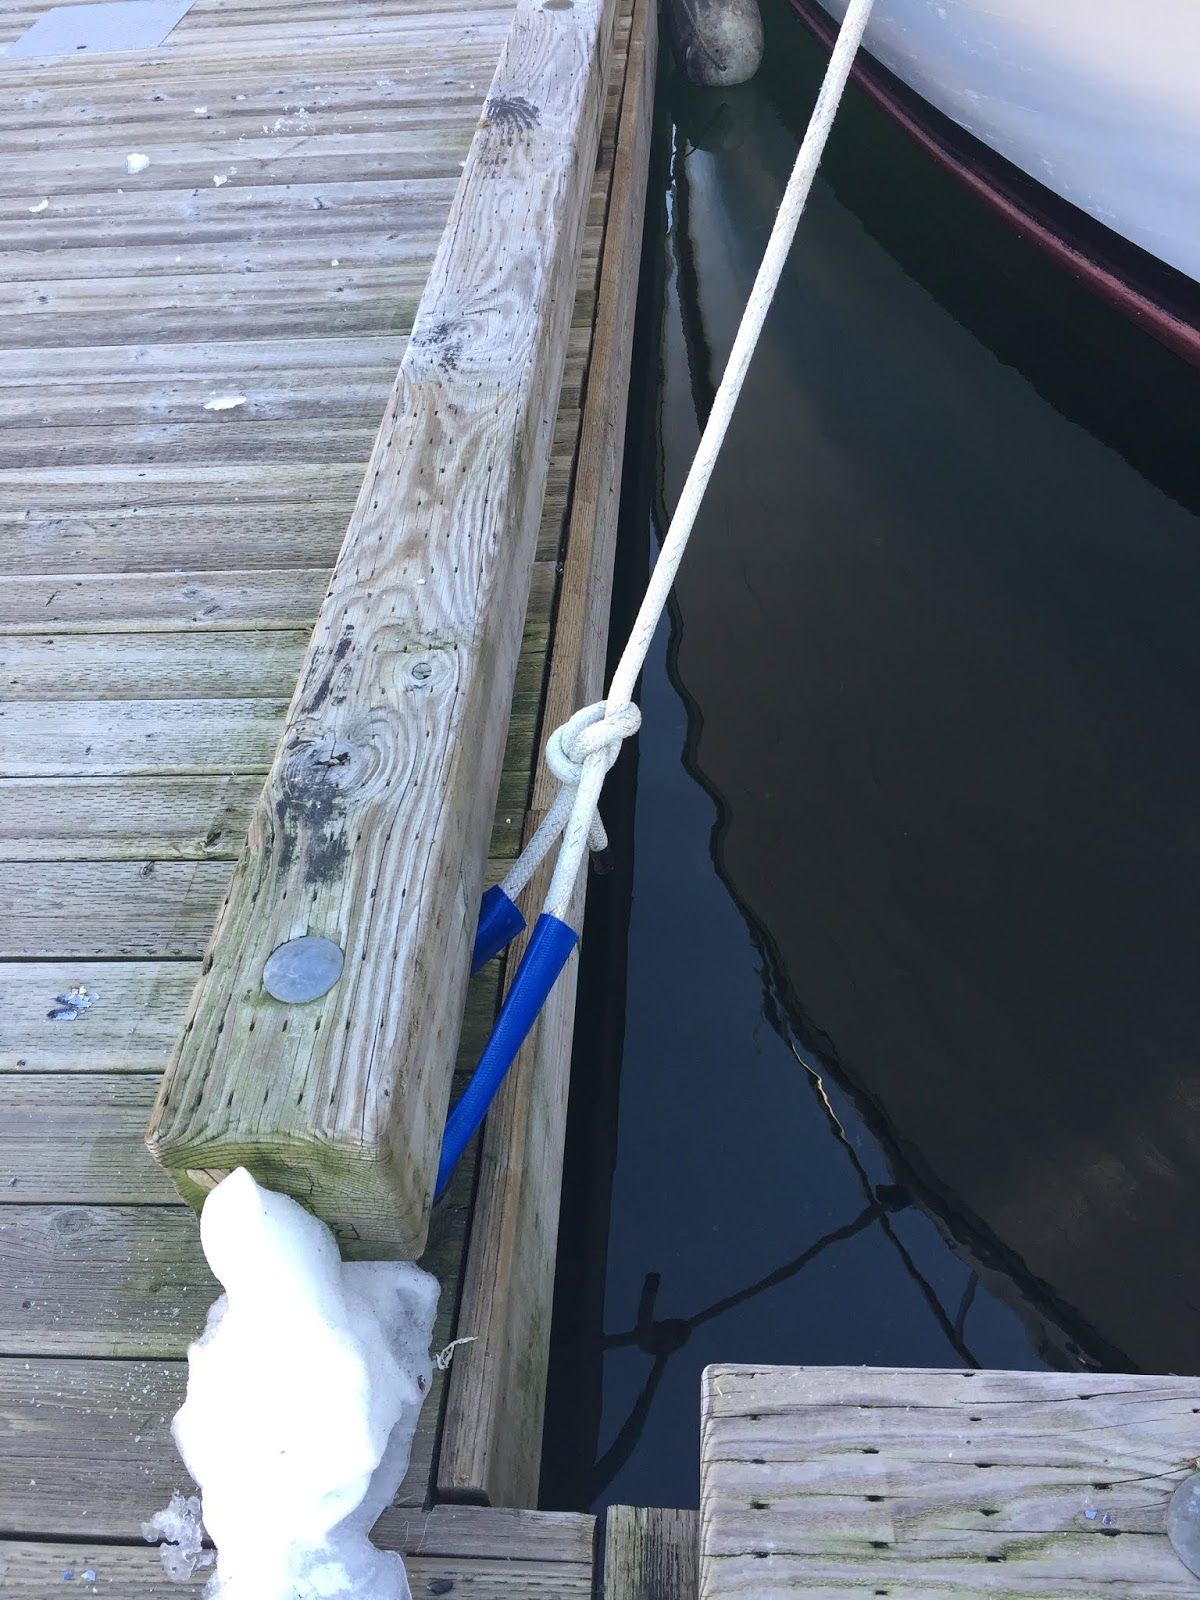
Our spring lines [one line really— with the middle cowhitched to a breast cleat] originate from amidship and are lead around the bull rail and one of the bull rail supports. Each end is then lead back to itself and secured with a couple of rolling hitches. This allows for easy spring line adjustments without having to untie/uncleat anything... [particularly handy in sporty conditions...]

This method holds extremely well in any blow, and still allows you to safely adjust the docklines while on deck. The springlines are adjusted on the dock by sliding the rolling hitches one way or the other. [No need to fumble untying/tying knots in inclement conditions...]

We secure all four of these regular dock lines while the temporary breast line is still in place— only removing it after our standard dock lines are all made fast. 
We typically reverse this order when departing the dock: [situations and conditions pending...]
Most of the time when preparing for departure from a dock [always depending upon conditions...] we first re-install the temporary breast line and then remove the spring lines. This is all done from the dock. 
The remaining dock lines are slipped from the boat. [bow, stern, and temporary breast line] The temporary breast line is typically the last to be slipped before departing the dock...


Why not run lines around the bull rail itself? 

Often we do— especially when a vertical support isn't conveniently located, or is abrasive. 

Notice how dock lines have burnished this well seasoned bull rail over decades of use:
We are often asked if the wind blows much up here... Those grooves were created by ropes on wood over time...

When securing dock lines to a bull rail, we lead the line from the boat under the bull rail, then back to the boat over the top of the rail. [i.e., line 'on a bight'] This is necessary when the vertical bull rail supports are not conveniently located, or of a rough material that might damage our lines.

Why run the line from the boat under the bull rail; then back to the boat over the top? 

When adjusting those lines or departing the dock, you can handle them from the deck of the boat: just uncleat the line on the boat and toss over the bull rail onto the dock. It retrieves without friction or tangle by just pulling it under the bull rail.

If you went over the top of the bull rail and then under back to the boat, you end up with the line wrapped around the bull rail as you retrieve from the boat...

Other methods we sometimes use for securing docks lines to bull rails include: [especially when a line isn't long enough, or it is inconvenient to loop back to the boat...] 


Basically, there are as many ways to secure a vessel to bull rails as there are boats...


Lines don't need to be this tight...
This happened over one winter...


...or this loose...


Do we ever get splinters? 

Absolutely! 

Soft lines snag like silk stockings on rough wooden bull rails. Lines with splinters in them are hazardous to handle [who said meathooks can't be made of wood?...] Therefore we use good hard 3-strand line of appropriate size for our vessel [1"] with no snagging issues. [Soft laid 3-strand line, brait, etc. would be just as bad as double- braid...]
Soft hand dock lines don't work well with wood bull rails due to snaging and splinters... And besides, double-braid lines don't stretch enough anyway and are therefore a poor choice for dock lines anywhere you might get some wind or waves...
I hope some of this is useful to those of you who may not be familiar with docks having bull rails. 

And of course, most of the above information also applies to docks that have cleats, rings, bollards, etc. 

Please share your favorite methods for dealing with bull rails...