If they go for a swim while we are at anchor, we want them to be able to self-rescue.
Since our boat has no swim platform, we braided some stiff, old, retired docklines [3/4” 3-strand nylon] into a feline crew ladder- which we always deploy when at anchor. [That crew has no free roaming deck privileges when underway…]
We left a loop at the top for hanging on a cleat, and clubbed the bottom. It extends about a foot below the water surface, so could never get caught up in the high speed underwater winch, but facilitates use by a swimming gato.
To introduce it to the crew when it was new, we temporarily fastened it to the mast and anointed it with catnip…
We made this hawse ladder several years ago, and it has held up well [and thankfully has yet to be used.]
We sometimes spend weeks at a time lying at anchor, so the underwater portion of the rope will invite some growth and creatures. It is easily cleaned when we forget to retrieve it while getting underway, and is ultimately dragged along in the water at 6-8 knots for a while…
Yes, we are occasionally asked by other boaters [a rare occurrence where we hang out…] what it is for…
This is one of a series of brief, no nonsense posts that we call a Tidbit:
noun; small and [possibly] particularly interesting items of gossip or information...
The purpose is to share succinct posts about lessons learned, or things we use or do that work [or don't...] that are common to many of us boaters.
The goal is to garner feedback from those of you having first-hand experience with a better approach/ solution/ product...
We never assume what we are sharing is the ideal or only; it just seems to best suit our needs [and/or habits and/or budget] from our experiences thus far...
Sometimes these Tidbits originate from a topic of discussion on one of the forums we participate in, and this happens to be one. [The original forum response- which includes additional details- is appended below.]
Since we encounter this question fairly often- and since it may affect other boaters- it made sense to post a more detailed response for future reference.
➛ ➛ Peruse the right-hand sidebar for the up-to-date list of Tidbits ➛ ➛
Alternate title: Extending the length of chain anchor rode This article relates to ground tackle and chain sizes typically used by cruising vessels today up to, say, 60 feet in length.
e.g., 1/4 — 7/16 inch (and metric equivalents) Grade 43 (ISO and DIN) anchor chain.
Grades higher than 43 (e.g., Grade 70) are a different matter and require different connectors than those discussed here.
For our needs, splicing two or more lengths of anchor chain together requires a joint at least as strong as the chain being spliced, and the joints need to pass through the windlass gypsy smoothly.
Note: Our requirement to smoothly pass through the windlass under load limits our choices somewhat. Therefore we will only discuss what we have used and tested in our windlass.
There are other options available that are at lease as strong as the chain including:. Omega links; 2 shackles; soft shackles; etc., but these options won't pass through our windlass under strain. [Note that I didn’t include Quicklinks as they are not strong enough for our use case…]
Additionally- under the heading of other options- we don't hesitate to use an appropriately sized and constructed soft shackle as an emergency ground tackle joiner, or as back-up for [installed in addition to] shackles or other chain joints.
[Update Apr-2025:] Another- possibly more permanent- option I haven’t tried [yet] but that has been purportedly used by other cruisers would be to use a HMPE twine [e.g., Samson Lash-It!] to lash two chains together. Simple math will determine how many wraps are needed, and an anti-chafe sleeve would make for a permanent solution that is windlass friendly.
What to use?
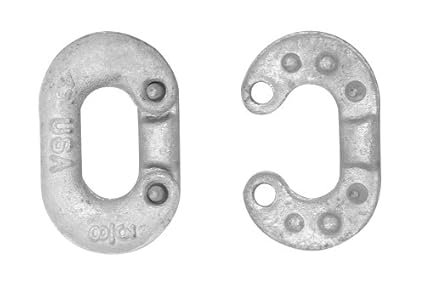
Most of us immediately think of C-Links for joining lengths of chain:
Unfortunately, even quality forged C-Links [matching chain size] are weaker than our G43 chain. [Substantially weaker in fact; more below...]
Are there options that will meet our criteria of being at least as strong as our G4 chain, and work with our windlass?
We are fortunate that our horizontal anchor windlass tolerates a twin-clevis link matching the chain size:
We realize this may not work in some (many?) windlasses under load. But it is cheap to test, and we think they are worth having on hand anyway...
Following are a couple of short videos of a double-clevis traversing our windlass gypsy under load:
The next video is in slow motion and shows a worst-case scenario of our worn 10 year old chain jumping on the gypsy under load. Close scrutiny reveals it is not the double-clevis connecting to the length of new chain causing the jump; in fact, it is what catches after a one link hop. Also note the chain tries to jump a second time, but the double-clevis holds despite being the link connected to the hopping link…
Note: We have since encountered one double-clevis orientation that sometimes stalls the windlass: when it is oriented with the cotter pins facing the chain stripper. [i.e., cotter pins facing the center of the gypsy.] If this happens under a fair load, the double-clevis jams at the stripper, necessitating reversing it out and rotating the orientation 90° in either direction.
This doesn’t seem to happen unless under relatively high load. Therefore I try and watch for this orientation, and stop the double-clevis before the windlass and rotate the chain slightly before proceeding; a fairly uncommon event.
The twin-clevis has the added advantage of being quick and easy to install and remove.
Some additional comments about C-Links:
We haven't used C-links since we have always had very good results using a twin-clevis links, and prefer not to introduce known weak links into our ground tackle system.
But we do keep some C-Links on hand in case they are ever needed. [If we used one, we would back it up with a soft shackle or UMPE twine lashing to back-up a C-Link as mentioned, above...]
Tip: If you do end up using C-Links, be aware that peening the 'rivets' removes the galvanizing from the rivets, so those tiny rivets soon begin rusting away.
I have heard from several other cruisers over time thay they found the two halves of a previously peened C-Link loose on their chain because the tiny rivets rusted off over time.
It has been suggested [credit to Evans Starzinger] that gluing the two halves together with 5200 when installing [before peening the rivets] will likely help mitigate the risk of them separating.
I would definately back them up with a soft shackle or UMPE twine lashing if I used them on my G43 chain.
Lets compare these two chain joiners for strength, but first we need to decide which relative strength values to compare.
Tensile [minimum breaking] Strength is more important than Working Load Limit [WLL; Maximum (safe or suggested) working load] for evaluating the strength of components in our ground tackle system.
This is because WLL is based upon an arbitrary Safety Factor [ratio of Tensile Strength] which can (and does) vary by product, country, and sometimes even reselling vendor*.
But the Minimum Breaking Point [Tensile Strength] is fairly consistent among similarly manufactured components.
We cannot always easily find the Tensile Strength for specific ground tackle components, but the WLL is often listed.
But what may not be readily available is what safety factor [e.g., 3:1? 4:1?, etc.] that was used to establish the WLL. [e.g., 1/3rd or 1/4th of minimum breaking strength...?]
When doing the math to make sure a component is at least as strong as your chain, remember the connecting links we are discussing [forged C-Links and forged twin-clevises] are listed with a 4:1 safety factor, but our [US made G43] anchor chain is- for some reason- listed with a 3:1 safety factor. [A more conservative 4:1 ratio is used in Europe for G43 chain...]
Note for reference [again in the US...] that G30, and G70 chain and above are listed using a 4:1 safety factor... [Perhaps to stay consistent with the vagaries of our archaic system of measurement?]
See the Practical Sailor article in the Additional Resources section below for further elucidation.
Matching our chain with joiners of adequate strength: We use 5/16" G43 ACCO [US made] chain listed with a 3,900 lb WLL.
With a 3:1 [US only] safety margin for G43 chain; 3,900 x 3 = 11,700lbs Tensile strength. [Minimum breaking strength; nominal]
A 5/16" forged Crosby C-Link is listed using a 4:1 safety margin and a 1,950 lb WLL. Therefore, Minimum Breaking [or Tensile Strength] = 4 x 1950 = 7,800 lbs. [vs. 11,700 for the chain; 33% weaker than the chain; your call...]
See the C-Link Testing by Cox Engineering for more information.
Now do the math for a 5/16" forged twin-clevis link: [4,700 lb WLL @ 4:1] and you will find it is much stronger than the sames size G43 chain.
Bottom line: if a twin-clevis link will work on your windlass, that is the next reasonably priced, and substantially stronger choice [i.e., not weaker than the chain it is joining...] for joining our size G4 anchor chain [This applies up to 1/2 inch G43 chain size- which is as far as I looked...]
Don't forget to apply this same principle when selecting which anchor shackles to use in your ground tackle system... [There is a similar shackle discussion with product links on our Ground Tackle page if you desire more details.]
Another use for the double-clevis:
We also use a double-clevis to attach the rope anchor rode [warp] to the main anchor chain.
We splice the 12 plait Dacron warp [Sampson Tenex] to a short piece of anchor chain. [e.g., 2 ft]
From our Ground Tackle page [which includes splicing instructions and many other references...]
We then connect that short piece of chain to the bitter end of the main chain rode using a double-clevis.
This saves us having to redo the rope-chain splice whenever we end-for-end the anchor chain. Instead of cutting the rope and re-splicing to the chain, we only have to remove one cotter pin and replace it when reassembling.
This works especially well for us because the rope-chain splice is rarely- if ever- deployed...
We are also experimenting with splicing the rope directly to the pin in a double-clevis; eliminating the short piece of chain.
Why? Because sometimes the chain link the rope is spliced to rusts prematurely- perhaps because it is often kept wet with salt water from the saturated rope- eventually requiring a re-splice.
If the pin the rope is spliced to in a double-clevis rusted, it could be removed and replaced without having to re-splice the rope. A small but useful gain.
Please let us know if you know of or have used other types of chain connectors that meet our two basic criteria. Thanks!
What make of windlass do you have? The double clevis rides properly in the wildcat in both the horizontal or vertical orientation, or do you have to make sure that it is horizontal?
GM,
Your question makes me realize I didn't provide enough clarity- sorry about that...
I have a horizontal capstan windlass [Lighthouse 1501] with dual 5/16" ISO chain gypsies. [Here is that project— with photos and links— if you are interested...]
What I intended to say is I only have experience with the twin-clevis chain links on my horizontal windlass. [~90° chain wrap.]
If I understand your question correctly, you are asking if the twin-clevis needs to be oriented horizontally in order to feed through the horizontal wildcat. I have tested it both ways and orientation of the twin-clevis doesn't seem to matter. It is worth noting that the twin-clevis link doesn't quite nest into the wildcat like a link of chain does, but it does well enough not to cause the chain to skip/jump- even under load. [However, I will add further link orientation testing to my list next time I have to end-for-end the chain on the docks. The windlass has a manual kedging socket (>10k lbs pull) so I can easily/safely perform some higher load tests...]
You didn't ask, but to close the thought and extend this question to using a vertical windlass: I have no experience, and have not tested it. However, since the chain wrap is typically greater on a vertical windlass [e.g. ~180° compared to ~90° on a horizontal windlass] I would speculate that it would work just as well— if not even better than a horizontal capstan. [i.e., more links to grip, ostensibly further reducing the risk of the chain slipping/jumping.]
It is certainly a cheap experiment to try on any windlass, and I believe some forged twin-clevis links [and C-Links] are handy to have in the cruiser's groundtackle tool box at any rate...
This is one of a series of brief, no nonsense posts that we call a Tidbit:
noun; small and [possibly] particularly interesting items of gossip or information...
The purpose is to share succinct posts about lessons learned, or things we use or do that work [or don't...] that are common to many of us boaters.
The goal is to garner feedback from those of you having first-hand experience with a better approach/ solution/ product...
We never assume what we are sharing is the ideal or only; it just seems to best suit our needs [and/or habits and/or budget] from our experiences thus far...
Sometimes these Tidbits originate from a topic of discussion on one of the forums we participate in, and this happens to be one: Link to original post [22-Jan-2024]
Since we encounter this question on occasion, it made sense to post a more detailed response for future reference.
➛ ➛ Peruse the right-hand sidebar for the up-to-date list of Tidbits ➛ ➛
Alternate title: Sleeping around a Centre Saloon table
I haven’t had a dedicated pilot berth for a couple of boats now. [Last was the Valiant Esprit 37; Bob Perry design.] I really liked that typical pilot berth. [A snug tube that would contain you in a rollover- although likely bruised and soggy afterwards.]
What do we use for a pilot/ anchor watch berth in our center cockpit, center cabin Nauticat?
In the pilothouse, we have U-shaped seating surrounding 3 sides of a sliding, expandable [leaf] table which is mounted on a cabinet pedestal.
The longer [hull] side makes an excellent pilot/ anchor watch berth. [Though very rarely needed…] Do a sit up and see all instruments, MFD, etc. as well as look out the pilothouse windows, and with quick access to both helms.
We are fortunate to have a second helm station in the pilot house so we don’t have to sleep in our foulies when standing the rare anchor watch. [Think of it as a nautical contribution towards aging-in-place…]
A lee cloth is permanently attached to the cabinetry under the bottom cushions parallel to- and the length of- the table.
It is easily deployed by lacing a line between grommets along the top of lee cloth and strong eyes installed under the table top.
When a lee cloth isn’t really needed [which is our typical scenario] we instead remove the wedge shaped back cushions from the long part of the settee [against the hull] and drop them upside down [thick edge up] into the gap between the seat and cabinet- effectively widening the berth and filling the chasm most might prefer not to discover while sleeping.
It may be worth noting that this berth has been renamed by some landlubber guests in the past who didn’t study-up on their nautical jargon before visiting [as we do recommend on our Guest Page.] Typically this happens when our overnight guest count exceeds the number of available guest berths [very rare as we can sleep 8 without becoming overly friendly] and occasionally when guests- who normally share sleeping accommodations- decide [not always mutually] not to [for reasons unknown to us.]
Our other dog house offers very remote [and very basic] accommodation, but also include something unique: a guest selectable degree of separation [length of dinghy painter…]
Both are great locations for a nap, too [weather pending…] And either could be used while underway! [Again, Wx pending…]
It may not be of interest to many of you for various reasons. (Lucky you. So go count your blessings and read no further...)
This is more related to the higher latitudes we frequent, with the associated cooler waters... (Or for anyone who becomes separated from the boat while underweigh...)
We fully realize- and have personally experienced- regions of the world where one may never wish to get out of the water... This blurb is for those of us who must, for whatever reason(s).
We routinely examine the following questions when on our own boat:
While at anchor:
How do we get back aboard our vessel from another craft (e.g., SUP, kayak, dinghy, etc.)
How about if we are in the water? (Intentionally or otherwise...)
Our boat's freeboard is too high to pull ourselves back onto the boat.
Are our ladders usable and always available?
If not, are they readily deployable by someone in the water?
When deployed, does a ladder extend far enough below the water surface to facilitate easy use? (If the first rung is at water level you need to try it before depending upon it...)
How about if wearing diving gear?
Or folks not in the best of shape, or slightly injured?
What if someone in the water is injured? (But can still climb a ladder...)
Retrieving an injured person who cannot rescue themselves from the water is a different topic.
How about at the dock? (Any dock...)
Just as you note the locations of fire extinguishers and escape routes when visiting another boat, you also take note of any boarding ladder locations, life rings, and fire extinguishers at all docks, right?
No, or none existent? Then best make sure your own boat has provisions to readily get back aboard...
Our home port slip is too high above water level to easily pull ourselves onto. (Especially without getting a belly full of splinters, or road rash...)
Additionally, our harbor's ladders are a 200-300 yard swim for those moored near the ends of the floats. This is because there is only one ladder per fairway (Must be a legal/ insurance minimum?) And those ladders are round runged, center poled designs, so your numb, slippery feet-now bloodied after kicking off the thick layer of muscles- would try to slide off the ends of the short rungs, reaking havoc on your ankles and legs. But better than nothing...?
Since we do enough stupid stuff every year (without even trying...) to inadvertantly qualify for multiple Darwin awards- in different catagories even- we strive (whenever possible) to avoid competing unnececessarily. (And besides, since our progeny fledged long ago- as did their's- it is way too late to stop our contributions to the gene pool...)
Therefore we do give some thought (and practice) to reboarding our boat from other floating objects- and of course the water. (Not to mention other tricky maneuvers- whether warranted or not...)
Our re-boarding ladders are extremely basic- if not ineligant- but also very sturdy and practical.
Speaking of basic: several boats ago, when I was much older and still semi-immortal, I had one of those collapsing rope ladders with hard rungs. I kept it hung over the side with a line hanging so I could yank it down into the water if needed. What a pain those are to climb, but again; better than nothing... perhaps...
Back to the present. On our current boat, we made sure the welded, folding stainless steel ladder permanently attached to our stern can be easily deployed by someone in the water.
Here is our very basic stern boarding ladder with 3 rungs underwater when deployed (unfolded so it extends below the water surface.) Note: Four underwater rungs might be better for SCUBA divers- and perhaps those of us with a higher than normal surface area to volume ratio...)
The next photo is what it looks like in the stowed position.
Note it is designed so it can still be used undeployed. (e.g., For accessing the dinghy, etc.)
Also note the sturdy stair treads thru-bolted to tabs welded to the stainless tubing rungs. These are much preferred to round tubing...
The [whiteish] trip-line that runs up from the wire bale (simple latch that holds the ladder in folded position, upper right, above) can be yanked from either side of the ladder by someone in the water. Pulling the trip line lifts the latch, resulting in gravity deployment of the swinging part of the ladder (the underwater portion.)
Note to selves: keep fingers, toes, noses, and any other dangly bits well clear of the ladder hinges- and noggins out of fall path- when deploying from the water... (i.e., Make sure everyone is off to either side of the ladder before deploying.
How easy is it to access the aft deck from the boarding ladder? Our wood railing has a hinged gate in the middle of the transom to make it an easy walk-through.
In the following image, I am standing on the ladder using my toe to lift the latch to deploy the lower portion of the ladder. (A boat hook would be safer, but less acrobatic...)
Following is a photo of our midship boarding ladder: a folding, portable model which can be deployed anywhere along the toe rails on either side of the boat.
Here it is shown deployed at the starboard midship lifeline gate. (The top wood rail is also hinged at this point- as in the above transom photo.)
This ladder has pins through the toe rail to secure it in place, as well as a criuser's safety line (since this ladder doesn't float...)
Also notice this portable ladder has stand-offs that bear against the hull.
Hint: Use crutch tips for this purpose. They are much sturdier and last much longer than the usual rubber caps you find in hardware stores. They also have a metal washer sandwiched in the thick foot so the tubing cannot punch through the rubber over time- tatooing the hull... (We find them in local hardware stores for ~$5/pair...)
We deploy the portable boarding ladder when at anchor- offering the rare visitor easier boarding as well as facilitating loading and unloading from other floating craft (e.g., SUP, kayak, dinghy, canoe, logs, etc.)
These are our simple methods of making sure we can always get out of the water in a hurry- even at the dock.
One final safety reminder we regale ourselves with often: Just as we treat the edge of the deck as we would a 500 foot cliff when underweigh, we always use any ladder as though we are climbing up or down from a 2nd story roof on a house (or the boat in the yard:)
Facing the ladder! (NOT with our back to it!)
The same applies for companionway ladders/ steep steps, etc. (For us anyway...)
This is missing the word Samuel Jackson is known for saying.
There were some other images that were funnier, but I try to keep this blog mostly family friendly.
We aren't asked what's in our wallet, that's kind of rude, but cruisers are often asked, "what's in your ditch bag".
Here's one of ours, yes, we have three ditch bags, I'll show just one today. This was an exercise I should have already done, but I had actually never gone through the bag, item by item before. I knew that if Bill packed it, that it would be filled with all kinds of good safety items, so I was complacent.
ACR Rapiditch
This bag has floatation built into it, and will float about 25pounds of equipment. I was taking photos on the bed, and I had pushed back the cover, since the pattern is too busy for pictures, and I tried no to disturb the sleeping Gus in the background. 😁
The first EBIRB is in an outside pouch. [This is in addition to an EPIRB mounted in the boat, and 3 PLBs; 1 in a pouch on each of our PFDs, and one vacuum packed in the liferaft...]
An emergency position-indicating radiobeacon (EPIRB) is a type of emergency locator beacon, a portable battery powered radio transmitter used in emergencies to locate airplanes, vessels, and persons in distress and in need of immediate rescue. In the event of an emergency, such as the ship sinking or an airplane crash, the transmitter is activated and begins transmitting a continuous radio signal which is used by search and rescue teams to quickly locate the emergency and render aid. The signal is detected by satellites operated by an international consortium of rescue services, COSPAS-SARSAT. The basic purpose of this system is to help rescuers find survivors within the so-called "golden day"[1] (the first 24 hours following a traumatic event) during which the majority of survivors can usually be saved. The feature distinguishing modern EPIRBs, often called GPIRBs, from other types of emergency beacon is that it contains a GPS receiver and broadcasts its position, usually accurate within 100 meters, to facilitate location.
The underside of the lid has a mesh pouch, contents:
Waterproof flashlights and a diving light [We also have headlamps and flashlights in each of our PFD pouches- always with us...]
Hard to see here, but that black snake is a heavy duty bungee style SUP leash, connected to the bag so we can attach it to our person, or whatever, so that the bag doesn't float away in an emergency situation...
Some boat emergency items: a soft bung to plug a leak; some goop to stop a leak [in case you can quell a leak before actually evacuating...] and a silicone measuring cup [which can be used as a bailer, drinking cup, pee and/or vomit receptical, etc...]
In these two black plastic containers contain rolls of biodegradable wag bags for waste- kitty or otherwise.....
A floating SOS signal light [USCG approved in leu of pyrotechnic flares...]
Field First Aid Kit [in it's own heavy duty waterproof bag] and 100 feet of nylon line
GPS and VHF radio; each in a waterproof Pelican case, and they both use the same AA Lithium batteries [20 year shelf life, no leaking, and work well in cold temperatures...]
Two stainless steel knives: one is a pocket knife similar to a Swiss Army kniff, and the other is a sailor's knife, with a few different options. [We also have knives attached to our PFDs...]
Daytime Emergency Signal Flag, which can only be seen in the daylight, no fancy stuff involved. [One is included with the SOS Emergency light, above...]
Cliff bars for easy nutrition [and a few pouches of cat food too...] and lots of line for whatever.
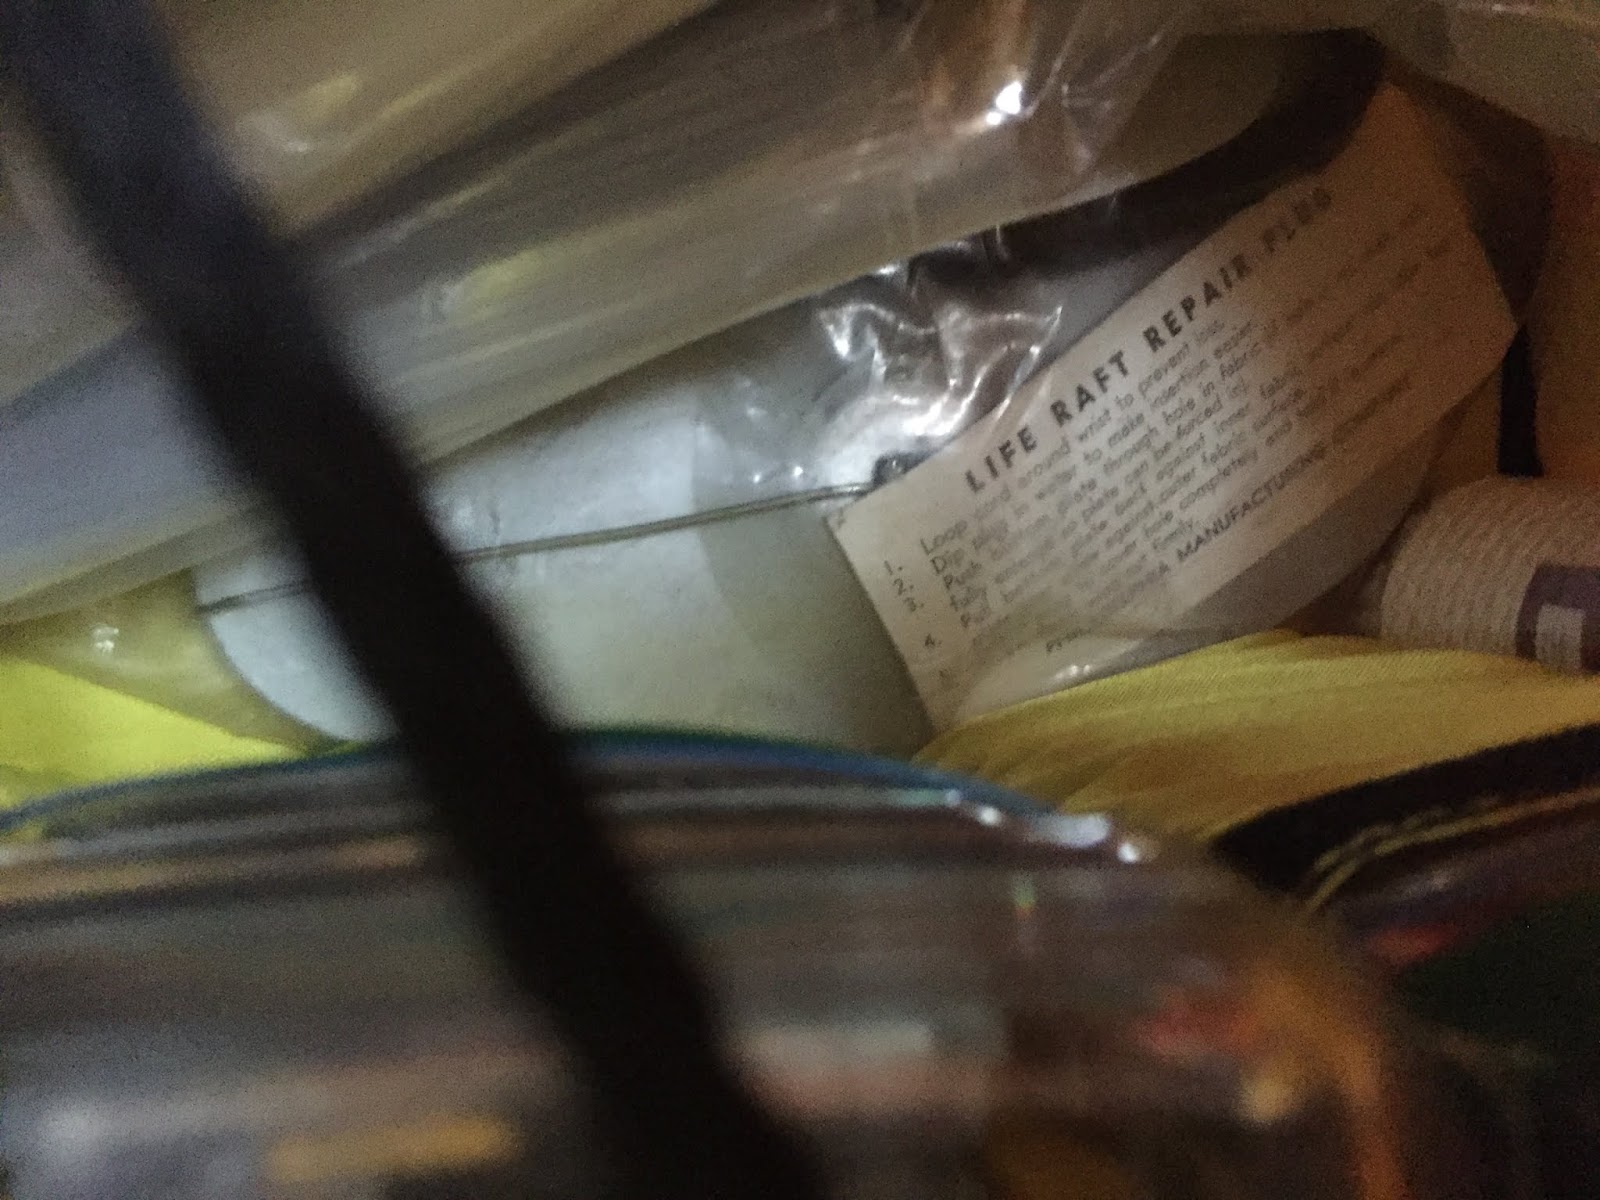
Life raft/dinghy repair kit [supplementing what is already vacuum packed in with the liferaft...]
A ziplock of various sized ziplocks.
Tide Tables [replaced annually]
Two headnets, well, you know, mosquitoes, and other flying annoyances. Two vacuum packed survival, heat retention suits. [Being warm is good...]
Burried in the bottom is a small, portable solar panel kit for recharging batteries, phones, etc.
Everything is tied to the bag, so that if you open the top zipper, things can't fall out, and float away.
Yes, there are many other things that people put in their ditch bags, but wait.... there's more! I did say we have a couple more ditch bags, but you'll have to wait for future installments to see what they contain...
How many of you remember this original, "BUT wait there's MORE" ad? Hahahaha, you'll be showing your age if you do!