
➛ ➛ From our list of Stuff we have and use [and do...] in the right sidebar ➛ ➛
This is just a description of our ways of doing things that work for us on our boat in our cruising area and weather conditions, and why; not the right way of doing things. Only you can determine what's best for your vessel in the areas and conditions you encounter...
––––––––––––––––––
Updated Mar-2025; Feb-2024 [by Bill]
Updated Mar-2025; Feb-2024 [by Bill]
Added new reference re: benefits of extra long chain loop between bow and bridle attachment point.
Other minor revisions and updates; link testing and validation.
So... on to our bridle story... [Yes, my spelling is correct... My apologies to you romantics...]
Because we have all chain anchor rodes, our chain stoppers don't buffer shock loads to the boat or ground tackle [very deep anchorages excepted...] They do, however, prevent the load(s) from transferring to the windlass. Therefore we use a bridle [double snubber] made of rope for several reasons:
- Provide some elasticity on the anchor rode thereby reducing shock loads on the ground tackle and especially, the anchor
- Minimize chain noise on the bow rollers
- Since we have two bow anchors and a bobstay, a bridle helps keep the chain and/or single snubber from contacting the bobstay under tension [more below— with photos...]
- Put the load on the bridle attachment points vs. over our [cantelevered] bow roller[s] with a single line snubber
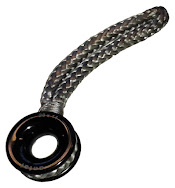
Attaching the bridle [or snubber] to the anchor chain:
Update Nov-2023; revised Mar-2025: This summer [2023 for climbing loop; 2024 for climbing rope] I experimented using a Dyneema climbing loop Prussik hitched to the middle of an 80ft climbing rope bridle, and to the chain with one of several methods: [All worked well and this is now our SOP…]
Start with a Dyneema webbing climbing loop [AKA sling] friction hitched to the middle of the bridle line. [This keeps the bridle attachment point from sliding]
Then Secure the remaining loop from the climbing webbing to the chain using one of the following methods: [Need to add photos]
- Pass loop through chain link, then loop again [a round turn] and then tie back to bridle using an Icicle hitch OR
- Dogbone [put loop through a chain link] and use small shackle as dogbone OR
- Loop in webbing attached to chain with soft shackle [Our current choice. Need photo…]
- Holds if one side of bridle releases [unlike a cow-hitch]
- See Practical Sailor article on this topic
 |
| Dyneema climbing loop Prussik hitched to middle of climbing rope. Loop then connected to anchor chain with a soft shackle. |
Previous and fallback method: Attach middle of bridle to anchor chain using a Prusik knot
After attaching the middle of the bridle to the chain, the two bridle ends are individually fair lead [one each port and starboard] either through the bow fairlead [or in front of the aft most welded bow pulpit stanchion- see following photos] and then to the respective cleat.
First photo: Looking down on the bridle over the starboard anchor roller while backing down for the final [2nd] set [and test.] The bobstay appears to angle toward the upper left corner of this photo. It is actually the centerline of the boat and only looks skewed because this photo is centered over the starboard bow roller...
Second photo [above]: Starboard side bridle leg fair lead forward of welded stanchion [our typical approach.] The fairlead [part of the aluminum toe rail] is immediately aft of this stanchion, and is sometimes used instead [with Chafeguard installed...]
Another advantage of hitching the snubber/bridle to the chain is it won't come loose [vs. an unmoused chain hook...] Nor will you loose the bridle/snubber [and chain hook] if you had to cast it off to veer more rode in inclement conditions. [Subsequently attaching a replacement bridle/snubber.] The abandoned snubber is still on the chain under water and will be retrieved when we weigh anchor...
For context, following is an overview of our typical overnight anchoring procedures: [Every time; regardless of anticipated (and welcome) benign conditions...]
I suspect it takes less time to do it than read about...
I should mention for years I used a Devil's claw to attach to the chain as they keep the load uniform on the chain link it is attached to... [and that would likely still be my preferred hardware if I went back to a hard chain attachment...]
Switching to a soft shackle as the chain attachment methodwill likely be even is faster and better- especially for post deployment chain length adjustments.
Storm strategies:
We also have a couple different bridle/snubber approaches for storm/hurricane conditions: [Remember we always deploy a bridle, so the following is back-up to that...]
If anticipating severe weather, we rig one of two backup snubber/bridle systems depending upon the situation:
The simple way to attach this snubber is to cowhitch an eye in the end of the snubber [that has Dyneema chafe sleeve installed- more below] to the bow eye. A better way to mitigate chafe at the bow eye attchment may be using a soft shackle instead.
However, this approach of directly attaching the end of the snubber to the bow eye doesn't allow us to adjust the snubber length, and more importantly, makes it very difficult [dangerous] to cast off the snubber in an emergency [short of using a knife on a pole...]
A more flexible arrangement is being able to adjust the length of the snubber from on deck. [Before soft shackles existed, I used a snatch block for this.] Now this can be readily accomplished by leading the snubber through a low friction ring or hook affixed to the bow eye. [Like these from Antal]


Or you can make your own Bullseye Strop and cow hitch it to the bow eye:

Leading the stormsnubber through tackle mounted low on the bow [near the waterline] allows us to lead it over an inner [unused] bow roller and subsequent use the warp drum on the windlass for adjustment if needed- leaving the longer loop of chain in the water during adjustments in rough conditions- or fair lead it back to the cockpit winches... [our preferred method...]
Using low friction rings, we can also similarly rig a 'anchor Barber Hauler' of sorts to the primary winches— attached to a snubber or individual bridle leg— for veering the boat to an angle [to prevailing condiitons] if needed. [Not unlike how one might rig a sea anchor.]
 From the chain fairlead each bridle end is led to deck level just like the day-to-day bridle arrangement. [Only typically through the toe rail fairlead instead of just around a pulpit stanchion. [See 'Second' photo above.]
This storm bridle configuration results in two boat attachment points per bridle leg, and transfers the majority of the ground tackle load to the vessel waterline. Outcomes include: improved scope in shallower anchorages [i.e., the water line to bow height need not be included in the scope calculation] and reduced veering [on our boat anyway] due to lower center of effort when the ground tackle is in tension. It also provides a very strong storm bridle which- by configuring line size and type- can be engineered for the desired elasticity but well within the chosen line working load. [i.e., extended cycles in inclement conditions since the longer, larger line still provides the needed stretch but is no where near its elacticity limits...]
This allows either keeping the bridle off the bottom in shallow anchorages or for a longer storm bridle [80ft/side or more] that can be adjusted/managed from the safety of the cockpit in inclement conditions. And since the two bridle legs are each on a winch, it is quick to independently adjust the legs to slightly veer the bow one way or another if needed.
Another more chafe resistant version of this storm bridle configuration uses a length of Dyneema [or any UHMWPE line] with eyes at each end, and long enough to attach to chain [Prusik knot] at about the waterline, and lead the eyes through the bow cleat fairleads [~20ft long total. A future version will be two Dyneema lines with soft eyes at each end. A soft shackle will be used at the chain to connect one eye from each snubber, resulting in a bridle...]
We cowhitch the end of a seperate nylon snubber eye to each Dyneema eye. The two nylonsnubbers are long enough to run to the aft return blocks used for the jib sheets, and then to the primary winches. Each Nylon snubber is longer than the boat, and easily controlled at the winches.
With this configuration the chain attachment point is still close to the waterline, and the Dyneema line could be run therough the fairlead on the bow eye if desired. We use a combination of Chafepro and snatch blocks attached to toe rails to fairlead each nylon snubber to the aft return blocks...
We are fortunate that our deck configuration lends itself well to this approach when needed.
What about chafe?
We use ChafePro [Yacht Series] to mitigate chafe at the bow chocks and anywhere else it is needed [and on our 1in 3-strand nylon dock lines...] with great success.
We are also experimenting with Dyneema chafe sleeves- and this looks very promising for many uses.
For a gotta have it now solution, for our money Williard and Sons has a great product and approach. There are many, many others, but the above is at least a good standard for comparison...
And here are some related forum discussions:
First photo: Looking down on the bridle over the starboard anchor roller while backing down for the final [2nd] set [and test.] The bobstay appears to angle toward the upper left corner of this photo. It is actually the centerline of the boat and only looks skewed because this photo is centered over the starboard bow roller...
  |
- Anchor Bridle/Snubber References:
- Practical Sailor articles:
- Ideal snubber size [with formulas]
- Hitches to Grip Anchor Chain
- Guess Where the Devil Resides
- Online bridle and snubber calculator [monohull and catamaran]
This bridle [and snubber] attachment method began it evolution over 30 years ago, initially using hardware; then a pair of rolling-hitches; next a cow-hitch [which has been determined in testing to slip under high loading, and also doesn't hold as well if one line fails...] and ultimately a Prusik knot. [Which will not slip under extreme loads, and holds if one side of the bridle goes slack; a cow-hitch does not...]
Future knotting experiments may include a Klemheist hitch- once I establish whether it will hold if one side goes slack [i.e., one of the bridle legs chafes through and breaks; I don’t believe it will pass this test…]
In the future I will very likely switch over to using a soft shackle for the chain attachment point for improved chafe prevention. I will probably start by experimenting with a Alpine Butterfly Loop Knot in the center of the bridle. I might also experiment with an eye splice around a closed thimble in the middle of the bridle [using a Sliding Eye Splice]— or perhaps Dyneema chafe sleve in the attachment eye— should this become the SOP... This allows the bridle/snubber attachment point to be easily changed, and the eye and thimble [or soft eye with chafe sleve] still readily rides over the bow roller assembly...
All of the above knots and hitches are easily untied after being loaded. [The hitches; not the crew untying them... Hmmm, more potential experiments...]
I don't always use the entire bridle length, and that allows for adjusting the chafe points in rough conditions. It is also long enough to lead to the primary winches if desired for safer handling of adjustments in inclement conditions- and maximizing bridle length and stretch...
Preparing a back-up bridle [and additional rode] for incliment conditions in advance:
If inclement weather is anticipated, I will pre-install a second, independent bridle, with a loop of chain in the water representing the new desired rode length in case it is needed. [e.g., perhaps another 60-100ft of chain to improve holding (increase scope) in a blow- but not touching the bottom.] Update 11-Feb-2024: The developer of my favorite anchor calculator has recently elaborated on the potential energy effect of this long chain loop between bow and bridle attachment point. [scroll to the middle of article to the heading: How long should the slack chain segment between bow and chain hook be? The 2nd bridle is fully installed and can be either flaked on deck [with a sacrificial twine belaying the chain at the bridle attachment point] or deployed as a lazy back-up. If this additional rode [with it's own bridle] is needed, I can cast off the original bridle [i.e., no need to retrieve enough chain in inclement conditions to remove it first...] and let it dangle underwater until retrieved in the future. This 2nd bridle also serves as a hot backup in case the first bridle is compromised. [e.g., breaks, chafes, etc.] Rinse. Repeat. If the secondary bridle is deployed in a storm, I will set up a new back-up bridle in case the secondary bridle fails or more scope is needed. |
 |
Photo showing 2nd [back-up] bridle installed and ready for deployment with extra large loop of chain.
|
 |
| Close-up of secondary bridle Prusik knot [and chain safety hook...] |
 |
Close-up of primary [forward] and secondary bridle lines on port side fair led to relevant attachment point. Black material is anti-chafe sleave- details below. Anchor locker lids and deck area are covered with 1/2" Starboard for wear resistance. |
Typical anchoring procedures: [for reference]
For context, following is an overview of our typical overnight anchoring procedures: [Every time; regardless of anticipated (and welcome) benign conditions...]
- Drop the hook and deploy most of the chain scope needed [3:1 minimum in depths shallower than ~40 ft with our 45kg (99lb) Spade anchor]
- "Soft set" the anchor [vessel momentum only... no engine power...]
- Let out more chain while slowly backing until desired initial scope is reached
- Unwrap enough flaked bridle line to expose a couple of feet of the middle loop [bight]
- Hint: Securing the middle of a bridle using a Prusik knot is easy to deploy if you flake your bridle line while it is 'folded' in half. I start flaking at the 2 bitter ends so the bight [middle of a loop of line] is on the outside of the coil of flaked line.
- Slide the bight under the deployed chain, open the loop, and tuck the remaining coil of line through it twice and cinch it up to make a Prusik knot
- Flake the rest of the bridle line on deck, lead fair and cleat the 2 bitter ends
- Why not soft eyes on the two bridle ends? Because you cannot get an eye off a cleat when it is under strain— unless you use a knife of course...
- Let out enough chain to put the load on the bridle with an appropriate amount of slack chain [typically 6 to 12 ft]
- Back down again to fully set the anchor
- Then back down hard at 90% throttle [estimated 1200+ lb bollard pull in reverse- but unmeasured as of yet] for at least a minute to test and validate the anchor holding [and bridle/snubber function/integrity...]
If I need to let out more chain it is quick to retrieve enough chain to bring the bridle attachment point back on deck (it goes over the bow roller easily.) I loosen [but not untie] the Prusik knot and then adjust the chain length. When I get close to the new length of chain desired, I again cinch the hitch and let out enough chain to re-engage the bridle.
I suspect it takes less time to do it than read about...
I should mention for years I used a Devil's claw to attach to the chain as they keep the load uniform on the chain link it is attached to... [and that would likely still be my preferred hardware if I went back to a hard chain attachment...]
In May-2019 Mantus Marine announced their new stainless steel Devil's claw. If I were using hardware to attach the bridle to the chain this may well be my choice.
- Chain attachment method resources:
- Here is a great forum discussion about various chain attachment hardware
- Practical Sailor articles: [worthwhile subscription required]
But I got tired of having to lean over the bow to attach/detach the Devil's claw and associated safety line to keep it attached to the chain. [Chain attachment devices won't clear past our captive bow rollers...] Once I changed to using a Prusik knot, [see Nov-2023 update above] I haven't gone back to hardware for the bridle-chain attachment.
Switching to a soft shackle as the chain attachment method
Storm strategies:
We also have a couple different bridle/snubber approaches for storm/hurricane conditions: [Remember we always deploy a bridle, so the following is back-up to that...]
If anticipating severe weather, we rig one of two backup snubber/bridle systems depending upon the situation:
1) A single storm snubber connected to the bob-stay attachment point just above the waterline [A single snubber works in this case since the attachment point is below the bobstay.]
The simple way to attach this snubber is to cowhitch an eye in the end of the snubber [that has Dyneema chafe sleeve installed- more below] to the bow eye. A better way to mitigate chafe at the bow eye attchment may be using a soft shackle instead.
However, this approach of directly attaching the end of the snubber to the bow eye doesn't allow us to adjust the snubber length, and more importantly, makes it very difficult [dangerous] to cast off the snubber in an emergency [short of using a knife on a pole...]
A more flexible arrangement is being able to adjust the length of the snubber from on deck. [Before soft shackles existed, I used a snatch block for this.] Now this can be readily accomplished by leading the snubber through a low friction ring or hook affixed to the bow eye. [Like these from Antal]


Or you can make your own Bullseye Strop and cow hitch it to the bow eye:

Leading the stormsnubber through tackle mounted low on the bow [near the waterline] allows us to lead it over an inner [unused] bow roller and subsequent use the warp drum on the windlass for adjustment if needed- leaving the longer loop of chain in the water during adjustments in rough conditions- or fair lead it back to the cockpit winches... [our preferred method...]
Using low friction rings, we can also similarly rig a 'anchor Barber Hauler' of sorts to the primary winches— attached to a snubber or individual bridle leg— for veering the boat to an angle [to prevailing condiitons] if needed. [Not unlike how one might rig a sea anchor.]
2) [New Jan-2021] The 2nd approach is to use a storm bridle [vs. snubber] connected to the same bobstay hull attachment point as the single snubber described above. Each bridle end is then led through its own low friction ring which is cowhitched Prusik knotted to the anchor chain.

Once on deck, the storm bridle [or storm snubber] can be secured to the bow cleats, or lead aft to the primary winch[es] [as described further below...]
This storm bridle configuration results in two boat attachment points per bridle leg, and transfers the majority of the ground tackle load to the vessel waterline. Outcomes include: improved scope in shallower anchorages [i.e., the water line to bow height need not be included in the scope calculation] and reduced veering [on our boat anyway] due to lower center of effort when the ground tackle is in tension. It also provides a very strong storm bridle which- by configuring line size and type- can be engineered for the desired elasticity but well within the chosen line working load. [i.e., extended cycles in inclement conditions since the longer, larger line still provides the needed stretch but is no where near its elacticity limits...]
Another storm bridle configuration is our current storm anchoring SOP: if we need a longer bridle than our standard 80ft of 5/8in 3-strand nylon [e.g., storm bridle is twice that] or if we anchor in shallow locations [very rare in our current sailing grounds] we run the bridle and/or snubber through the bow chocks [with chafe protection— more below; or alternatively over the port & starboard anchor rollers on the bow sprit] through the jib sheet return blocks on the stern, then to the primary winches on each side.
This allows either keeping the bridle off the bottom in shallow anchorages or for a longer storm bridle [80ft/side or more] that can be adjusted/managed from the safety of the cockpit in inclement conditions. And since the two bridle legs are each on a winch, it is quick to independently adjust the legs to slightly veer the bow one way or another if needed.
Another more chafe resistant version of this storm bridle configuration uses a length of Dyneema [or any UHMWPE line] with eyes at each end, and long enough to attach to chain [Prusik knot] at about the waterline, and lead the eyes through the bow cleat fairleads [~20ft long total. A future version will be two Dyneema lines with soft eyes at each end. A soft shackle will be used at the chain to connect one eye from each snubber, resulting in a bridle...]
We cowhitch the end of a seperate nylon snubber eye to each Dyneema eye. The two nylonsnubbers are long enough to run to the aft return blocks used for the jib sheets, and then to the primary winches. Each Nylon snubber is longer than the boat, and easily controlled at the winches.
With this configuration the chain attachment point is still close to the waterline, and the Dyneema line could be run therough the fairlead on the bow eye if desired. We use a combination of Chafepro and snatch blocks attached to toe rails to fairlead each nylon snubber to the aft return blocks...
We are fortunate that our deck configuration lends itself well to this approach when needed.
What about chafe?
We use ChafePro [Yacht Series] to mitigate chafe at the bow chocks and anywhere else it is needed [and on our 1in 3-strand nylon dock lines...] with great success.
We are also experimenting with Dyneema chafe sleeves- and this looks very promising for many uses.
Mooring Pendants?
We can make a stretch and compare a mooring pendant to a bridle: a mooring pendant is also a soft, strong, and reliable attachment method between groundtackle and the boat.
Start by reading this excellent article by a marine professional in Maine.
In closing, we all understand that everyone has different needs, experience, and situations to deal with, therefore there is no single best approach.
We enjoy learning from you as well, so please consider leaving us a comment detaining your preferances for using snubbers and bridles.
We enjoy learning from you as well, so please consider leaving us a comment detaining your preferances for using snubbers and bridles.
- Also see:
- Our complete ground and storm tackle inventory
- Sleeping well at anchor [blog post]
- Communicating while anchoring [blog post]
- Calculating scope can be very misleading... [Forum discussion]
- Good overview anchoring [engineering] calculator [including effects of bridles]
- An excellent treatise on anchoring- and the very best calculator…
- Online bridle and snubber calculator [monohull and catamaran]
And here are some related forum discussions:
Link to original forum post [19-Dec-2015]
Hi Rich,
I've come to the conclusion that the 'right' formula for an anchor bridle is one that will hold up in the worse conditions you expect. [It is no fun- even dangerous- setting or replacing a bridle when conditions have the chain bar tight...]
On our present boat I attach the middle of a ~80ft length of 5/8" 3-strand nylon [our boat displaces 22 tons loaded] to the anchor chain with acow-hitch Prusik knot [edited 8/13/2016] for our bridle. [The above is an excerpt from a recent related post- which contains more details including deployment variations and storm rig...] This on an all chain rode. [5/16" Grade 43]
[Edit] It may be worth mentioning we rarely if ever anchor in less than 30ft depth [at low water- with a 15-20ft tidal variation in current cruising grounds...] We typically anchor in 60-90ft...
We deploy our bridle every time we anchor overnight. Why every time? Because I'm lazy; I don't want to get up in the middle of the night because the conditions changed... [Deployment only takes 2-3 minutes total including take-down/flake/stow.]
____________________________________
Hi Rich,
Safe, shallow anchorages [something rare up here...] would require us to rig our bridle as we do for inclement conditions: fair lead from bow to primary winches [with anti-chafe covering at bow fairleads. (Or maybe hi-mod line in the future.) ] This way the bridle legs are long enough to do some good, and the attachment point doesn't have to contact the bottom...
In case this might work for you...
I'm sorry to cause any confusion, Hudson.
What I was trying to describe is how we would keep our longer anchor snubber/bridle length without letting the chain attachment point hit the bottom in a shallow anchorage: Instead of attaching at the bow and only have 15ft or so of bridle/snubber length, we would lead through bow fairleads back through return blocks near the stern, then to the primary winch(es) so the line is much longer, and chain attachment point just below the water surface. [This is also what we do if expecting inclement conditions so we can adjust the bridle from the cockpit...]
One possible difference with us is we always set the [overnight] anchor and bridle as though we are expecting storm force conditions. [And this has occurred several times over the years- once being blown off my anchor in unanticipated williwaws. (Think zero to Force 11 in under 15 seconds... then back to zero again...) Hence my conservative approach in higher latitudes...] It doesn't take any longer to do so and- being inherently lazy myself- I don't feel compelled to get up in the middle of the night to check things if the predicted conditions deteriorate. [And, in the case of williwaws, there is no time to take additional preventative measures...]
RE: Protected anchorages- your point is well taken, and I agree with seeking them out wholeheartedly. Though our average anchorage may be deeper than we usually read about, we only select those that are well protected from anticipated winds, with little fetch or wave/swell potential.
RE: Snubber/Bridle length: We choose to use a longer bridle because of our tidal variations of 15-20+ft; our scope ratio changes several times over the course of 24 hours. We keep the longer snubber to help ameliorate the smaller scope ratio [i.e., at higher tides in deeper anchorages we approach a 4:1 ratio- sometimes slightly less- with our 360ft of chain (+ 100ft of nylon rode for Hail Mary scenarios)...] The idea with the longer snubber/bridle is to reduce sudden forces on the anchor [and vessel attachment points...] in high-wind and/or gusty [e.g., williwaw] conditions- especially when at reduced scope due to high tide in a deep anchorage.
So far, so good... knock on wood...
I hope this helps clear up any confusion I may have caused.
Re: Line size for anchor bridle
Quote:
Originally Posted by cabo_sailor

I'm about to make up a new anchor chain bridle and could use some input on the size of the 3-strand.
My dock lines, secondary anchor line are all 5/8 three strand. The chain rode is 5/16 with a 45 lb CQR. In the past I've made up the bridle with 1/2 in 3-strand to encourage stretch. It's about 20 ft long. Question: Should I be using 1/2 or 5/8? Does it really make any difference? Thanks, Rich Sent from my iPhone using Cruisers Sailing Forum |
I've come to the conclusion that the 'right' formula for an anchor bridle is one that will hold up in the worse conditions you expect. [It is no fun- even dangerous- setting or replacing a bridle when conditions have the chain bar tight...]
On our present boat I attach the middle of a ~80ft length of 5/8" 3-strand nylon [our boat displaces 22 tons loaded] to the anchor chain with a
[Edit] It may be worth mentioning we rarely if ever anchor in less than 30ft depth [at low water- with a 15-20ft tidal variation in current cruising grounds...] We typically anchor in 60-90ft...
We deploy our bridle every time we anchor overnight. Why every time? Because I'm lazy; I don't want to get up in the middle of the night because the conditions changed... [Deployment only takes 2-3 minutes total including take-down/flake/stow.]
____________________________________
Re: Line size for anchor bridle
Quote:
Originally Posted by cabo_sailor
5/8 fits the cleats easily. My concern is attaching two such lines to the Mantus hook without it being too cramped. Our boat is around 24 K lbs but our waters are shallow. Typical anchorage is only about 10-20 ft.
|
Safe, shallow anchorages [something rare up here...] would require us to rig our bridle as we do for inclement conditions: fair lead from bow to primary winches [with anti-chafe covering at bow fairleads. (Or maybe hi-mod line in the future.) ] This way the bridle legs are long enough to do some good, and the attachment point doesn't have to contact the bottom...
In case this might work for you...
____________________________________
Re: Line size for anchor bridle
Quote:
Originally Posted by Quote:
Originally Posted by wrwakefield View Post ............................... ................... Safe, shallow anchorages [something rare up here...
would require us to rig our bridle as we do for inclement conditions ............
........... Hudson Force;1992151] I was confused by this. I was thinking just the opposite and considering a safe anchorage as being one with little fetch and no waves or swell. This would mean no surge or changing tension on the bridle and therefore, no need for a long length or stretch. My practices are influenced by spending most of my anchored times at 10 to 20 feet with no more than a half mile fetch, often far less, so I'm usually using a bridle with a pair of 5/8" lines no more than 20' and often just 10' deployed. |
What I was trying to describe is how we would keep our longer anchor snubber/bridle length without letting the chain attachment point hit the bottom in a shallow anchorage: Instead of attaching at the bow and only have 15ft or so of bridle/snubber length, we would lead through bow fairleads back through return blocks near the stern, then to the primary winch(es) so the line is much longer, and chain attachment point just below the water surface. [This is also what we do if expecting inclement conditions so we can adjust the bridle from the cockpit...]
One possible difference with us is we always set the [overnight] anchor and bridle as though we are expecting storm force conditions. [And this has occurred several times over the years- once being blown off my anchor in unanticipated williwaws. (Think zero to Force 11 in under 15 seconds... then back to zero again...) Hence my conservative approach in higher latitudes...] It doesn't take any longer to do so and- being inherently lazy myself- I don't feel compelled to get up in the middle of the night to check things if the predicted conditions deteriorate. [And, in the case of williwaws, there is no time to take additional preventative measures...]
RE: Protected anchorages- your point is well taken, and I agree with seeking them out wholeheartedly. Though our average anchorage may be deeper than we usually read about, we only select those that are well protected from anticipated winds, with little fetch or wave/swell potential.
RE: Snubber/Bridle length: We choose to use a longer bridle because of our tidal variations of 15-20+ft; our scope ratio changes several times over the course of 24 hours. We keep the longer snubber to help ameliorate the smaller scope ratio [i.e., at higher tides in deeper anchorages we approach a 4:1 ratio- sometimes slightly less- with our 360ft of chain (+ 100ft of nylon rode for Hail Mary scenarios)...] The idea with the longer snubber/bridle is to reduce sudden forces on the anchor [and vessel attachment points...] in high-wind and/or gusty [e.g., williwaw] conditions- especially when at reduced scope due to high tide in a deep anchorage.
So far, so good... knock on wood...
I hope this helps clear up any confusion I may have caused.
____________________________________
I'm excited to use the waterline connection of my bobstay for our snubber to be able to decrease rode length to achieve desired scope, as we often anchor in deep water like you. But the engineering physics are confusing to me if the attachment point is on the deck, 5 feet above the waterline, and the line is led through a friction ring at the waterline, the load is distributed through the upper AND lower connections, correct?
ReplyDeleteIf true, this means the formula for scope would not eliminate the need to figure in the distance between the water and snubber connection or fairlead (chock, roller, etc), correct?
Hi David,
DeleteI apologize for my delayed response. Since we were corresponding via email, I totally forgot you had also asked on the blog.
The short answer about scope [rode length] is it ends [assuming it begins at the anchor...] at the first point it is attached— or fair lead— on the boat. [The bow eye in your example.]
Now I'm going to ask your question in a different way to introduce some additional considerations:
When figuring the angle of the rode at the anchor when the rode is under high load [i.e., is 'bar tight' or almost straight...] one only needs to measure the angle between the straight line of the rode and the slope of the seabed in the direction the anchor is set, correct? [Trick question.... more below...]
Yes. And the worse case angle of the rode is determined by the straight line between the anchor attachment point, and the fairlead the rode is first lead through on the boat... In your example, the bow eye [with the snubber- now part of the straight line rode...]
Explaination of trick question, above:
When anchoring, our goal is to keep the angle of the rode at the anchor attachment point smaller than the tripping angle of the anchor. [Typically under ~5° with modern anchors] We typically do this by letting out more scope in incliment conditions, but this common approach doesn't allow for a sloped bottom... [That is another discussion well worth reading at the following link:]
http://www.cruisersforum.com/forums/f118/calculating-scope-can-be-very-misleading-137516.html
Are we having fun yet?!