April 27, 2019

Friday Funny 04-26/19 (My Bedding Tidbitting)


It's just the normal stuff around here... everyday life at the dock. Taking care of bills, shopping, cleaning, the stuff everyone does. Our exceptions are the boat projects, the planning for where we are going next, and next, and next, with plenty of flexibility for the when, and with whom.

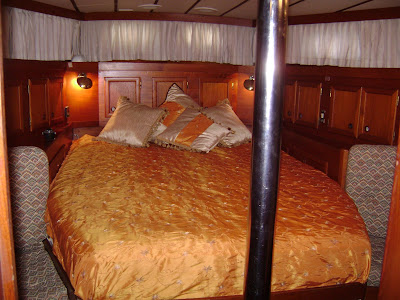
Bill's last "tidbit" was about bedding, and how we use fleece bedrolls, but we've been using sheets for about a year now. We're still trying to find the the method we like best. I sewed the top sheet to the fitted sheet at the bottom, but it's still a pain to get the fitted bottom sheet to stay on. I tried those elastic straps with the clippy things on the ends under the mattress, but they just snapped off the sheet periodically. 

As Bill pointed out in his article, I made flannel liners for the fleece bedroll, and they fit in our small washer onboard, but I have a problem with them. They don't match... horror of all horrors. 😲
Seems like a small thing, but they're bright red, and I like grey, and turquoise. My sheets are grey, and the fleece is grey. 

I stopped writing at this point and decided to check out Amazon for the correctly colored, polyester, flannel sheets. I haven't been able to find them, and voila, I just order 2 sets. We may go back to the bedroll, as nobody really likes trying to make the bed.  Bedrolls are, fluff, smooth, and go, done.

Gus doesn't see why anyone needs to "make" the bed.

We tried out the new inflatable paddle board in the pool this week. Sorry, no pictures, water, pool, splash, and Iphones don't mix. I could paddle the board around, as long as I was on my knees, no dice with standing up. It's hard! Bill got on it also, and did great with standing up. We may go back this week, and practice more, and maybe get photos.

As always, we enjoy hearing from you, either here in comments or on our Facebook Denali Rose Sailboat page.


April 23, 2019

Tidbit: Bedding considerations in cooler climates... [Updated Apr-2019]

This is one of a series of brief, no nonsense posts that we call aTidbit: 
noun; small and [possibly] particularly interesting item of gossip or information...
The purpose is to share succinct posts about lessons learned, or things we use or do that work [or don't...] that are common to most of us boaters. 


The goal is to garner feedback from those of you having first-hand experience with a different approach/ solution/ product/ or additional useful information to share...  
We never assume what we are sharing is the ideal or only; it just seems to best suit our needs [and/or habits and/or budget] from our experiences thus far...
Note: The blog post which follows [Originally posted 5-Mar-2016] — having been reviewed and updated— has been inducted into Tidbits since it qualifies, but was published ~3 years before we initiated the Tidbit series...  
                               ➛ ➛ Peruse the right-hand sidebar for the up-to-date list of Tidbits ➛ ➛                               

Since most of my experience is boating in cooler climates, [ignoring one multi-year coconut-milk-run...] I am sometimes asked about special considerations and adaptations I found useful over time. 

In this post I'll discuss my take on bedding [sheets and blankets if you like] and ways of reducing/preventing condensation under and around mattresses. 
I will use the term mattress to mean whatever substrate you choose to sleep upon. This includes custom innerspring mattresses, foam pads, seat cushions, camping mattresses and pads, sacks of rice, etc. Basically, whatever you prefer...
I [now we...] have been making our boat beds a bit differently for the last few decades. (Those of you in warmer climes may wish to experiment with non-fleece variations of what I am about to describe...)

I always hated the fitted sheet wrestling match [as does Donna...] so I experimented on myself one winter 30+ years ago and made a fleece bedroll the shape of the V-Berth on my 37 ft Valiant Esprit at that time. [I'm positive I'm not the first, and I'll bet there are even better ideas out there, but this works great for me, now us...]

Wonderful! I had one item to wash, and making the bed was as easy as standing at the head of the berth and unrolling the fleece on top [with a flourish if anyone is watching...] 

The bedroll facilitated easy access to the stowage below the berth as I had no fitted sheets to wrestle with. And it cost [much] less than a set of custom fitted sheets- which are only part of a solution anyway...

My original bedroll design was more complicated than it needed to be [as I am wont to do...] But hey, it was the middle of winter and I needed another project...

It had the full length matching two-way zippers that met in the middle of the bottom, so the top and bottom could be separated [each half then became a single person bed roll] and one of both sides of the bottom could be unzipped for ventilation for a hot footed sleeper...

I eliminated the zippers in subsequent models [which typically failed after a few years, and weren't all that comfortable to lay upon if the bedroll shifted around while sleeping... 

The new models were sew together across the bottom and up the sides to about knee level. [Don't go higher otherwise it is more like exiting a sleeping bag instead of a bed- especially if the berth orientation requires you to enter/exit toward the foot or side of the berth vs. crawling out head first...] 

This modified design is ideal for us; easy to get out of if you have to exit the foot of the berth as we do, and no tangling or burrito effect...

Other variations over time included using a heavy [thicker] fleece on one side [e.g., 300 weight— which is what I recommend if you like a cool sleeping area but a single 'blanket'...] and a lighter fleeced on the other. [e.g., 200]  This way I could flip the bedroll over to accommodate seasonal temperature changes... 

I learned to always use high quality Polar Fleece. [e.g., Polartec] It doesn't pill-up [becoming coarse in texture and uncomfortable to sleep on...] like the cheap stuff does. 
Research your fleece choices and shop carefully... [Today we purchase high quality PolarTec fleece online from Seattle Fabrics... I'm sure there are other good sources of high quality fleece as well...]
Fast forward to our current boat with a custom shaped, quasi-queen sized mattress. It has a cloth hinge down the middle so the mattress folds in half lengthwise. This is handy for getting it into the boat through our companionway in the first place. 

Folding the mattress in half also allows for reasonably easy access to the storage and steering systems underneath the berth. And the emergency tiller arm [which extends through to the aft deck] can be installed and used with the mattress folded in half...

At sea, a lee cloth can be attached to the hinge to split the berth in two— making two pilot berths when needed... 


The bedroll eliminates the need to remake the berth whenever we fold the mattress over to access stowage beneath the berth. [Which isn't really that often, however the convenience is not to be overrated...] I think two seperate mattresses would also work well if they were covered by a single foam topper of choice to prevent us from feeling the joint in the middle... 

We keep a few fleece blankets on hand if we need them, and of course we have super cold weather sleeping bags on board. [And a 4 season tent I can use as the dog house... All are in a supplemental ditch bag in case we ever have to abandon ship close to shore. Remember we are exploring the Alaskan coastlines these days...]


Other considerations:

Since Denali Rose spoils us with a small front-loading combination washer/dryer, we have made some micro-fleece sheet liners that fit inside the fleece bedroll so we can wash those easily on the boat. 
The one piece queen size fleece bedrolls are just a tad too big for our 1.8 cu ft washer... A two piece bedroll (with zippers on the sides and bottom) may work better for us now so we could wash the fleece halves separately onboard... [The liners save us having to wash the fleece bedrolls very often...]

What about condensation under the mattresses and cushions on a boat? 
If you don't provide for constant air circulation [which also creates a thermal break between the warm and cool surfaces] under all mattresses/ seat cushions that are in use in cool climates, you will induce condensation where they touch cold surfaces. Portions of the mattress/ cushions will get wet underneath— and on the sides where they contact the hull— eventuallly leading to mold and mildew... [Not to mention a damp, smelly, unhealthy bed...]

How do we avoid this?

We have found it is very desirable to cover all often used mattresses with a totally encasing hypoallergenic, water resistant, breathable [i.e., not plastic or rubber...] cover. It keeps the mattress clean and helps keep moisture from reaching the mattress. 

But a mattress cover alone is not enough. It won't stop condensation from occuring... [It does help keep the mattress clean and dry, however...]

To help prevent condensation from occurring under mattresses and cushions we use Hypervent

I personally used it on my last 3 boats in cooler climates [occasionally living aboard in -20°F temps and colder during some winters...] for the last 30+ years or so. It is still a very good value for the price, and light [albeit bulky] to ship... 

Since Hypervent is waterproof, if it ever needs cleaning just take it outside and hose it off...


One Hypervent trick [more ideas here...] I discovered over time is to also extend it up the side(s) and end(s) of the mattress [just to the top of the mattress... this stuff is stiff and scratchy...] anywhere the mattress is against the hull, bulkhead, furniture, etc. This greatly improves airflow, and keeps the mattress/foam pads from sliding around.

The Froli sleep system appears to be another very viable option for providing air circulation [and user adjustable mattress comfort] but we haven't tried it yet. It reportedly works well, and has the added advantage of letting you individually customize your mattress comfort levels by zone. It is also the most expensive of the lot.


Dri-Dek and the like also work to some extent, but these wet floor tiles are not as thick as the above solutions, so air flow is diminished. Therefore this approach is not as effective as the thicker Hypervent... [From personal experience long ago...] 


Other boaters have reported having some success reducing condensation under their mattresses with parallel wood slats and/or drilling a series of holes [e.g., 1"+ diameter] in the platform supporting the mattress. Neither of these solutions allow for 100% air flowhowever, and only the slats would create a partial thermal break between the slats...

Some who live at the dock in winter [i.e., have shorepower] report using undermattress electric heating pads with good success.

And speaking of shore power, don't forget to run a dehumidifier. [Or those of you in warmer climates, run your air conditioning. We find our A/C works well for us to quickly dry out the boat in summer...] Either will really help keep everything dry...
Do you have proven bedding options you prefer, or other ways of preventing condensation under the mattress in cool climates? 
Please share in a comment!

Additional Resources:


April 19, 2019

Friday Funny 04-19/19 (Projects in Process)


Yes, now that the mainsail cover is done to our satisfaction, (at least for now), I'm procrastinating on getting back to the "recover the salon cushions" project. 


I feel as lazy as Elsie usually is. See the top cushion, and the bottom cushion? They don't match, it's because I finished the top one, and I haven't started on the bottom one yet. I use Elsie as an excuse, I can't possibly disturb the kitty now can I? 


My main reason for dragging this process out, is that no matter how meticulous I cut, and sew, the new cover is never quite right the first time. My seam ripper is my best friend. Also, I kept changing my mind about what color I wanted to use, and so now that I've totally decided, I need to redo the ones I made in the rejected color, to the selected color. Redo, and redo again, is there a pattern here?

The ultra-suede color I picked out 4 years ago, Sahara, is still being manufactured, and I actually had to purchase additional yardage recently. I buy it off of Ebay from the same store every time. The cost is usually around $24.00 a yard, vs $99.00 a yard from our favorite marine yardage supplier, and the Ebay store does free shipping. It's a terrific deal, imagine shipping 5 yards or so of upholstery fabric to Alaska, and it always arrives fast, and in perfect condition. 

Someday I hope to post a "It's Done!" photo but for now, here's a peek at some of the progress.

Pilothouse main salon.
Har Har.

As always, we enjoy hearing from you, either here in comments or on our Facebook Denali Rose Sailboat page.


April 16, 2019

Electric Winch for Dinghy Davits [Updated Jan-2024]

Preview of version 2.0 [Details below]


  ➛ 
➛ From our list of Stuff we have and use [and do...] in the right sidebar ➛ ➛   

This is part of a series describing some of our boat system refits and their operation.

We refer to these often not only for our own use, but also when asked specific questions about systems on Denali Rose, and when participating in discussions on various forums. 

We should also mention that we wait a while [1+ years in this case...] before publishing new articles— allowing enough time for the concept [and/or product] to demonstrate itself worthwhile to us [or not]...
We aren't implying our choices are the best, unique, or only way to go; they just happen to be the decisions we made at that moment in time...

__________________________

Overview:

To make it easier to raise and lower our 11 foot long fiberglass RIB [with 15hp outboard motor and 6 gallon fuel tank...] on our fixed davits— and to make it a one person job— we replaced the two manual 5-part tackles [one per davit] with a single 12V DC ATV winch with a 3000 pound capacity.

I'm sure we are not the first to take this approach, but will share what we did in case any aspects are interesting or useful to others...


Details: [Updated May-2021 with version 2 of winch lifting line configuration]


There is a lot going on in this photo of the original prototype:
  • The 12V DC ATV winch with [white] spool dividing disk [see updates below] is dead center on the spreader seperating the two davit arms.
 Updated 17-Jun-2021 [test began 30-Jul-2020]:
We are experimenting  have been using the winch without the divider disk since Jul-2020. So far it has been working well. We just tied the lifting line to the center of the rope drum using a clove hitch. [See reply to questions from 'Old John' in comments, below, for more details. There are also before and after photos below in the section about making the divider disk.]  
  • The aged dinghy chaps [since replaced...] are loose on the partially deflated dinghy [winter cold reduces its air pressure... that is snow to the right on the chaps...]
  • The orange lifting line is 1/4 inch HMPE line [e.g., Dyneema] 
    • Each end has a thimbled Brummel splice variation with a locking carabiner that clips to its respective bridle lifting point in the dinghy
      • Future iterations may include a small whoopee sling block at each lift point on the dinghy leadinf forward on the davits to a cleat on the davits to micro adjust dinghy bow and stern heights when 'parked' in the davits
    • Note the orange lifting line is slack in this photo because the white w/ red hash doublebraid line is the safety [tensioned] line when the dinghy is stowed— optionally removing the load from the winch
    • The orange lifting line requires two blocks on our davits to provide a 2 part purchase and fair lead it to the desired vertical drop location [on both sides]
    • The dark smude [looks like grease] on the orange line and lines behind it [just left of winch in photo] must be an artifact of increasing the exposure [brightening] after the photo was taken 
  • A portion of the inverted kayak cartop J rack can just be seen lower center in the photo [more about this below...]
  • [Note to self:] This photo also reveals we are still using the 4 snatch blocks originally installed during the proof-of-concept stage... That reminds me we need to reclaim them at some point- replacing them with dedicated single blocks. [Done; see Mar-2021 update, immediately below, and Version 2.0 section further below.]
    • Update Mar-2021: These Harken Carbo T2 blocks are waiting to be are now installed [but the above and below two photos still show the snatchblocks we used during the proof-of-concept phase...]
  • Unrelated to the winch but explaining other objects in the photos, below:
    • The light directly above the winch is our 'back-up' light [900 lumens]
    • The large light to the right is the stern navigation light
    • The smaller all around light under the stern nav light is a dusk-to-dawn anchor light that serves two purposes:
      • It shows the stern of the boat when at anchor [There is also one on the bow and one amidship to clearly show our vessel at anchor— in addition to the masthead anchor light]
      • It acts as a 'garage' light when using the dinghy in the dark
    • All this is sheltered under two 165 watt solar panels structurally joined [with butyl tape waterproofing the joint... can't have the dinghy garage roof leak...] and pivoting on their athwartships centerline

Here is a wider angle shot taken from the same spot— showing both davits: [still original version...]


Since the [one piece] orange lifting line runs in opposing directions on the winch drum, the rope drum is divided in half by a home made disk:* 


*See July-2020 update above regarding not using a dividing disk. 

We have determined if the leads to the winch are straight and centered on the spool,  the dividing disk detailed below is not necessary. 

  
Original configuration with rope drum dividing disk
V2.0 without the dividing disk [since Jul-2020]


We will leave the details for making the dividing disk in case your installation warrants using one.


The spool dividing disk was fabricated on the dock using drill bits and hole saws on a small sheet of 1/2" Starboard [what we had on hand...] 

The first hole drilled in the disk was a small diameter [which became a slot] in the ID of the disk [where it contacts the winch drum- parallel to the drum] to allow a single piece of Dynema line to run through the hole/slot, and then to blocks on each of the davits, then down to the dinghy. [No multi-purchase tackle necessary because the winch handles the load easily.]

I next drilled the OD then the ID using hole saws.

Then I drew a line through the center [that would be the cut line] and drilled through the circumference for bolts to tie the two halves together once it was cut in half.

This disk was then sliced in half and bolted back together in the center of the rope spool on the winch. 
Note: After using a while, I learned a couple of wraps of silicone rigging tape around the denter of the rope drum where the divider disk is installed helps keep the disk from 'walking' to one side or the other over time...
A machine shop would take less time and produce a better looking result, but my home made version works just fine for this very low RPM, low load use case...


Version 2.0: [Implimented Mar-2021; documented in June after a few months of use and debugging...]
  • Replace the snatch blocks with Harken Carbo T2 blocks 
  • Introduce a 2:1 lifting ratio for better fine control and slower speed while lifting/securing the dink in the davits
  • Add an easy method to micro adjust (up/down) one lift point (dink bow- because it is lighter) so the dinghy is perfectly oriented when snug in the davits [with a slight tilt to the stern to drain rain water...] 
    • Adjustment only needed on one side 
      • We chose the bow because it is lighter and this is a manual adjustment


Close-up of prior photo...


Lift block on dinghy bow

Note: The white lines with red flecks in these two photos [one each in bow and stern] serve two purposes:  As dock lines, and more importantly, as safety lines when the dinghy is ‘parked’ in the davits. After the dinghy is hoisted into storage position, the red flecked lines are lead over the davit arms and forward to a cleat. Then the winch is eased slightly- just enough to put the full load on the flecked lines, with the winch lines as back-up.

Lift bridle on dinghy transom


The above photo shows the dinghy engine [port] side where originally we had a second micro-adjustment point. Since the adjustment is really only needed on one side [we chose the lighter bow] we eliminated the left most block in this photo and just made an eye on the end of the orange line- which is now attached to the 'quick link' the block is lashed to in this photo.


Operation: 

Running the winch winds up the lines from opposite sides simultaneously. [One line on top of the spool; the opposing line over the bottom...]

This approach keeps the tensile loads balanced on the winch mounts. [The winch isn't pulled excessively one direction or the other...] With the tensioned lines running athwartships, it has the added benefit of reducing operator risk if lines ever disconnected or parted while under tension... [The winch operator stands on the aft deck using either a hard wired up-down momentary toggle switch, or a cabled remote— all positions out of harms way...]

For safety lines [double-securing the dinghy in the 'parked' position] individual double braid lines [~5ft long] are tied to the fore and aft lift points in the RIB [white with red hash lines in the above photo]. These safety lines are used when the dinghy is stored in the davits, and allows us to release the tension on the winch. [Once the dinghy is raised to stow position, these safety ties are manually fed through the same blocks the orange lifting line runs through, then forward [relative to mothership...] to a cleat on each davit. After cleating, the winch is jogged to release tension on the winch and lifting lines...]

For rapid dinghy deployments [e.g., Emergency egress] the disengage knob on the end of the winch is facing the aft deck. This means if we need to deploy the dinghy in a hurry [or in the event of a 12V DC power outage to the dinghy winch] one person can uncleat the two safety lines [one on each side] and flip the disengage dial to let the winch free-spool, lowering the dinghy by gravity and making it ready for passenger loading in 10-15 seconds total.

This has all been working great fulltime since deployment in early 2018,  and the relatively cheap winch is holding up well. 
To help mitigate the affects of our salt water environment on the ATV winch I replaced any fasteners I could with SS and reinstalled with anti-seize. Any unreplacable yet accessible fasteners were removed, coated with Corrosion-X, and reinstalled with anti-seize. Everything susceptible to corrosion is kept coated with Corrosion-X [including the two 12V DC electrical connection points on the winch...] 
All wiring to the winch is 6 AWG. 
For safety and security, an off switch was installed inside the boat for disabling the winch. [Switch off the ground wire that controls the winch relay— an ~18AWG wire— to disable the winch controls...]

This didn't take long to fabricate and install, and was fairly cheap and very rewarding as boat projects go.

Click image for larger version

Name: IMG_7083.jpg
Views: 0
Size: 411.9 KB
ID: 182626
How things look from the aft deck...  [original version] 

A few more details to note:
  • Each of the two davit arms has a topping lift to the mizzen masthead
  • Each davit arm has a cartop kayak J rack mounted upside down for the dinghy inboard pontoon to nest into when hoisted into travel position  [easier to see in the short video, below]
  • Our feline first mate and engineering officer, Gus, signed-off on the installation.
[original version] 


Following is a candid video showing the very first time we tried this new fangled electric dinghy lift. Among other things, it revealed some minor changes were needed to balance the lifting eye locations and bridle lengths [We will be inserting whoopee slings at both lift points to accommodate this adjustment.] It also demonstrates the winch is very capable of the task...


[original version]


What else needs to be done? [Updated Jun-2022]
  • Replace the snatchblocks used for the proof-of-concept with permanent single blocks.
    • √ Update Mar-2021: These Harken Carbo T2 blocks are now waiting to be installed
    • √ Replace Harken supplied UHMP lasking with larger diameter UHMP double-loop (dogbone) soft shackle for better chafe resistance (per following photos)

The white line with red trace (right hand photo, above) is the safety line that takes all the strain when the dinghy is secured in the davits. (i.e., The orange UHMP line from the winch is slackened to put load on the white-red line- relegating the winch line as back-up.)


  • Safety stop: When the lifting line is re-run, install a microswitch [low amperage disconnect for winch control relay... wiring already run...] near each primary block. This will serve to stop the winch automatically when the dinghy reaches maximum 'height'. 
    • Right now stopping the winch is incumbent on the operator... [A distraction could produce interesting results... Not unlike those which have occured with other electric winches or anchor windlasses...]
  • Install a polyurethane rubber plug [snubber] directly behind the newly spliced lifting line thimbles to mitigate damage to the blocks should the line be reeled tightly against them...
  • √ Implement an easy way to make small adjustments to the length of [one of] the two lifting lines so the dinghy comes up parallel to the davits
    • This may become became a part of improving the lifting eye/ bridle components
    • The first try may be using the previously mentioned whoopee slings
  • √ Replace cable lifting bridle on dinghy transom with UHMP line version [perhaps two whoopie slings...?]

Would we change anything if we did it again? [Updated Jun-2021]
  • We already removed the winch spool dividing disk [in Jul-2020] since our lines are fair led to the center of the spool we determined it is not necessary [and has been removed... see details above]
Looking up from under winch [i.e., view from the dinghy]


  • To slow the final stage of 'docking' the dinghy in the davits, we have now installed a two-part tackle using a single block that would have a locking carabiner attached for connecting to each of the two dinghy bridle lifting points
    • The bitter end of each of the two lifting lines would be rove through a single lifting block and led back to the end of each respective davit and secured
      • We did this on the heavy [outboard motor and fuel tank] side of the dinghy
      • On the other side [bow end] we ran this bitter end through another block to a cleat on the davit for micro-adjusting [photos above]
    • This halves the up/down speed [and the load on the winch- which isn't necessary for this winch, but will likely make it last even longer...] 
    • [Update Jun-2021: we didn't need to use a smaller diameter line]  To fit enough additional line [~14 feet] on the winch drum to accomplish this we may need to use a smaller diameter HMPE line [e.g., 3/16 inch Dyneema— which would still be plenty stong for the purpose intended @ 4,900 lbs breaking strength...]

If you mechanized the raising and lowering your dinghy, do you have any as-built details you are willing to share? 


April 13, 2019

Friday Funny 04-12/19 (Presents!)

Both!

As some of you know, my birthday was this month, I've been accused of being a late April Fool's joke since it occurs right after the 1st. I did have a wonderful day, with well-wishes from many friends, and family.

I didn't get a post published last week, and I'm late this week, but you know, life, it happens.

Bill bought me a birthday present that was too big to ship to Wrangell, so I hopped on an airplane, and went to Seattle to see my daughter, and other family.

My daughter made this for me, it's called "diamond painting", just fits the electrical panel door.

Bill's present to me was at my brother's house, and we had a wonderful dinner, and I picked up my big box. I did get to open one end and peek in. Woot!! A inflatable stand-up paddle board. My daughter's partner graciously carried the box through the parking lot, and Sea-Tac airport, till we got it checked in as luggage. THANK YOU!

The box is home.


We laid it out on the dock so we could inflate, and UV protect it with 303.

All ready for use.

Now we need to figure out how to carry it onboard, inflated or deflated, and of course, I'll need to make a cover for it.

Set against the aft port side rail for now.

My new sweatshirt?