
 |
Preview of version 2.0 [Details below] |
We refer to these often not only for our own use, but also when asked specific questions about systems on Denali Rose, and when participating in discussions on various forums.
We should also mention that we wait a while [1+ years in this case...] before publishing new articles— allowing enough time for the concept [and/or product] to demonstrate itself worthwhile to us [or not]...
We aren't implying our choices are the best, unique, or only way to go; they just happen to be the decisions we made at that moment in time...
__________________________
Overview:
To make it easier to raise and lower our 11 foot long fiberglass RIB [with 15hp outboard motor and 6 gallon fuel tank...] on our fixed davits— and to make it a one person job— we replaced the two manual 5-part tackles [one per davit] with a single 12V DC ATV winch with a 3000 pound capacity.
I'm sure we are not the first to take this approach, but will share what we did in case any aspects are interesting or useful to others...
Details: [Updated May-2021 with version 2 of winch lifting line configuration]
 |
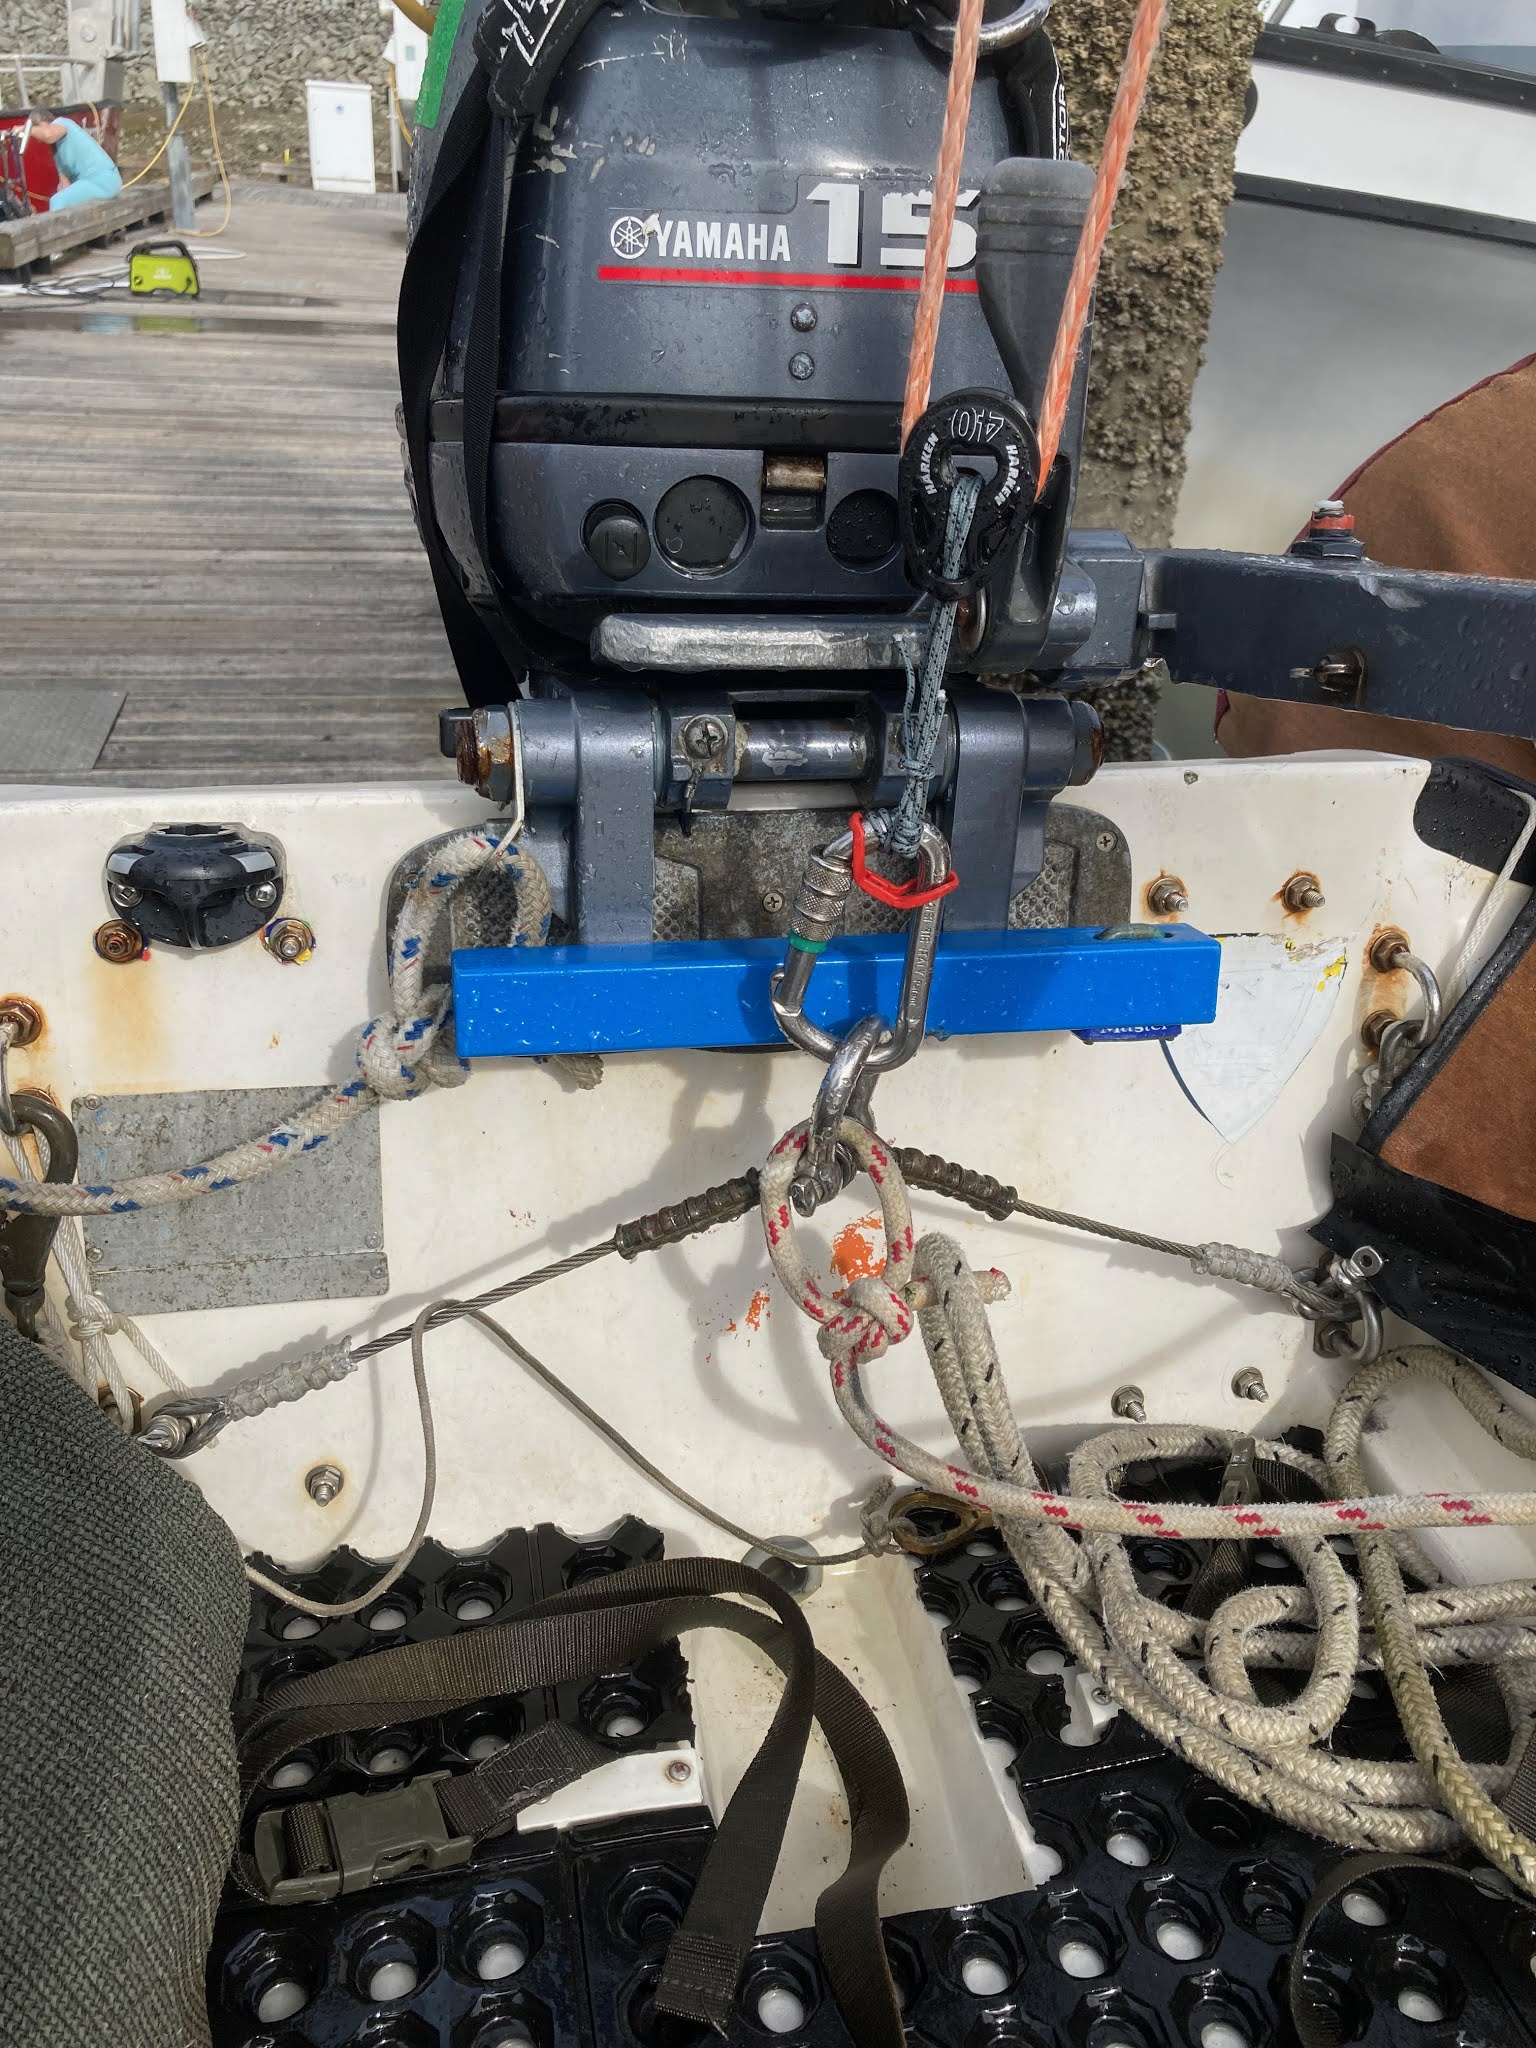
There is a lot going on in this photo of the original prototype:
Updated 17-Jun-2021 [test began 30-Jul-2020]:We
|
Here is a wider angle shot taken from the same spot— showing both davits: [still original version...]

Since the [one piece] orange lifting line runs in opposing directions on the winch drum, the rope drum is divided in half by a home made disk:*
*See July-2020 update above regarding not using a dividing disk.
We have determined if the leads to the winch are straight and centered on the spool, the dividing disk detailed below is not necessary.
 |
| Original configuration with rope drum dividing disk |
 |
| V2.0 without the dividing disk [since Jul-2020] |
We will leave the details for making the dividing disk in case your installation warrants using one.

The spool dividing disk was fabricated on the dock using drill bits and hole saws on a small sheet of 1/2" Starboard [what we had on hand...]
The first hole drilled in the disk was a small diameter [which became a slot] in the ID of the disk [where it contacts the winch drum- parallel to the drum] to allow a single piece of Dynema line to run through the hole/slot, and then to blocks on each of the davits, then down to the dinghy. [No multi-purchase tackle necessary because the winch handles the load easily.]
I next drilled the OD then the ID using hole saws.
Then I drew a line through the center [that would be the cut line] and drilled through the circumference for bolts to tie the two halves together once it was cut in half.
This disk was then sliced in half and bolted back together in the center of the rope spool on the winch.
Note: After using a while, I learned a couple of wraps of silicone rigging tape around the denter of the rope drum where the divider disk is installed helps keep the disk from 'walking' to one side or the other over time...A machine shop would take less time and produce a better looking result, but my home made version works just fine for this very low RPM, low load use case...
Version 2.0: [Implimented Mar-2021; documented in June after a few months of use and debugging...]
- Replace the snatch blocks with Harken Carbo T2 blocks
- Introduce a 2:1 lifting ratio for better fine control and slower speed while lifting/securing the dink in the davits
- Add an easy method to micro adjust (up/down) one lift point (dink bow- because it is lighter) so the dinghy is perfectly oriented when snug in the davits [with a slight tilt to the stern to drain rain water...]
- Adjustment only needed on one side
- We chose the bow because it is lighter and this is a manual adjustment
Close-up of prior photo...
Lift block on dinghy bow Note: The white lines with red flecks in these two photos [one each in bow and stern] serve two purposes: As dock lines, and more importantly, as safety lines when the dinghy is ‘parked’ in the davits. After the dinghy is hoisted into storage position, the red flecked lines are lead over the davit arms and forward to a cleat. Then the winch is eased slightly- just enough to put the full load on the flecked lines, with the winch lines as back-up.
Lift bridle on dinghy transom

The above photo shows the dinghy engine [port] side where originally we had a second micro-adjustment point. Since the adjustment is really only needed on one side [we chose the lighter bow] we eliminated the left most block in this photo and just made an eye on the end of the orange line- which is now attached to the 'quick link' the block is lashed to in this photo.


Running the winch winds up the lines from opposite sides simultaneously. [One line on top of the spool; the opposing line over the bottom...]
This approach keeps the tensile loads balanced on the winch mounts. [The winch isn't pulled excessively one direction or the other...] With the tensioned lines running athwartships, it has the added benefit of reducing operator risk if lines ever disconnected or parted while under tension... [The winch operator stands on the aft deck using either a hard wired up-down momentary toggle switch, or a cabled remote— all positions out of harms way...]
For safety lines [double-securing the dinghy in the 'parked' position] individual double braid lines [~5ft long] are tied to the fore and aft lift points in the RIB [white with red hash lines in the above photo]. These safety lines are used when the dinghy is stored in the davits, and allows us to release the tension on the winch. [Once the dinghy is raised to stow position, these safety ties are manually fed through the same blocks the orange lifting line runs through, then forward [relative to mothership...] to a cleat on each davit. After cleating, the winch is jogged to release tension on the winch and lifting lines...]
For rapid dinghy deployments [e.g., Emergency egress] the disengage knob on the end of the winch is facing the aft deck. This means if we need to deploy the dinghy in a hurry [or in the event of a 12V DC power outage to the dinghy winch] one person can uncleat the two safety lines [one on each side] and flip the disengage dial to let the winch free-spool, lowering the dinghy by gravity and making it ready for passenger loading in 10-15 seconds total.
This has all been working great fulltime since deployment in early 2018, and the relatively cheap winch is holding up well.
To help mitigate the affects of our salt water environment on the ATV winch I replaced any fasteners I could with SS and reinstalled with anti-seize. Any unreplacable yet accessible fasteners were removed, coated with Corrosion-X, and reinstalled with anti-seize. Everything susceptible to corrosion is kept coated with Corrosion-X [including the two 12V DC electrical connection points on the winch...]
All wiring to the winch is 6 AWG.
For safety and security, an off switch was installed inside the boat for disabling the winch. [Switch off the ground wire that controls the winch relay— an ~18AWG wire— to disable the winch controls...]
This didn't take long to fabricate and install, and was fairly cheap and very rewarding as boat projects go.
| How things look from the aft deck... [original version]
A few more details to note:
|
 |
| [original version] |
Following is a candid video showing the very first time we tried this new fangled electric dinghy lift. Among other things, it revealed some minor changes were needed to balance the lifting eye locations and bridle lengths [We will be inserting whoopee slings at both lift points to accommodate this adjustment.] It also demonstrates the winch is very capable of the task...
[original version]
What else needs to be done? [Updated Jun-2022]
Replace the snatchblocks used for the proof-of-concept with permanent single blocks.- √ Update Mar-2021: These Harken Carbo T2 blocks are now
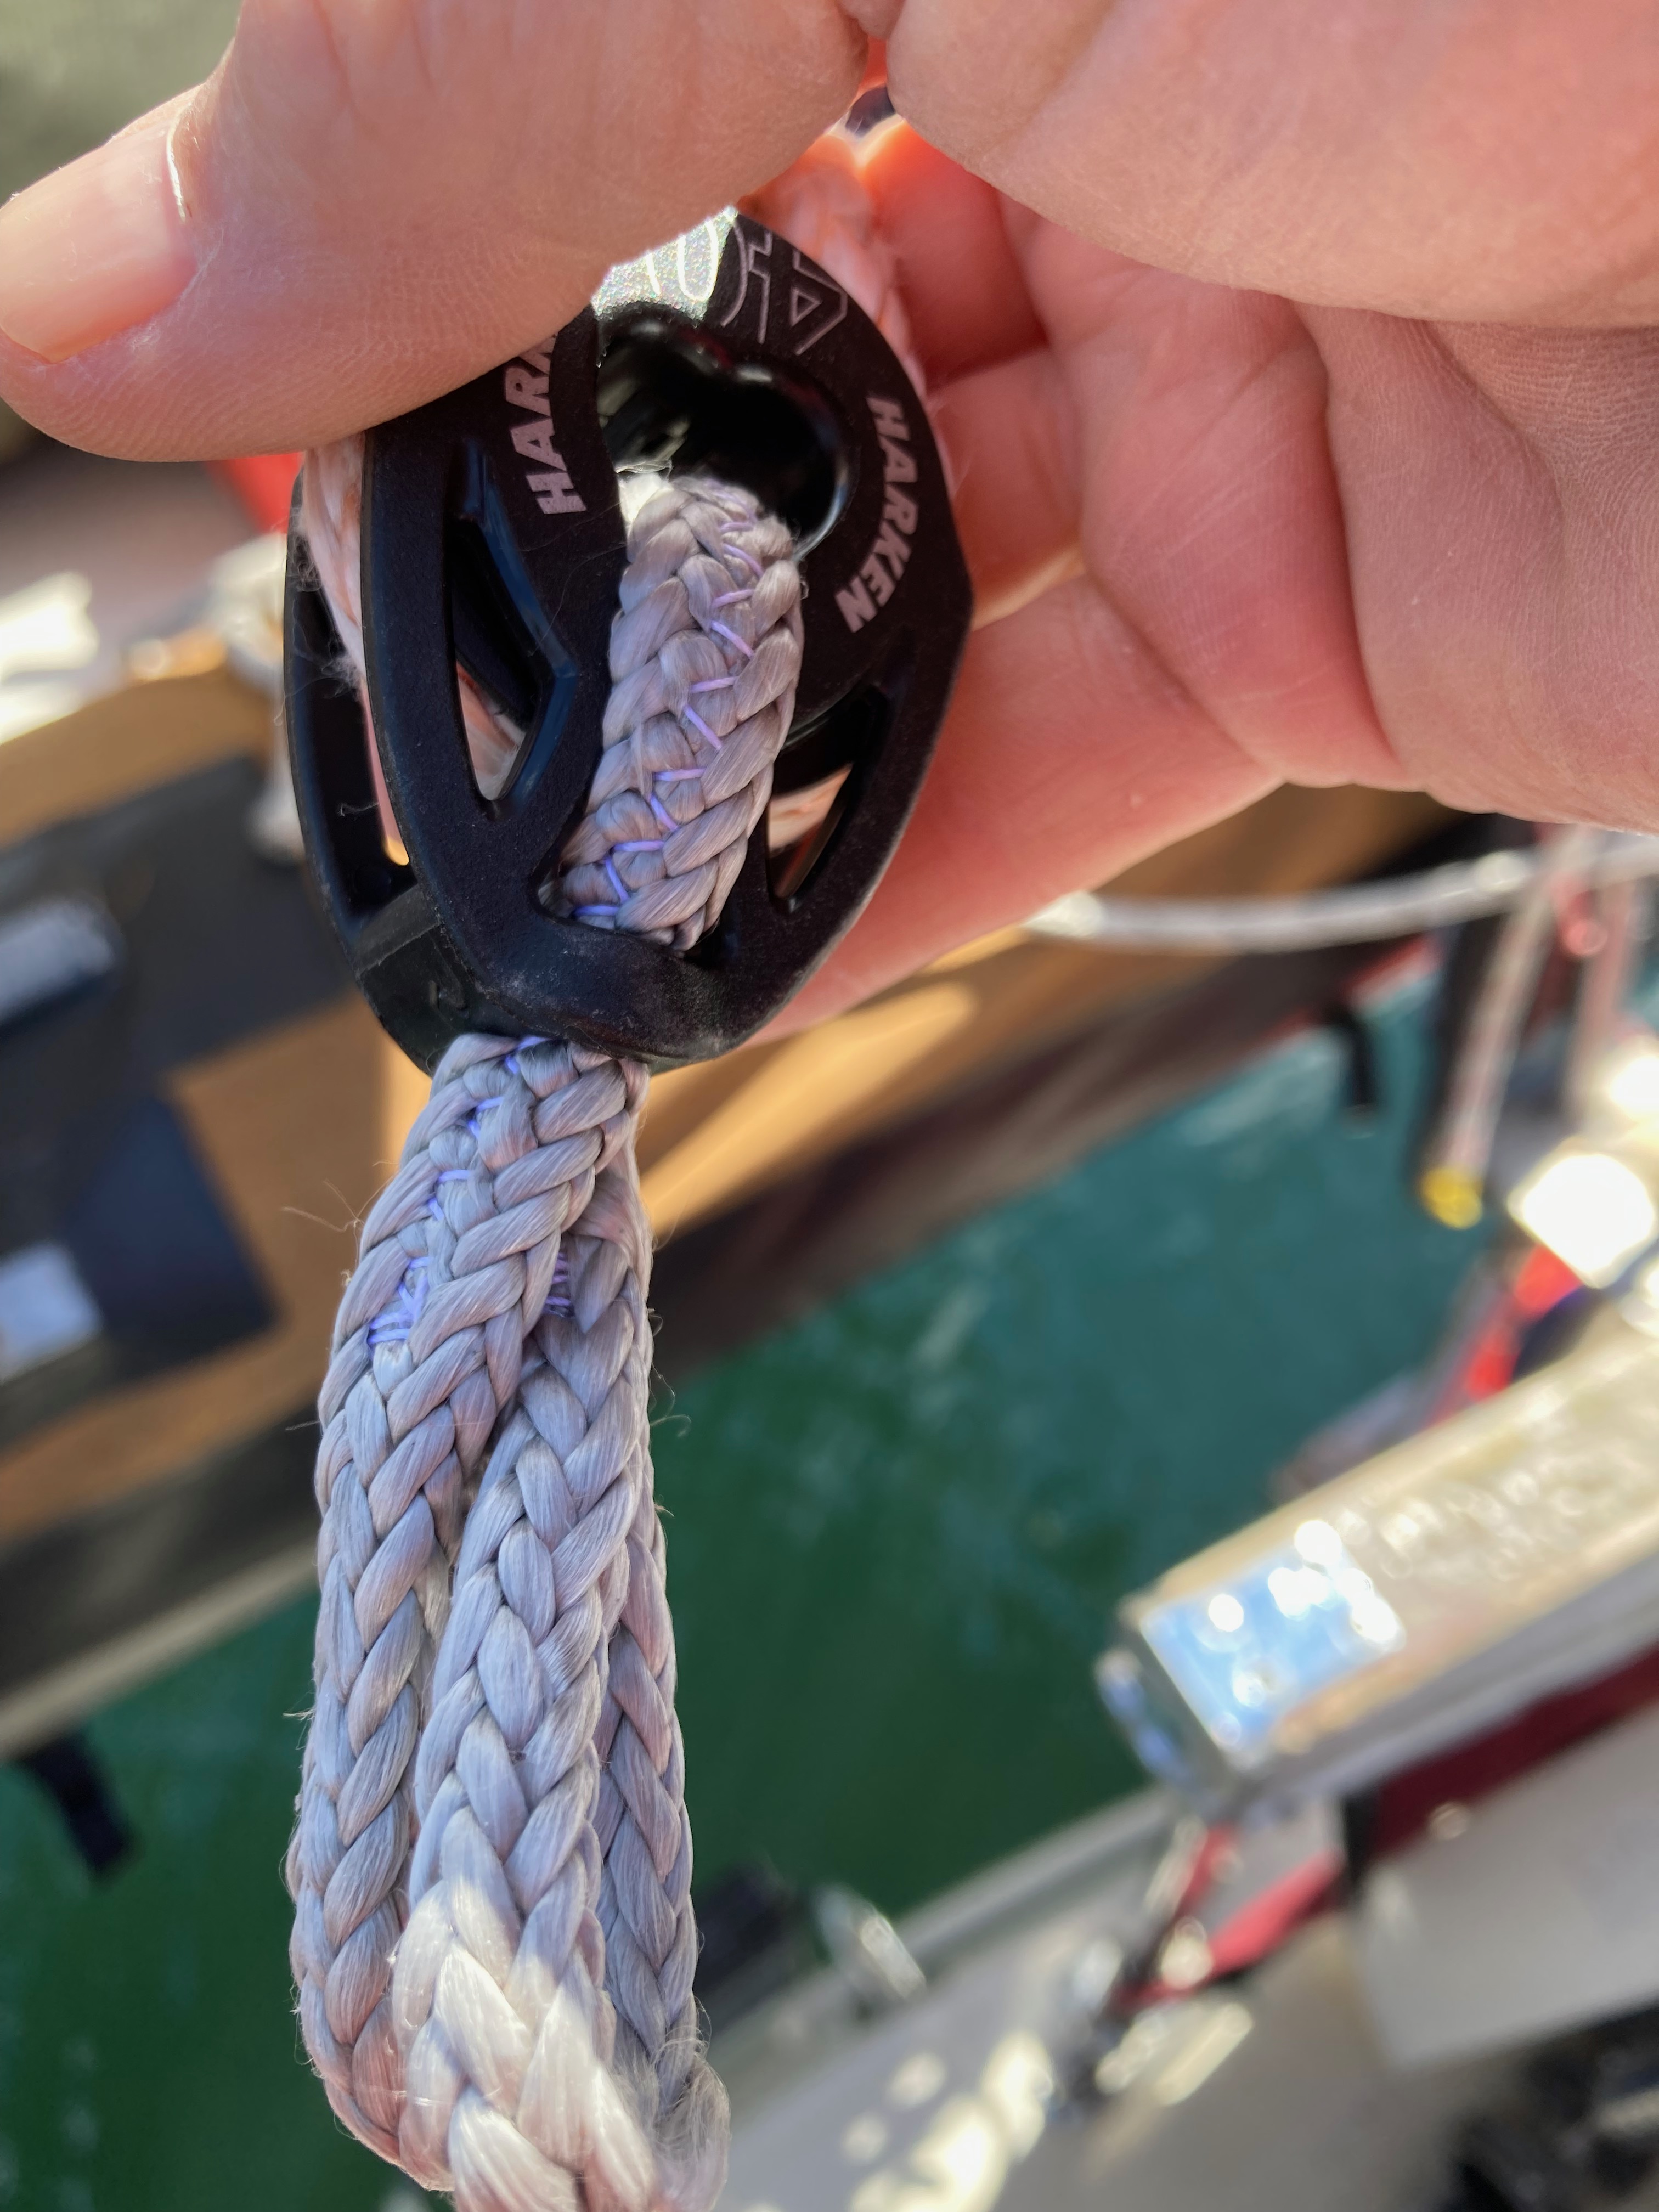
waiting to beinstalled - √ Replace Harken supplied UHMP lasking with larger diameter UHMP double-loop (dogbone) soft shackle for better chafe resistance (per following photos)


| The white line with red trace (right hand photo, above) is the safety line that takes all the strain when the dinghy is secured in the davits. (i.e., The orange UHMP line from the winch is slackened to put load on the white-red line- relegating the winch line as back-up.) |
- Safety stop: When the lifting line is re-run, install a microswitch [low amperage disconnect for winch control relay... wiring already run...] near each primary block. This will serve to stop the winch automatically when the dinghy reaches maximum 'height'.
- Right now stopping the winch is incumbent on the operator... [A distraction could produce interesting results... Not unlike those which have occured with other electric winches or anchor windlasses...]
- Install a polyurethane rubber plug [snubber] directly behind the newly spliced lifting line thimbles to mitigate damage to the blocks should the line be reeled tightly against them...
- √ Implement an easy way to make small adjustments to the length of [one of] the two lifting lines so the dinghy comes up parallel to the davits
- This
may becomebecame a part of improving the lifting eye/ bridle components The first try may be using the previously mentioned whoopee slings- √ Replace cable lifting bridle on dinghy transom with UHMP line version [perhaps two whoopie slings...?]
Would we change anything if we did it again? [Updated Jun-2021]
- We already removed the winch spool dividing disk [in Jul-2020] since our lines are fair led to the center of the spool we determined it is not necessary [and has been removed... see details above]
 |
| Looking up from under winch [i.e., view from the dinghy] |
- To slow the final stage of 'docking' the dinghy in the davits, we have now installed a two-part tackle using a single block that would have a locking carabiner attached for connecting to each of the two dinghy bridle lifting points
- The bitter end of each of the two lifting lines would be rove through a single lifting block and led back to the end of each respective davit and secured
- We did this on the heavy [outboard motor and fuel tank] side of the dinghy
- On the other side [bow end] we ran this bitter end through another block to a cleat on the davit for micro-adjusting [photos above]
- This halves the up/down speed [and the load on the winch- which isn't necessary for this winch, but will likely make it last even longer...]
- [Update Jun-2021: we didn't need to use a smaller diameter line]
To fit enough additional line [~14 feet] on the winch drum to accomplish this we may need to use a smaller diameter HMPE line [e.g., 3/16 inch Dyneema— which would still be plenty stong for the purpose intended @ 4,900 lbs breaking strength...]
If you mechanized the raising and lowering your dinghy, do you have any as-built details you are willing to share?
Hi Bill
ReplyDeleteWe spend most of our cruising season anchored in Guatemala so need to lift our dinghy every night. your lifting system looks like just what we need. Before I order the parts and start work I have a few questions;
1. Is the winch really up to the job of lifting and lowering a dinghy every day for months? Have you needed to replace yours?
2. Is 6mm Dyneema able to withstand the wear and tear?
3. Your idea of using a one part tackle sounds good, could you explain it a little more please? Maybe a diagram?
Thanks for your blog, its much appreciated
John
Hi OldJohn,
DeleteThanks for your patience.
We have been without internet access for a few weeks now (as promised…)
I will first mention I need to update this blog entry. The main change this year is I removed the dividing disk on the winch because it would slowly walk toward one end due to pressure from a lifting line that was not fair led to the winch spool, and so far it still works as expected- even without the dividing disk.
I just tied the ‘middle’ of the lifting line to the center of the spool with a clove hitch.
I have learned over time it is very important to fair lead to the spool so the line doesn’t bunch up on one end.
On to your questions:
1. Is the winch really up to the job of lifting and lowering a dinghy every day for months? Have you needed to replace yours?
Generally speaking, a quality ATV winch is absolutely up to the task long term. (This does not take into account poor manufacturing/design of some really cheap units— or routine drenching in salt water… This is why I chose one rated 3,000lb pull assuming the gearing and motor are heavier duty than one rated for, say, 1200 lbs…)
As an example, I used an ATV (4-wheeler) to plow snow for 15 years when we lived in interior Alaska. The blade was raised and lowered by the winch; 100s of times each plowing session and often in 30 to 40 below zero temperatures (°C or °F are the same at -40°) Extreme abuse. That same winch came with my 2004 ATV and continues to serve to this day. I never had to do anything with it/to it. (It is a 3,000lb Warn brand)
Likewise so far with the sub US$100 model I chose for the dinghy davits. All I did for preventative maintenance was replace any fasteners I could with stainless steel (using anti-seize on all threads- even fasteners that couldn’t be easily replaced) and keep the electrical connections well corrosion proofed. (I use CorrosionX, but any grease will likely do…) We have 3 years on it now with hundreds of uses/season and it shows no signs of weakening and sounds just like when it was new. (We likely only use 10-15% of its capacity for a lift with 15hp outboard motor and 6 gal fuel tank…) The winch is also less loaded because the small diameter line is close to the rope drum axis- even when there are a couple of rows of line on the drum...
I believe I mentioned in the original write-up (I am offline as I write this so cannot confirm…) I always safety tie the dinghy (with separate lines, and lifting straps when underway...) once raised into stow/transport position, and back the winch off slightly to remove any strain on the winch and the lifting line. This also mitigates chafe on the main lifting lines.
These 3rd party winches are cheap enough now that it would be easy to keep a spare or two on hand… our back-up is a pair of multi-part tackles, but I will likely grab another of these winches before going too remote…
...continued below...
...continuation from above...
Delete2. Is 6mm Dyneema able to withstand the wear and tear?
To proof the concept, I bought a couple of UHMP lines for ATV winches [~US$15 delivered] I figured they won’t be as high a quality as Spectra or Dyneema [and they aren’t, but that is subjective…] so I wouldn’t cry if it was destroyed during trial and error phases.
Three years later it is still the main lifting line, and while showing some expected fuzzing of the external surface, it is still going strong. [I have some Dyneema on hand to replace it…] In your case, you have extended UV exposure to consider as well… Ours is only strong enough to make an impact about 5 months out of the year here at ~56-60°N, and my davits are shaded under a couple of solar panels…
Your idea of using a one part tackle sounds good, could you explain it a little more please?
I haven’t done it yet, but the idea was to slow down the lift rate [and consequently reduce the load on the winch by half or so…] by running each lifting line bitter end through a single block attached to each dinghy lift point [e.g., a single block with a carabiner for attaching to the dinghy lift point…] The bitter end would then be attached on the davits in a spot that allows the two down lines to be fair lead, and so it centers the dinghy. [It could attach right next to the block leading the down line to the dinghy, or some distance off making a Y of lifting lines helping steady the dinghy as it is lifted… [It will depend upon davit configurations…]
I hope this helps better explain the single block at the dinghy lift attachment point. [Our sat phone email won’t send images cost effectively…]
I hope this helps, and thanks for your kind remarks.
Cheers! Bill