January 25, 2016

Tidbit: New Dodger and Bimini with Hard Tops [Updated Mar-2024]

This is one of a series of brief, no nonsense posts that we call aTidbit: 
noun; small and [possibly] particularly interesting item of gossip or information...
The purpose is to share succinct posts about lessons learned, or things we use or do that work [or don't...] that are common to most of us boaters. 


The goal is to garner feedback from those of you having first-hand experience with a different approach/ solution/ product/ or additional useful information to share...  

We never assume what we are sharing is the ideal or only; it just seems to best suit our needs [and/or habits and/or budget] from our experiences thus far...

Note: The original blog post [below] has been inducted into Tidbits since it qualifies, but was published 3 years before we initiated the Tidbit series...

                               ➛ ➛ Peruse the right-hand sidebar for the up-to-date list of Tidbits ➛ ➛                               


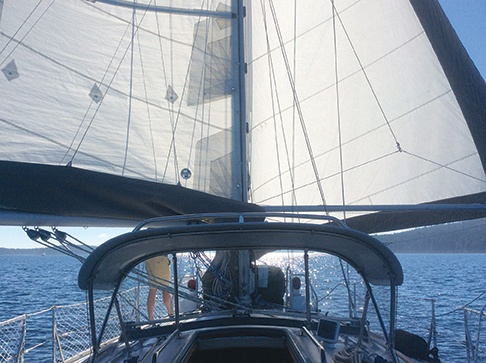
We've been researching DIY options for replacing our 'canvas' dodger and bimini with hard tops using the existing 1" stainless steel frames, and adding a rigid windshield to the dodger. 

Sounds like a great spring
 project, doesn't it?


Following are the current finalists in my order of preference by method, then approach


————————


Using Starboard:


Using polycarbonate [e.g., Lexan] sheets:

Fabrication from scratch:
Third Party Manufacturers: [A sampling; not a comprehensive list.]

Related Resources:

Materials Research:
  • Top:
    • HDU [High Density Urethane] board instead of Starboard or as core with FRP skins
    • Starboard
    • FRP Skins [glued back-to-back either with or without foam core]
    • Opaque polycarbonate sheet 
      • See above article Hard Dodger made with lexan sheets from Cruising World
  • Windshield:
I'll keep adding to this list as I find viable resources in an effort to narrow our focus, and as a source of ideas for a possible hybrid approach. [...And as a rational for procrastinating...]


1/2" Starboard formed to match existing dodger frame.
(Photo from Roger Dodger article linked above...)

January 21, 2016

Determining which [remote location] communications devices to choose ...

We occasionally participate in various boating forums. [See our Some Forums We Read sidebar for links...]

Some of those topics may be relevant here, so once in a while we will repost on our blog for reference.


The following may be one of those cases. To accommodate our non-boating blog readers, sometimes we add some {additional information and links} to the original forum post. (below)


It is worth noting since we are discussing electronic and emergency devices, this post may likely have a relatively short shelf-life... [2-5 years?]


Link to original forum post [18-Jan-2016]

Re: SSB or SatPhone?

Quote:
Originally Posted by SJFK View Post
Could I ask the community about what comms system they rely on? We are soon going to set off on our cruising adventures and we have had a lot of conflicting advice about what to get on board. I have worked with HF comms before and quite a few people have said that SSB did not provide them with the reliability and quickness of contact that their sat phone system did. So do I go fitted for SatPhone only with a good airtime package , or should I get a SSB receiver fitted as well, or should I go the whole hog which is very expensive, and get Satphone and SSB transceiver with a pastor modem? We intend spending a few months in the Caribbean before making our way to New Zealand in due course.
I would welcome the collective wisdom to help me, I hope, come to a practical decision.

Many thanks

SJFK
SJFK,

Your answer(s) will depend upon who [people, companies, agencies, etc.] and what [e.g., weather forecasts, blog posts, etc.] you want/need to communicate with, your ranking of importance [e.g., frequency of use] of voice, eMail, and SMS, whether the communication is one-to-one, or one-to-many, and of those methods, rank whether one-way and/or two-way communication is required.

Once you work out that matrix reflecting your needs, you will gain more clarity about what technology/ies might best suit your requirements.

[For another perspective to the matrix approach, look at West Marine's article on this topic.]

Our communications analysis revealed two-way eMail was the most important function for our day-to-day needs, followed by voice [mainly for emergencies] and SMS [mainly for notification of voice mail or email received.]

Next you will rank the order of importance of the technologies- based upon your above matrix- so you can rank their order of use in your day-to-day life aboard.

e.g., Our preferred order of use is Cell/WiFi, Sat phone [both using UUplus email for weather files and two-way email communications] Voice/SMS via Sat phone, SSB. Obviously that order can change depending upon what the need of the moment is... e.g., in southern climes where SSB nets are prevalent, SSB may be used more on a daily basis, and therefore slide up the order of use scale...

What do we use? Our penchant for higher latitude destinations drove us to an Iridium sat phone when cell and WiFi are not available. [This was before the release of IP Sat hot-spot devices like the Iridium Go... More on this in the blog post referenced below...]

We spend $400/yr on a discounted sat rate plan that limits us to Alaska and Canada- which suits our present needs. We rely on using UUplus email service with the phone, and it more than pays for itself with sat phone minutes saved through its efficiencies. With a passive, external mushroom antenna, we rarely are without a usable signal for long- even when transiting mountainous terrain [which is most of the time...]

If you are interested, you can read more about our satellite communication device selection process in this blog post - which also has links to other related forum posts...

If you go with two-way HF radio {High-Frequency or HAM Radio}, given your cruising itinerary, be sure to go with a properly installed and operating DSC {Digital Selective Calling} capable HF radio [e.g., ICOM M802 is likely the most common] so you can readily contact emergency service agencies, and fellow cruisers using the Global MMSI numbers. [VHF and HF/Marine SSB]

We also have the ICOM M802 with Pactor modem and set it up for full time, non-emergency DSC so other friends [outside of VHF range...] who set their radios up similarly can 'hail' us. [We use the non-emergency DSC 'hailing' set-up and procedures outlined in this book.] {Of course, it is also set up for DSC use during emergency communications as well...}

If we had to choose between Sat phone and SSB, the sat phone would be the easy choice for us. However, we recognize everyone's needs are different [as will become evident once you work through your communications decision matrix, above.]

In hopes this helps you focus on what is important to you...

Cheers!

Bill

________________________________

Related blog posts about Communications

Other Resources:

January 17, 2016

Anchoring with a bridle...

This post has now been added to our list of Stuff we have and use [and do...] sidebar where we will keep it updated in the future.

Please see that updated version.

___________________________________________________

Original version:

Everyone and every boat has their recipe for anchoring, setting a snubber or bridle, all with the goal of sleeping well... 
This is just a description of our ways of doing things that work for us, and why; not the right way of doing things- only you can determine what works for you... 

These kinds of posts are also a discussion about our SOPs [Standard Operating Procedures], so we update them as needed and include lots of external references, and append relevant forum discussions where appropriate.

So... on to our bridle story... [Yes, my spelling is correct... My apologies to you romantics...]


Because a chain stopper doesn't buffer shock loads to the boat or ground tackle, we use a bridle [double snubber] made of rope with some elasticity. 

We also have one chain stopper per anchor to isolate the windlass [temporarily] in the event of a bridle failure...


Our bridle is a single length of 5/8" 3-strand nylon line: I attach the middle of an ~80ft length  [our boat displaces 22 tons loaded] to the anchor chain with a cow-hitch. 

This method evolved over 30 years from first using hardware, then rolling-hitches, now a cow-hitch. 

In inclement conditions, an extra wrap or two of the cow hitch forms a Prusik hitch (which will not slide under extreme loads, and holds if one side of the bridle goes slack; a cow hitch does not...) 


Future knotting experiments will include a Klemheist hitch- if I can determine whether it will hold if one side goes slack; and a soft shackle. 


All of these hitches are easily untied after being loaded. [The hitches; not the one untying them... Hmmm, more potential experiments...]


If we switch to a soft shackle for the chain attachment point for improved chafe prevention, I will try a figure-eight loop (stronger than an overhand loop, and more easily untied after being loaded...) or an eye splice with a closed thimble in the middle of the bridle so the soft shackle attachment point can be changed, and it still rides over the bow roller easily...


I don't always use the entire bridle length, and that allows for adjusting the chafe points in rough conditions. It is also long enough to lead to the primary winches if desired for safer handling of adjustments in inclement conditions- and maximizing bridle length and stretch...


In the current bridle iteration [sans soft shackle] the cow-hitch is easy to deploy if you flake your bridle line while it is 'folded' in half. I start flaking at the 2 bitter ends so the middle [hitch portion of the loop of line] is on the outside of the coil of flaked line.


For context, following is an overview of our overnight anchoring procedures: [Every time; regardless of anticipated (and welcome) benign conditions...]

  • Drop the hook and deploy most of the chain scope needed
  • "Soft set" the anchor [vessel momentum only... no engine power...]
  • Unwrap enough flaked bridle line to expose a couple of feet of the loop
  • Slide the loop end under the deployed chain, open the loop, and tuck the remaining coil of line through it and cinch it up [likewise for Prusik or Klemheist hitches]
  • Flake the rest of the bridle line on deck, lead fair and cleat the 2 bitter ends
  • Let out enough chain to put the load on the bridle with an appropriate amount of slack chain [typically 6 to 12 ft]
  • Back down hard to fully set and test the anchor
If I need to let out more chain it is quick to retrieve enough chain to bring the hitch back on deck (it goes over the bow roller easily.) I open the cow-hitch so it is about 2ft in diameter and then adjust the chain length. When I get close to the new length of chain desired, I again cinch the hitch and let out enough chain to re-engage the bridle.

I suspect it takes less time to do it than read about...


I should mention for years I used a Devil's claw to attach to the chain As they keep the load uniform on the link it is attached to... [and that would still be my preferred hardware if I went back to a hard chain attachment...]

But I, too, got tired of having to lean over the bow to attach/detach the Devil's claw and associated safety line to keep it attached to the chain. Once I developed this cow-hitch method, I haven't gone back to hardware for the bridle-chain attachment.

Switching to a soft shackle as the chain attachment method may be even faster and better- especially for post deployment chain length adjustments.


We also have a couple different bridle approaches for storm conditions:


One adds a second, single bridle [which can be the primary or secondary bridle as needed] which connects to the bob-stay attachment point at the waterline. We built a simple mechanism [like a heavy-duty snatch block] that allows for bridle adjustment on deck. This also allows us to use the warp drum on the windlass for adjustment if needed- leaving the longer loop of chain in the water during adjustments in rough conditions- or lead it back to the cockpit winches...


Another is our current storm anchoring SOP: if we need a longer bridle than our standard 80ft of 5/8in 3-strand nylon [e.g., storm bridle is twice that] or if we anchor in shallow locations [very rare in our current sailing grounds] is to run through the bow chocks [or alternatively over the p & s anchor rollers on the bow sprit] through the jib sheet return blocks on the stern, then to the primary winches on each side. 


This allows either keeping the bridle off the bottom in shallow anchorages or for a longer storm bridle [80 ft/side or more] that can be adjusted/managed from the safety of the cockpit in inclement conditions. 

We are lucky that our deck configuration lends itself well to this approach.

We use ChafePro [Yacht Series] to mitigate chafe at the bow chocks and anywhere else it is needed [and on our 1in 3-strand nylon dock lines...] with great success.

We all have different needs and situations, and I enjoy learning about everyone's approach for dealing with this common requirement.


And here are some related forum posts:

Link to original forum post [19-Dec-2015]

Re: Line size for anchor bridle

Quote:
Originally Posted by cabo_sailor View Post
I'm about to make up a new anchor chain bridle and could use some input on the size of the 3-strand.

My dock lines, secondary anchor line are all 5/8 three strand. The chain rode is 5/16 with a 45 lb CQR.


In the past I've made up the bridle with 1/2 in 3-strand to encourage stretch. It's about 20 ft long.


Question: Should I be using 1/2 or 5/8? Does it really make any difference?


Thanks,

Rich


Sent from my iPhone using Cruisers Sailing Forum
Hi Rich,

I've come to the conclusion that the 'right' formula for an anchor bridle is one that will hold up in the worse conditions you expect. [It is no fun- even dangerous- setting or replacing a bridle when conditions have the chain bar tight...]


On our present boat I attach the middle of a ~80ft length of 5/8" 3-strand nylon [our boat displaces 22 tons loaded] to the anchor chain with a cow-hitch for our bridle. [The above is an excerpt from a recent related post- which contains more details including deployment variations and storm rig...] This on an all chain rode. [5/16" Grade 43]


[Edit] It may be worth mentioning we rarely if ever anchor in less than 30ft depth [at low water- with a 15-20ft tidal variation in current cruising grounds...] We typically anchor in 60-90ft...


We deploy our bridle every time we anchor overnight. Why every time? Because I'm lazy; I don't want to get up in the middle of the night because the conditions changed... [Deployment only takes 2-3 minutes total including take-down/flake/stow.]


____________________________________

Re: Line size for anchor bridle

Quote:
Originally Posted by cabo_sailor View Post
5/8 fits the cleats easily. My concern is attaching two such lines to the Mantus hook without it being too cramped. Our boat is around 24 K lbs but our waters are shallow. Typical anchorage is only about 10-20 ft.


Sent from my iPhone using Cruisers Sailing Forum
Hi Rich,

Safe, shallow anchorages [something rare up here...] would require us to rig our bridle as we do for inclement conditions: fair lead from bow to primary winches [with anti-chafe covering at bow fairleads. (Or maybe hi-mod line in the future.) ] This way the bridle legs are long enough to do some good, and the attachment point doesn't have to contact the bottom...


In case this might work for you...

____________________________________

Re: Line size for anchor bridle

Quote:
Originally Posted by Quote:
Originally Posted by wrwakefield View Post
...............................
................... Safe, shallow anchorages [something rare up here...
would require us to rig our bridle as we do for inclement conditions ............
...........

Hudson Force;1992151]I was confused by this. I was thinking just the opposite and considering a safe anchorage as being one with little fetch and no waves or swell. This would mean no surge or changing tension on the bridle and therefore, no need for a long length or stretch.


My practices are influenced by spending most of my anchored times at 10 to 20 feet with no more than a half mile fetch, often far less, so I'm usually using a bridle with a pair of 5/8" lines no more than 20' and often just 10' deployed.
I'm sorry to cause any confusion, Hudson.

What I was trying to describe is how we would keep our longer anchor snubber/bridle length without letting the chain attachment point hit the bottom in a shallow anchorage: Instead of attaching at the bow and only have 15ft or so of bridle/snubber length, we would lead through bow fairleads back through return blocks near the stern, then to the primary winch(es) so the line is much longer, and chain attachment point just below the water surface. [This is also what we do if expecting inclement conditions so we can adjust the bridle from the cockpit...]


One possible difference with us is we always set the [overnight] anchor and bridle as though we are expecting storm force conditions. [And this has occurred several times over the years- once being blown off my anchor in unanticipated williwaws. (Think zero to Force 11 in under 15 seconds... then back to zero again...) Hence my conservative approach in higher latitudes...] It doesn't take any longer to do so and- being inherently lazy myself- I don't feel compelled to get up in the middle of the night to check things if the predicted conditions deteriorate. [And, in the case of williwaws, there is no time to take additional preventative measures...]


RE: Protected anchorages- your point is well taken, and I agree with seeking them out wholeheartedly. Though our average anchorage may be deeper than we usually read about, we only select those that are well protected from anticipated winds, with little fetch or wave/swell potential.


RE: Snubber/Bridle length: We choose to use a longer bridle because of our tidal variations of 15-20+ft; our scope ratio changes several times over the course of 24 hours. We keep the longer snubber to help ameliorate the smaller scope ratio [i.e., at higher tides in deeper anchorages we approach a 4:1 ratio- sometimes slightly less- with our 360ft of chain (+ 100ft of nylon rode for Hail Mary scenarios)...] The idea with the longer snubber/bridle is to reduce sudden forces on the anchor [and vessel attachment points...] in high-wind and/or gusty [e.g., williwaw] conditions- especially when at reduced scope due to high tide in a deep anchorage.


So far, so good... knock on wood...


I hope this helps clear up any confusion I may have caused.

____________________________________

January 14, 2016

Shorefasts [Updated May-2024]

We occasionally participate in various boating forums. [See our Some Forums We Read sidebar for links...]

Some of those topics may be relevant here, so once in a while we will repost on our blog for reference.


The following may be one of those cases. To accommodate our non-boating blog readers, sometimes we add some {additional information and links} to the original forum post. (below)


Curious about our complete ground and storm tackle inventory? [With links to many additional resources.]


Link to original forum post [8-Dec-2015]


Re: Short handed 'line ashore' anchoring

Quote:
Originally Posted by Nick Boxer View Post
Hi, this is my first post as a 'new forum member'.
I have been sailing for 20+ years as a share owner in the Ionian and have just purchased a 'whole boat' to spend more time in the area.
We intend to spend more time away from the 'town quays', as lovely as they are, at anchore with a line ashore, not a problem when we have a competent crew to assist, but I would like to master the art of carrying out this manoeuvre for all intent and purpose, single handed.
My wife is not particularly confident so I need to develop a system where I can do it singlehanded.
Does anyone have any practical advice? That is apart from the obvious, don't try it in the first place!
Our new boat is a Bavaria 38 Cruiser and I am experienced in the normal handling of similar vessels.
Any thoughts would be much appreciated.
Thanks in anticipation.
Nick,

Welcome to the forum! It sounds like you have some wonderful cruising ahead of you.

It has been many years since I had to run a shore-line by myself, but your question reminds me we should practice doing it alone in case of injury, etc.

I should also mention it is our preference not to use shorelines if at all possible because they add additional complication- especially in extenuating circumstances.

I apologize for this being somewhat lengthy, but as I thought through it there are 3 fairly different scenarios I have encountered over the years which require shorelines, and I have consequently developed multiple approaches for each scenario depending upon circumstances. There are likely other, better methods as well. But so far this has worked for me.

First- I would never attempt a solo shoreline if the conditions were anything but calm.

The method I choose depends upon the reason for needing the shore line. The three scenarios I have encountered are: [and there are doubtless other scenarios I have yet to experience...]
  1. a deep bottom sloping steeply up toward the shore
  2. limited swing [not due to other vessels...] in an otherwise acceptable anchorage
  3. a crowded anchorage that has a comparatively level bottom
In the higher latitudes we favor, it is typically the first 2 scenarios we encounter, and in the order listed.

Situation #1; Steep-to bottom: [Depending upon circumstances, the following procedures could also work for the other 2 situations as well.]

My typical method of anchoring in this situation is to back toward shore and anchor on the uphill slope of a steep bottom. This means I have to prevent the boat from drifting over and past the anchor, dragging it downhill and eventually [quickly] dislodging it from the bottom.

Once the anchor is set we keep backing the boat toward shore as close as we can [remember the bottom is coming up fast...] and toss a stern anchor [e.g., a Fortress FX27 or 37 depending...] as far as I can from the vessel, and drift away from shore paying out enough rode until I can soft set that anchor. Then I shorten the primary anchor rode on the bow until the boat is held in slight tension between the two anchors.

Sometimes I incorrectly estimate the middle location between the two anchors when I set the bow anchor [i.e., one anchor is left with inadequate rode or angle, etc.] and have to start over. This can be a simple as leaving the stern anchor fixed and paying out stern rode while motoring away from shore, going past the bow anchor until it dislodges. Keep progressing toward deeper water leaving the bow anchor dangling [remember we are on a steep slope in deep water...] ultimately letting out more bow rode and re-setting the primary anchor. Then I can again back toward shore letting out bow rode and taking in stern anchor rode until I re-set the bow anchor and find that ideal position between the two that will hold the boat while I run a shore line...

Once the shoreline is set, I will slack the stern rode but keep the anchor set if I need to go ashore again to retrieve the shoreline. This keeps the load on the shoreline with the stern anchor as back-up. [I prefer to run the shoreline around a tree or similar object and back to the boat so I can retrieve it from the boat... but that is not always possible...]

Scenarios #2 and 3 can sometimes be dealt with using a modified, somewhat simpler approach. If I can temporarily anchor out on shorter than usual scope [remember I mentioned I would only attempt these solo maneuvers in benign conditions...] and row a long line to shore, then I can either back toward shore retrieving shoreline as I let out bow anchor rode, or pull the bow anchor and reset it as I get closer to shore. If the shoreline can't reach the boat [e.g., I can't temporarily anchor close enough...] then I might buoy the bitter end of the secured shoreline [and anchor it if needed using the dinghy grappling hook anchor] That way I can retrieve it as I bring the boat within range backing toward shore.

Next I'll share some basics about our strategy regarding shorelines:
  • Shorelines need to be long [Our shortest line is 600ft (183m) [Update 2017: we now use several 100ft lengths with soft eyes at both ends…] Soft eyes in both ends of the shorelines allow us to couple them together if extra length is needed.]
  • They need to float
  • They need to be strong enough for the task [Dyneema meets all these criteria. Get a bright color so everyone has a better chance of seeing it.]
  • Flake and store shorelines in vented anchor rode bags or on reels/spools. [Don't try to coil them.]
  • Attach bright floats along the deployed shoreline(s) for visibility- especially if others may be in the area.
  • Shore attachment methods we use include:
  • We keep a couple of lengths of galvanized cables with eyes at each end for use as a necklace around rocks and boulders for attaching the shoreline [Chain can also be used, and stows more readily on the boat, but is much more difficult to handle on a rocky shore...]
  • We also keep some strong 2" nylon webbing vehicle towing straps (eyes on both ends...] for wrapping around sturdy tree trunks [so we don't damage the trees...] We also keep some 2" tubular webbing for the same purpose when we run a single shoreline around a tree and back to the boat so it can be retrieved without another trip to shore...
  • An assortment of Rock climber wedges can be handy as well
  • If there is a sandy beach, set a Danforth style anchor well up the beach and attach the shoreline to that
  • The boat attachment method is typically fair leading the shoreline(s) to primary winch(es) so it is easy to keep adequate tension on the primary anchor, and to adjust for tidal fluctuations
  • If it is a single line going around a tree and back to the boat, one end would be cleated with the other led to a winch

Method of shoreline deployment:

Attach the bitter end(s) to the boat and drop the bag(s) of shoreline(s) in the dinghy. It is much easier to pay out line stowed in the dink [and deal with tangles...] than drag the line from the boat. Row to shore and affix the line(s) as needed.

As you can see, there are lots of variables with these methods, and it is never quite the same twice... And it is very time consuming- especially by yourself...

I hope some of this may be as helpful as I find the descriptions of techniques provided by others.

Cheers!

Bill
__________________


Additional Resources:
  • Attainable Adventure Cruising on Shorefasts [A subscription site, and well worth US$1.66/month...]
  • How do we create stretchier, stronger lines in inclement conditions? [Especially useful for shorter shore lines to a quay or dock in surge or high wind conditions...]
    • To increase stretch [and strength] in times past I have had success tightly twisting two lengths of 3-strand nylon for each tie. That improves strength and give you a quick way to add some stretch if you have no alternatives at the moment... [One method is to secure the middle of a long enough length of 3-strand to the quay, then lead the 2 bitter ends to the boat. Twist the two secured lines together from the boat as tight as you can and cleat it off as a single line. Repeat for the other shore ties.]


January 12, 2016

iPads on our boat...

We occasionally participate in various boating forums. [See our Some Forums We Read sidebar for links...]

Some of those topics may be relevant here, so once in a while we will repost on our blog for reference.


The following may be one of those cases. To accommodate our non-boating blog readers, sometimes we add some {additional information and links} to the original forum post. (below)


It is worth noting since we are discussing electronic devices, this post will likely have a relatively short shelf-life... [1-3 years?]


Additional Resources:

––– Last updated 22-Jan-2017 [by Bill] –––


Link to original forum post [9-Jan-2016]


Re: Chartplotter + iPad - Which one where?


Quote:
Originally Posted by cshrimpt View Post
All,

Using Garmin Helm on an iPad, I can either mount the chartplotter on the pedestal guard using a NavPod and use the iPad below, or do it the other way around.

Sounds like it would be a simple choice, but there are some considerations.

Chartplotter mounted at nav station:

1. Plotter out of the weather
2. Possibly less chance of theft
3. Room for other instruments on pedestal
4. Need to waterproof iPad and figure out how to mount

Chartplotter mounted at helm

1. Less clutter at nav station
2. Could mount small multi-function instrument at nav instead
3. Possibly more accurate than iPad when underway
4. Not necessary to mount iPad. Can use in bunk, settee, etc.

Many other pros and cons as well.

I'm curious if anyone did it one way and wished they did it the other.

Thanks,

-C
-C,

I'll add a couple of other considerations I [and I'm sure many others] can share from first-hand experience having both iPads and an MFD on-board. {MFD: Multi-function Display, sometimes called a Chart Plotter...}

I should also mention that this post will likely become dated/obsolete in a few short years as the current iPads we all enjoy are replaced with new products that may not suffer from these same issues...

First, we love our iPads but we had several experiences over a couple of summers of full time sailing that convinced us not to rely on them as our primary or only nav/radar system/screen at an outdoor helm position: [We also have an indoor helm where we think the iPads- properly encased and mounted- are sufficient as primary screens...]

We have one generation 3, and two Gen 4 iPad Airs on-board [One is a mini.] This post is mainly related to our gen 4 iPad Airs. [But the results were the same with the Gen 3 unit as well...]

-The iPad screen isn't easily viewable in bright light- sometimes even when shaded under the dodger/bimini...

Also, sometimes the plane of polarization of various sunglasses is not parallel to the plane of the iPad screen, so you have to tilt your head or the iPad to see the screen.

The MFD is designed to be viewable in bright sunlight and isn't as sensitive to polarized sunglasses.

-iPads used as a mirror to your MFD or as a stand-alone nav device need charging if in use for more that a couple of hours, and the waterproof cords/plugs aren't really... And having charging cable(s) dangling around the cockpit is just asking for trouble and/or to be broken at the connection with the iPad... Also, those cables don't hold up well to UV or the elements...

This is not an issue with the MFD.

Side note: Be sure to use a USB charging source that is greater than 1 amp output [we found these 2 amp units are sufficient] or the iPad battery on our models will actually loose charge during the day when used for live navigation or as a mirror to the  MFD- even though it is plugged-in...  [We use readily available 2 amp output USB adapters that plug into our 12VDC power outlets.]

-The iPad overheats [yes, even in Alaska in the summer...] typically when in direct sunlight- especially in a waterproof cover... When this happens the screen goes black and a small message tells you it is too hot and will not be usable until it cools down [which usually takes 20-30 minutes after we physically relocated it to the shade...] This happens to us more often that you might imagine, and often when you need it most... For us, that is reason enough not to use them as primary screens outdoors.

This doesn't happen with the MFD.

-It is difficult/impossible to rely on hearing any alarms sounding via the iPad speakers when they are in a waterproof case, or even if they aren't when there is a bit of ambient noise from the wind, engine, etc....

Not so with the MFD- especially since it can be connected to external alarm sources.

-If the waterproof case has a film covering the screen, that can sometimes desensitize the touchscreen, and sometimes reduce screen clarity due to glare or bubbles between the film and iPad screen.

Not an issue with the MFD.

These are some of our first-hand observations and experiences that have led us to our conclusion that [for us] iPads are not acceptable as the primary or only MFD/Navigation/Radar/AIS screen on deck...

With all that said, we do use iPads at the outside helm, on deck, and down below, and love the flexibility and redundancy they provide- especially when we can hand one to guests and let them track our progress and 'look around' the charts without impacting the primary Nav system...

In case this is helpful...

Cheers!

Bill  
...